FLYOS-Armbian System Screen Configuration
Access Instructions
- Ensure the host computer is connected to WiFi and has obtained an IP address. Enter
IP:9999in the browser to access FLY TOOLS for screen configuration. - Example: If the host computer's IP is
192.168.6.110, visit192.168.6.110:9999
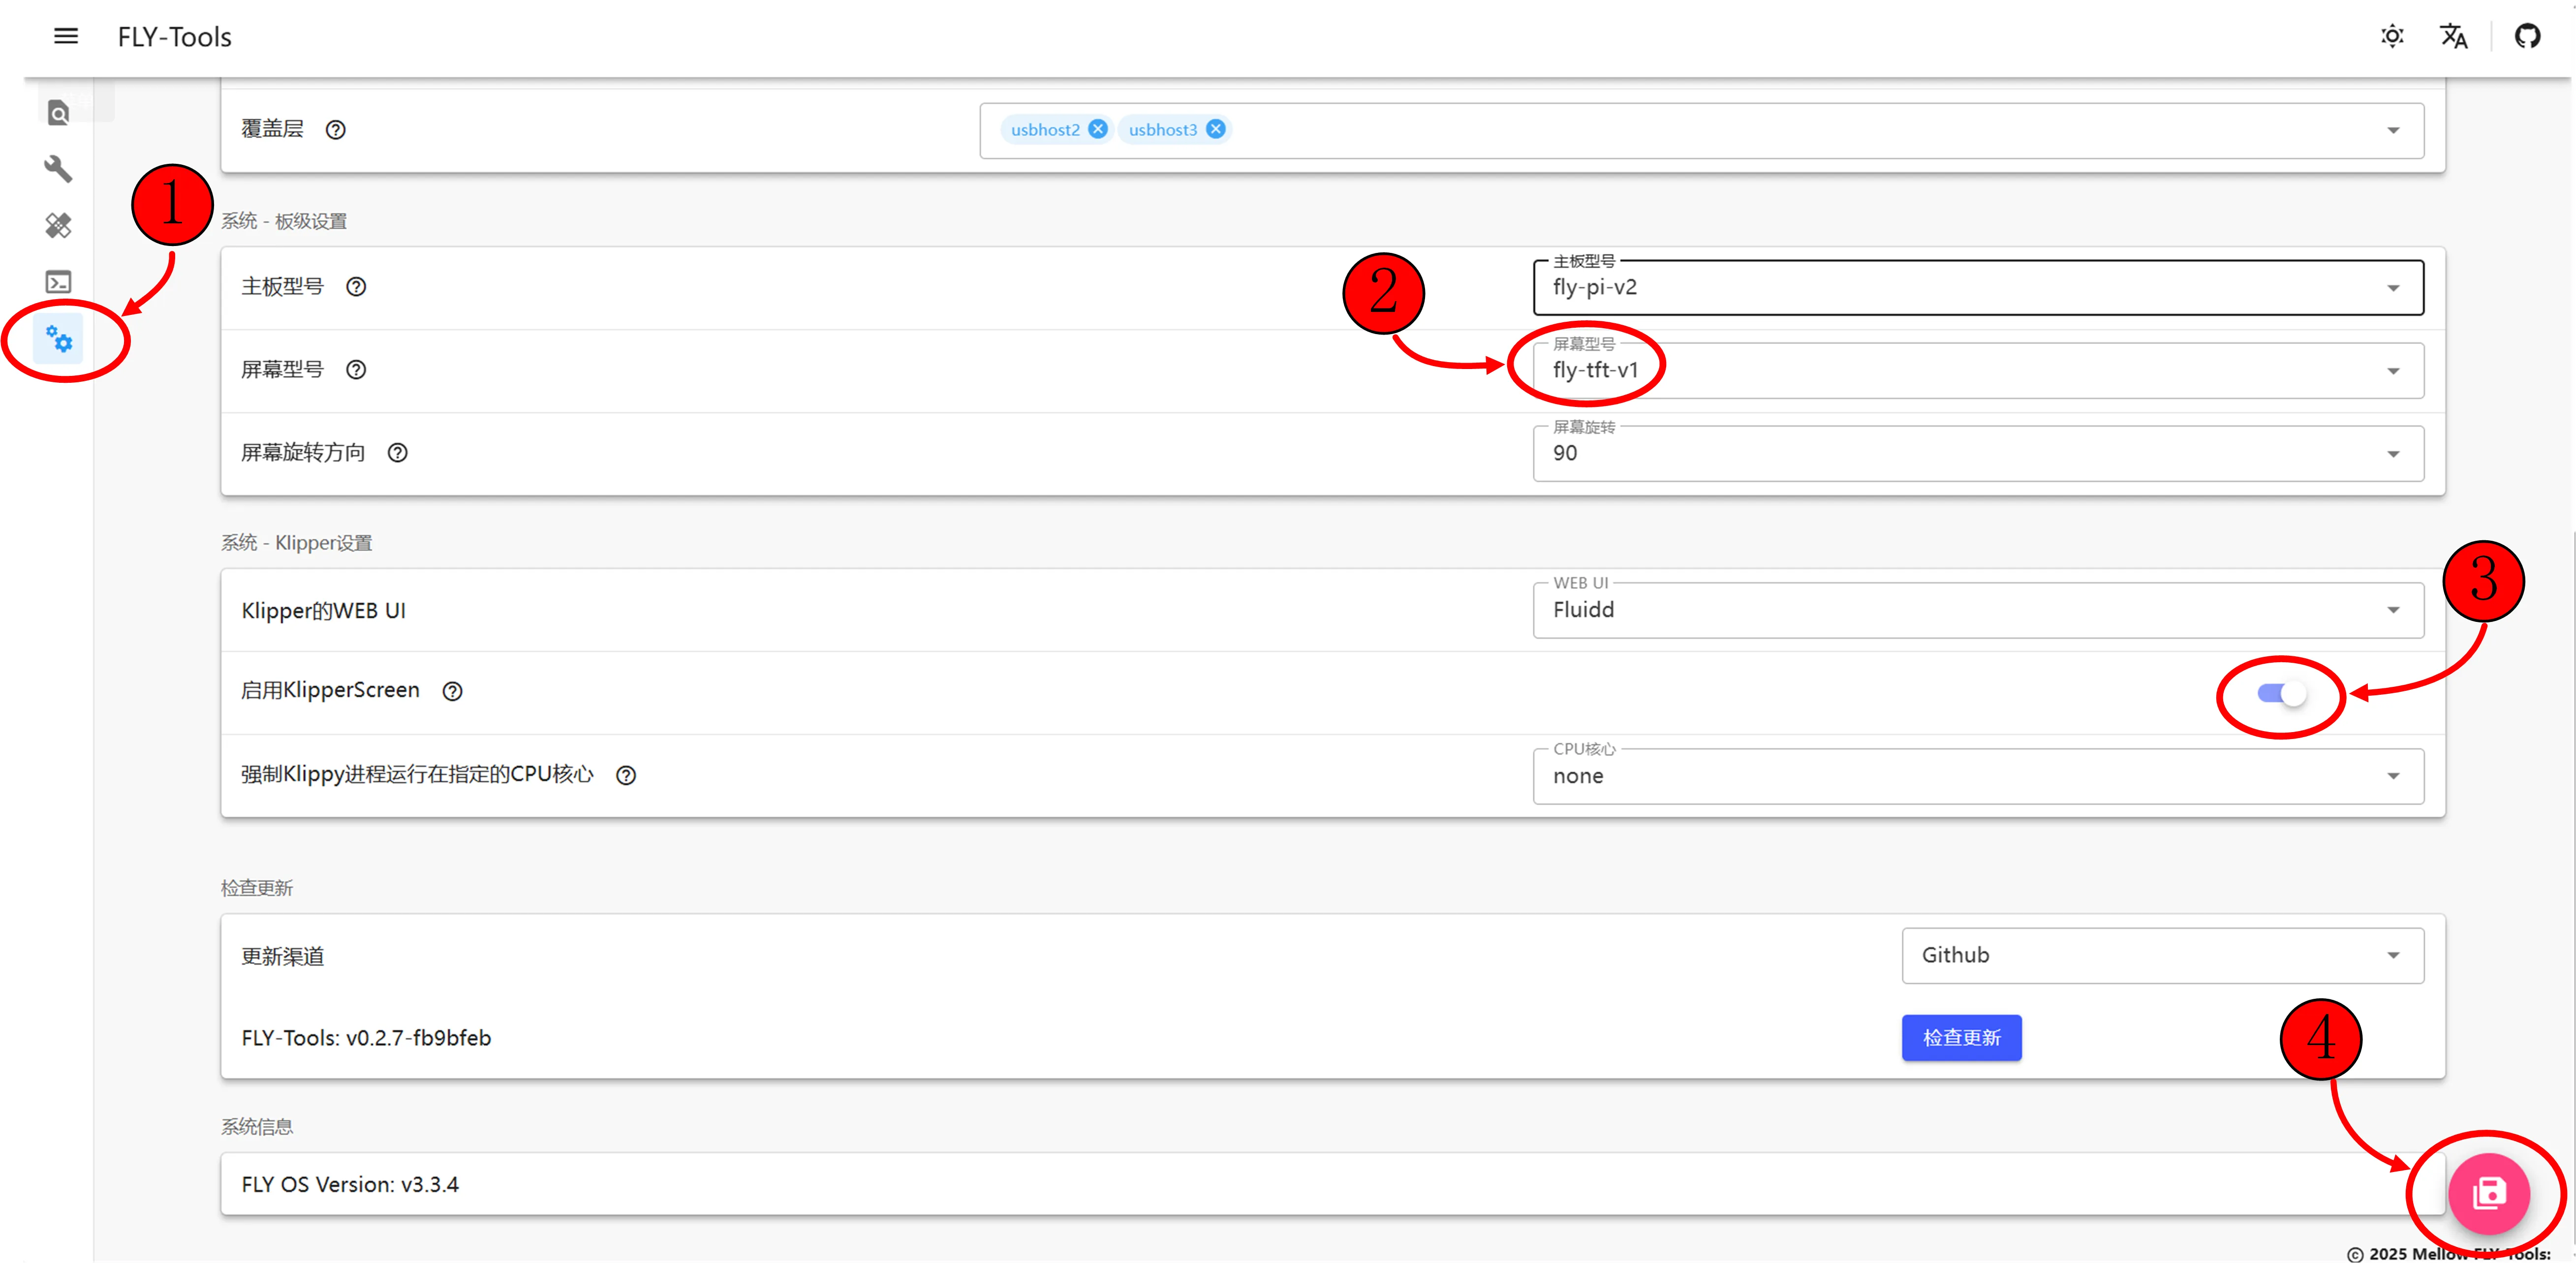
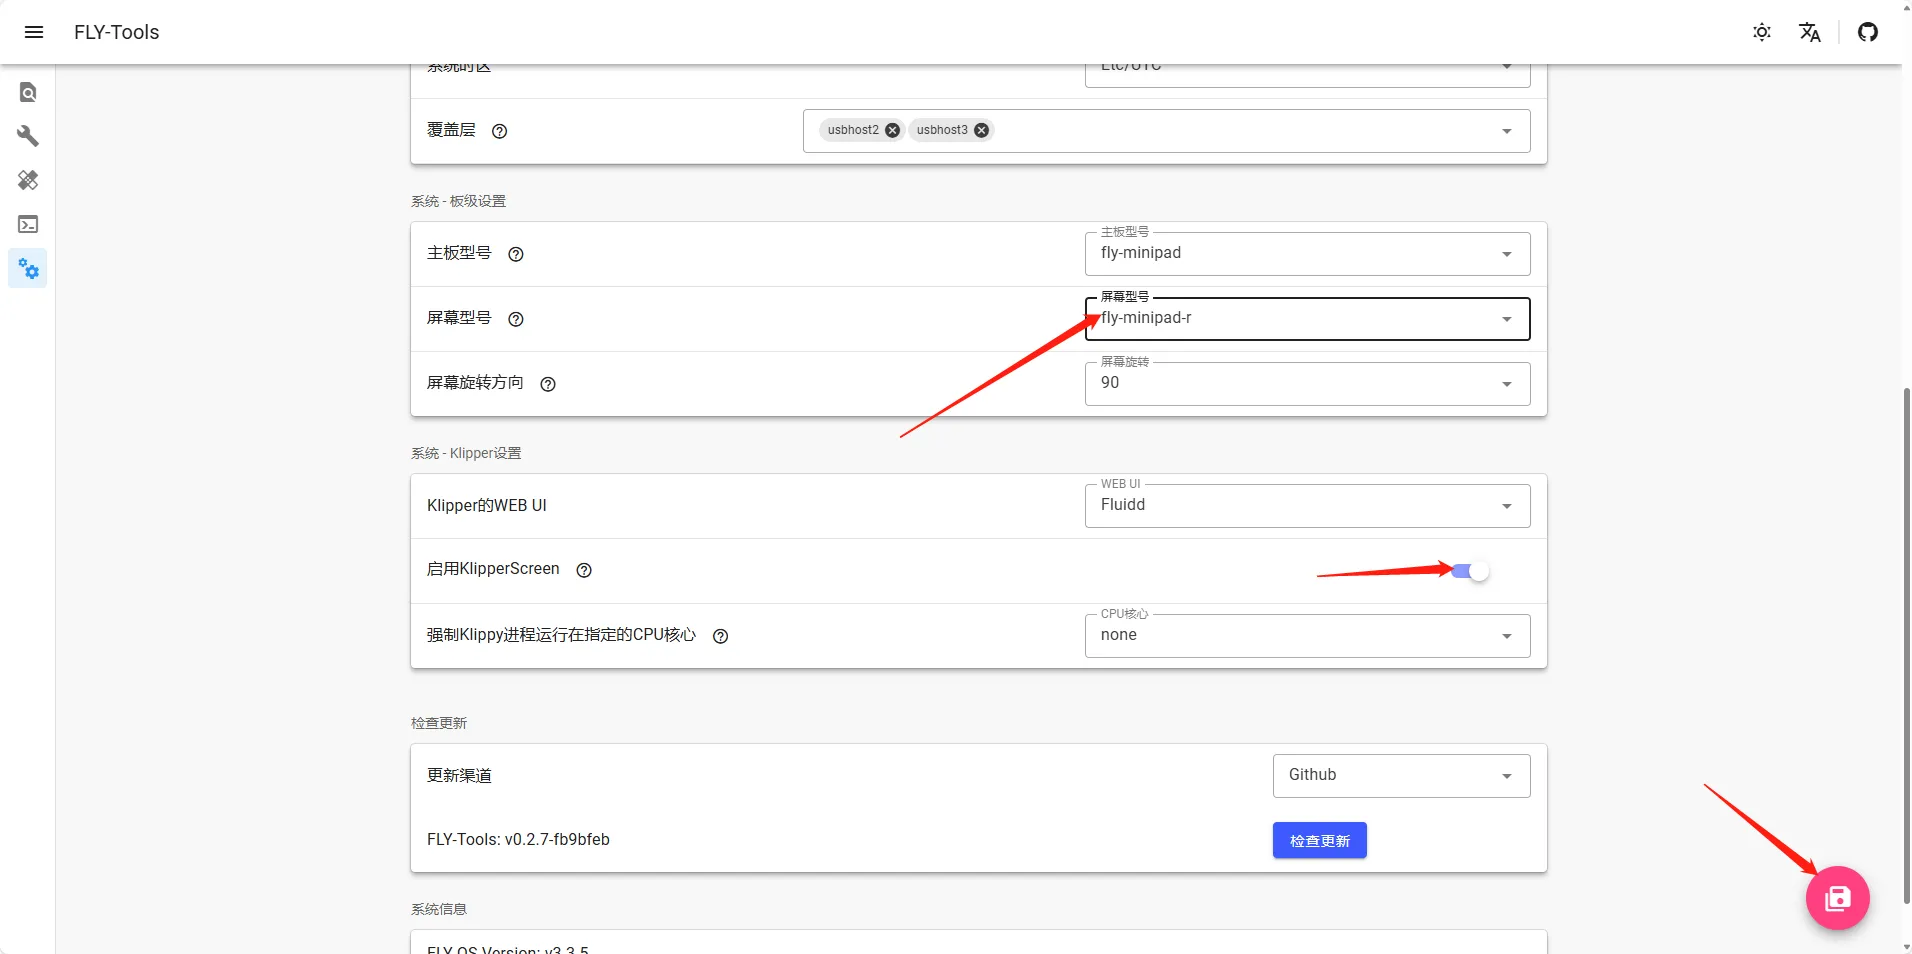
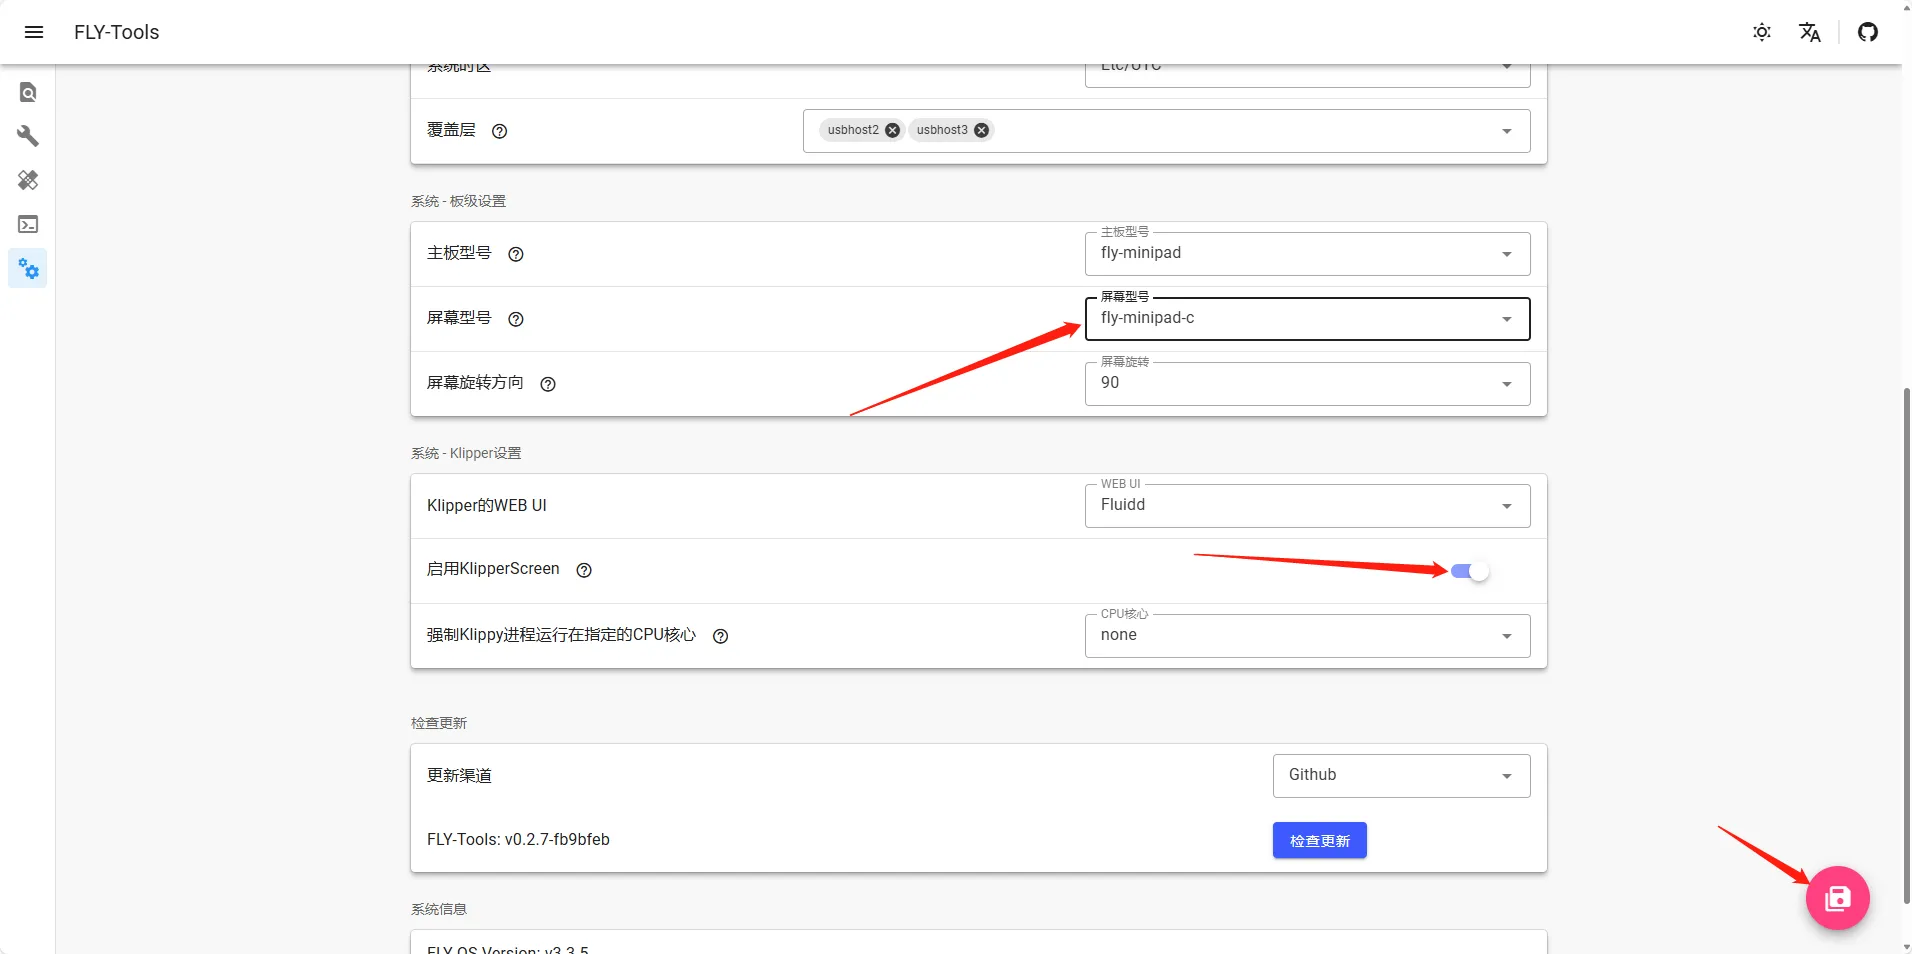
Configuration Steps
- Open FLY TOOLS and perform the following steps in order:
- Enable the Klipper Screen function
- Select the corresponding screen model
- Click the "Save Configuration" button at the bottom-right corner
- Restart the host computer to apply the configuration
Screen Type Selection Guide
- Resistive Screen: Select
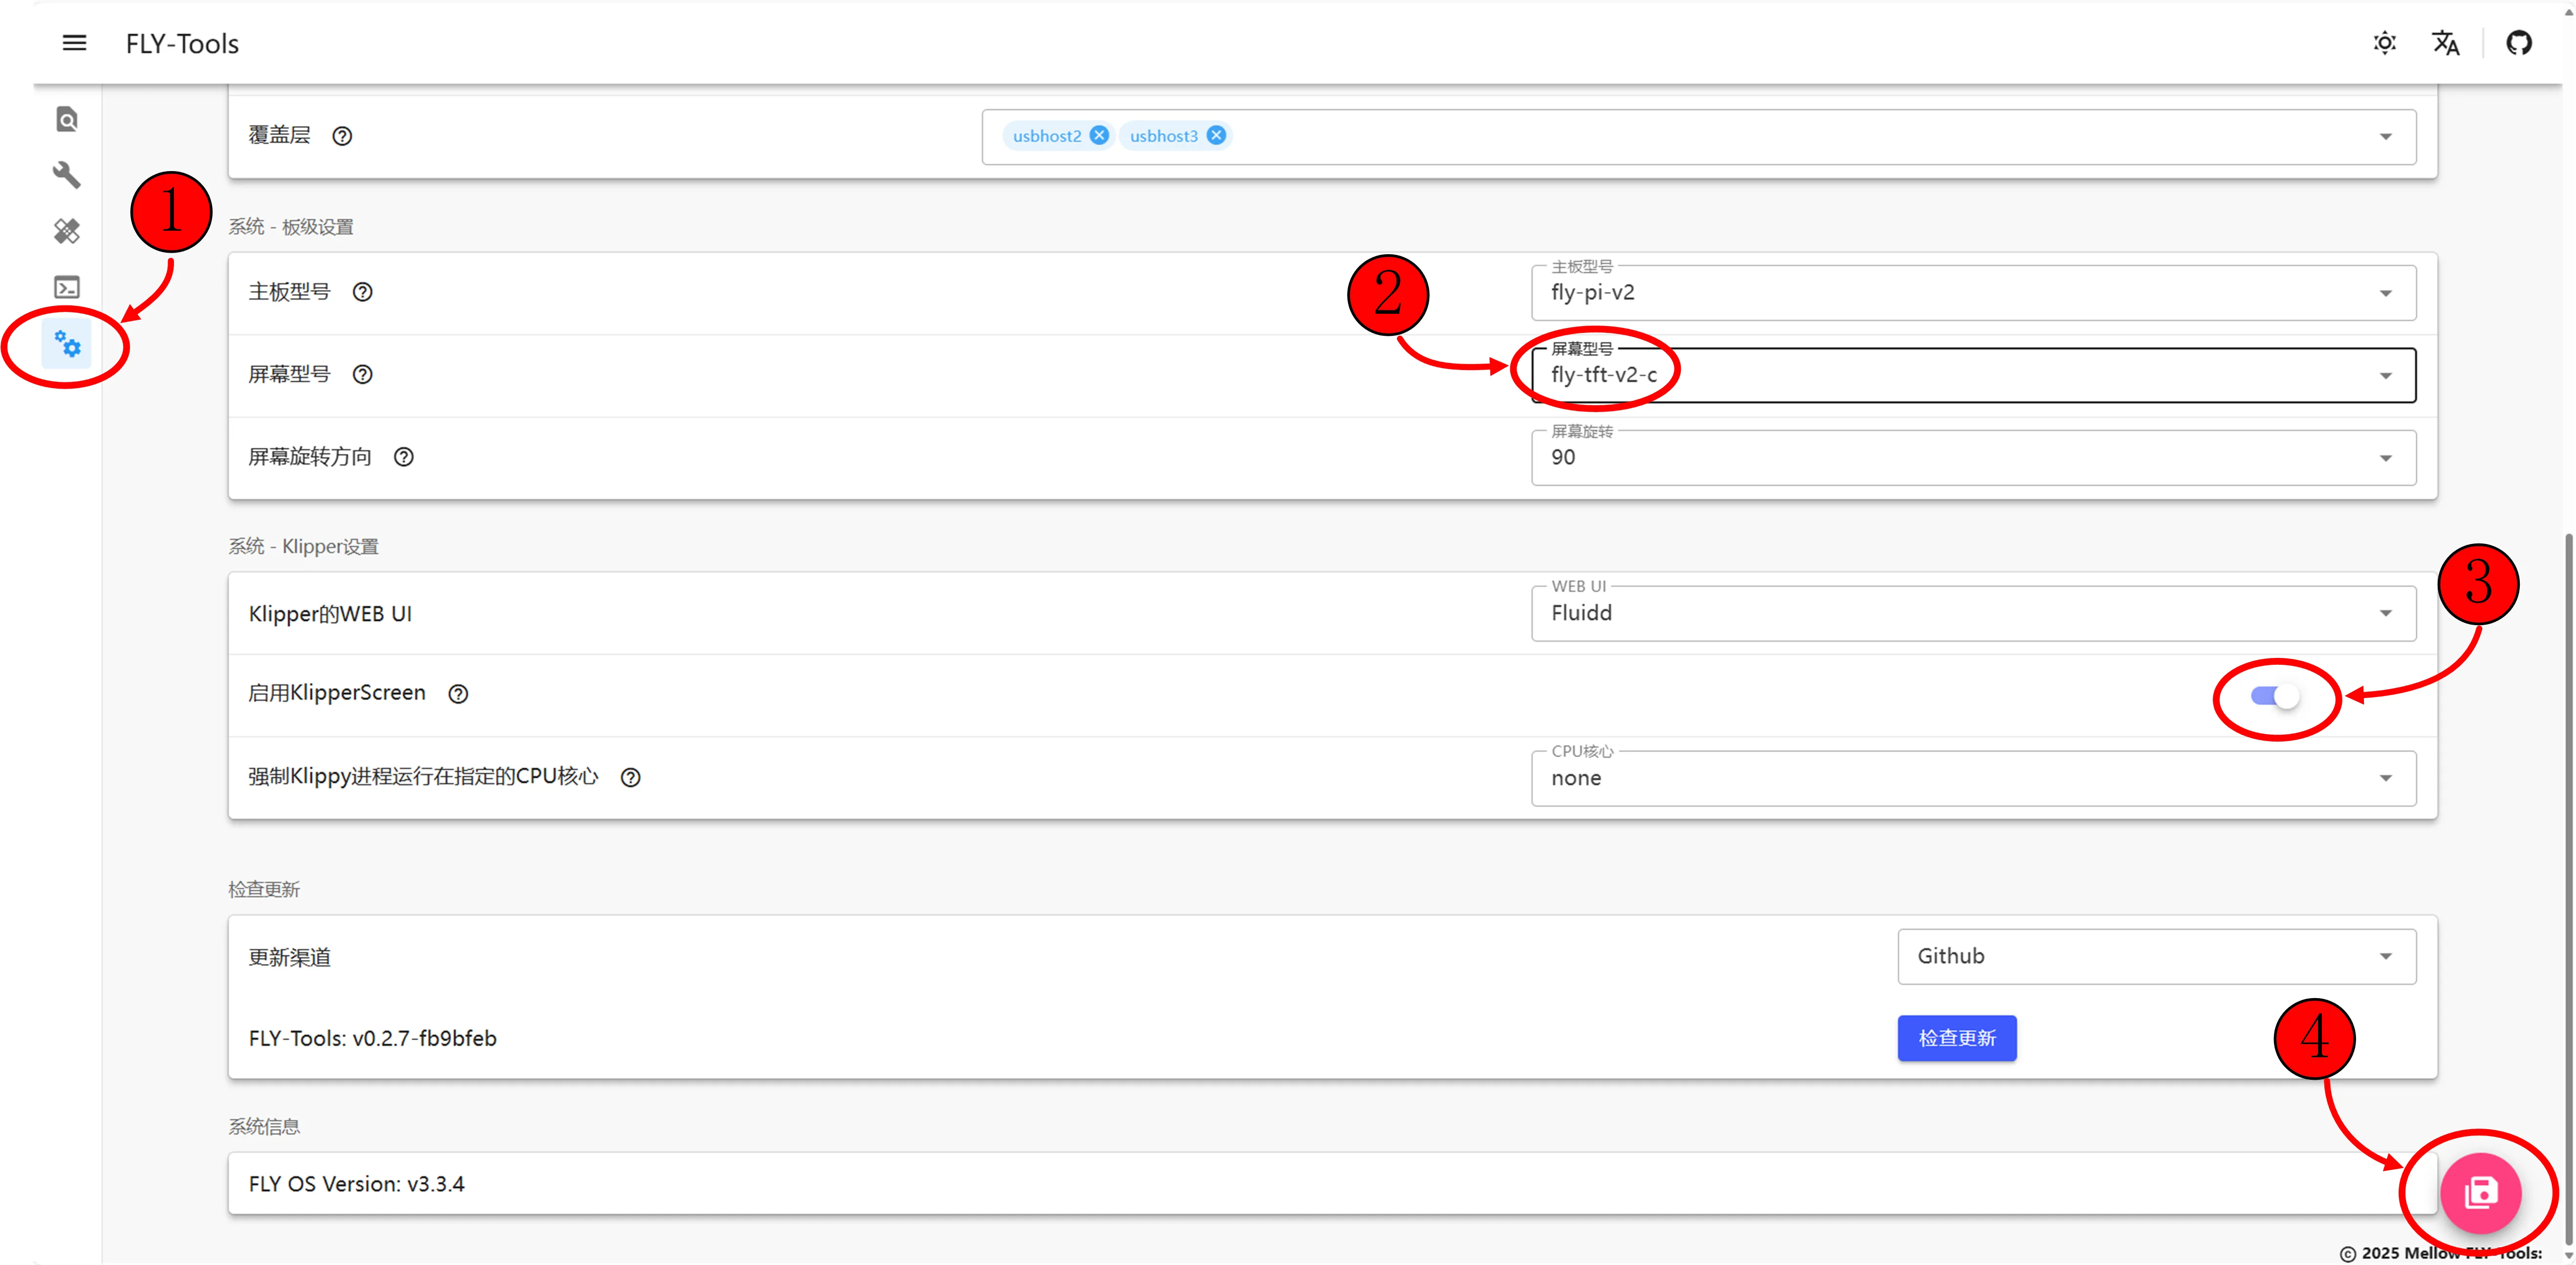
fly-tft-v1orfly-tft-v2-r(ensure the DIP switch on the back of the screen is set toResi) - Capacitive Screen: Select
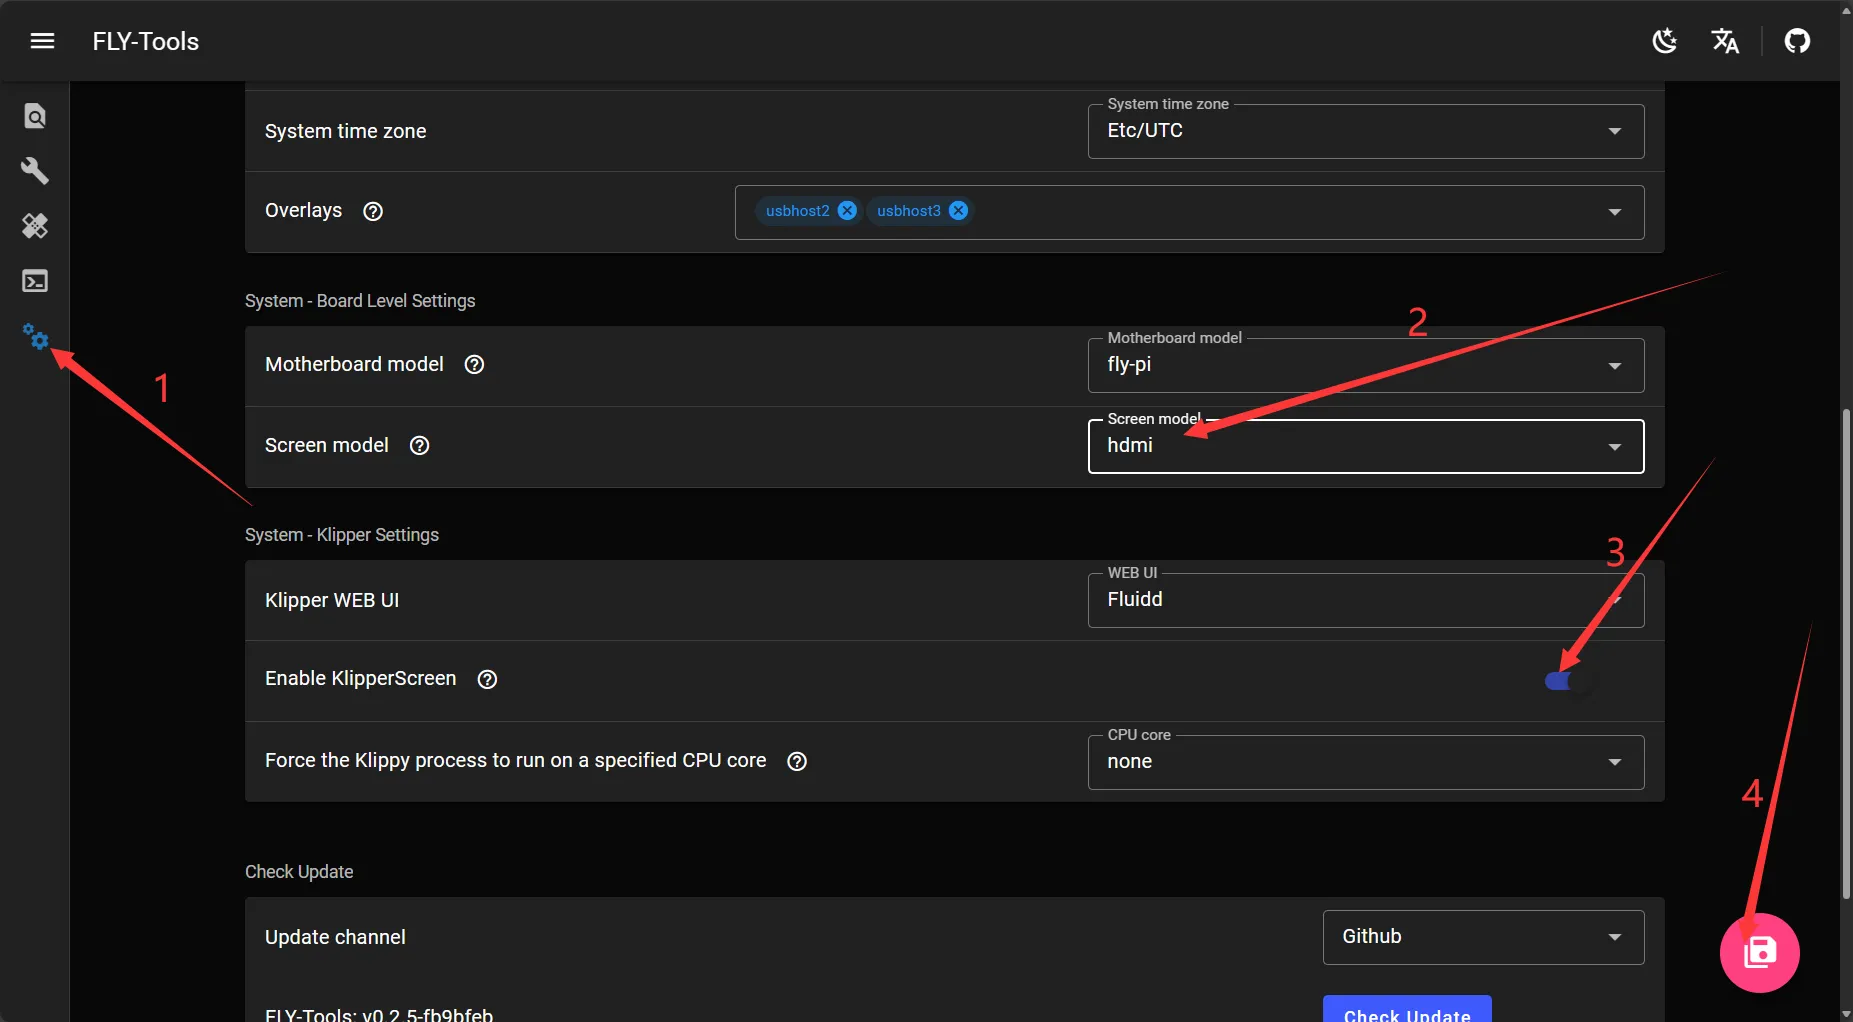
fly-tft-v2-c(ensure the DIP switch on the back of the screen is set toCap) - HDMI Screen: Select
hdmi
Configuration Reference for Different Motherboard Models
- Fly-C8
- Fly-Gemini
- Fly-PI(兀)
- Fly-PI-V2
- Fly-MINI-Pad
- Fly-Lite2.1
- Fly-Lite2
 |
 |
 | |
|
 |
|
|
Configuration Completion Notice
After saving the configuration, restart the host computer to take effect!
Screen Type Selection
- Resistive Screen: Select
fly-tft-v1(ensure the DIP switch on the back of the screen is set toResi) - Capacitive Screen: Select
fly-tft-v2-c(ensure the DIP switch on the back of the screen is set toCap)
|
|
| |
 |
 |
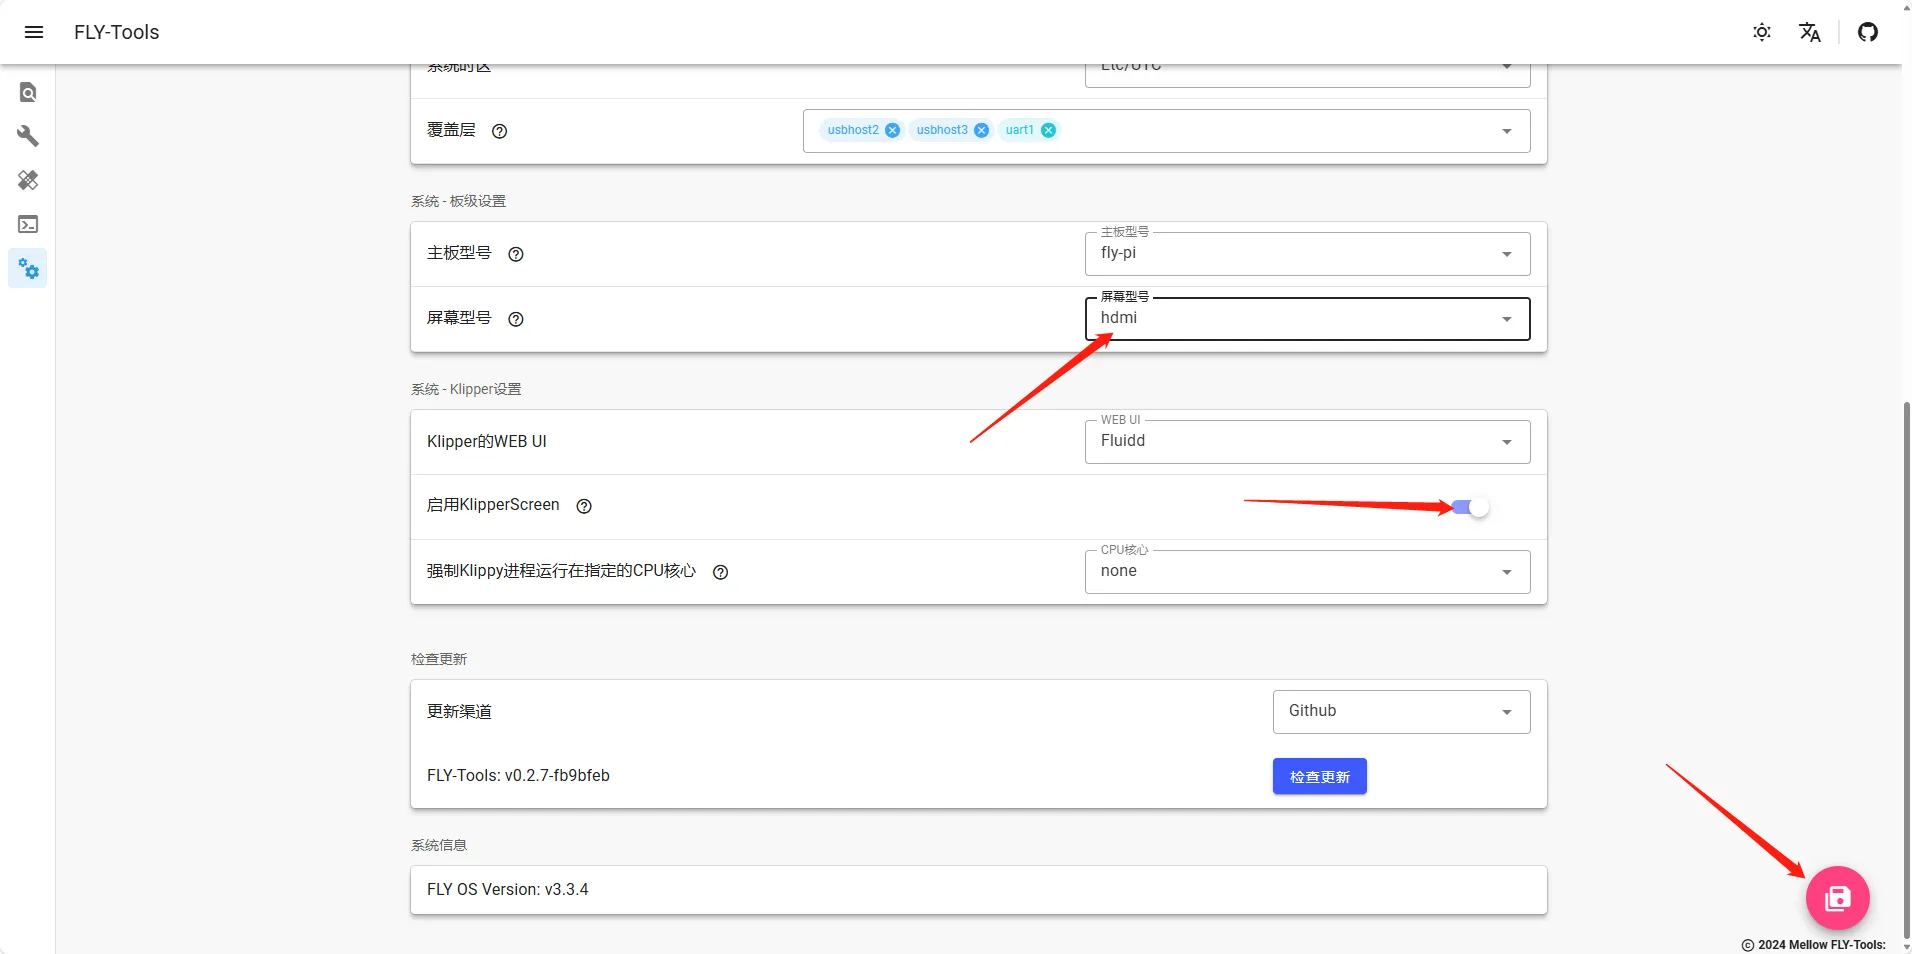
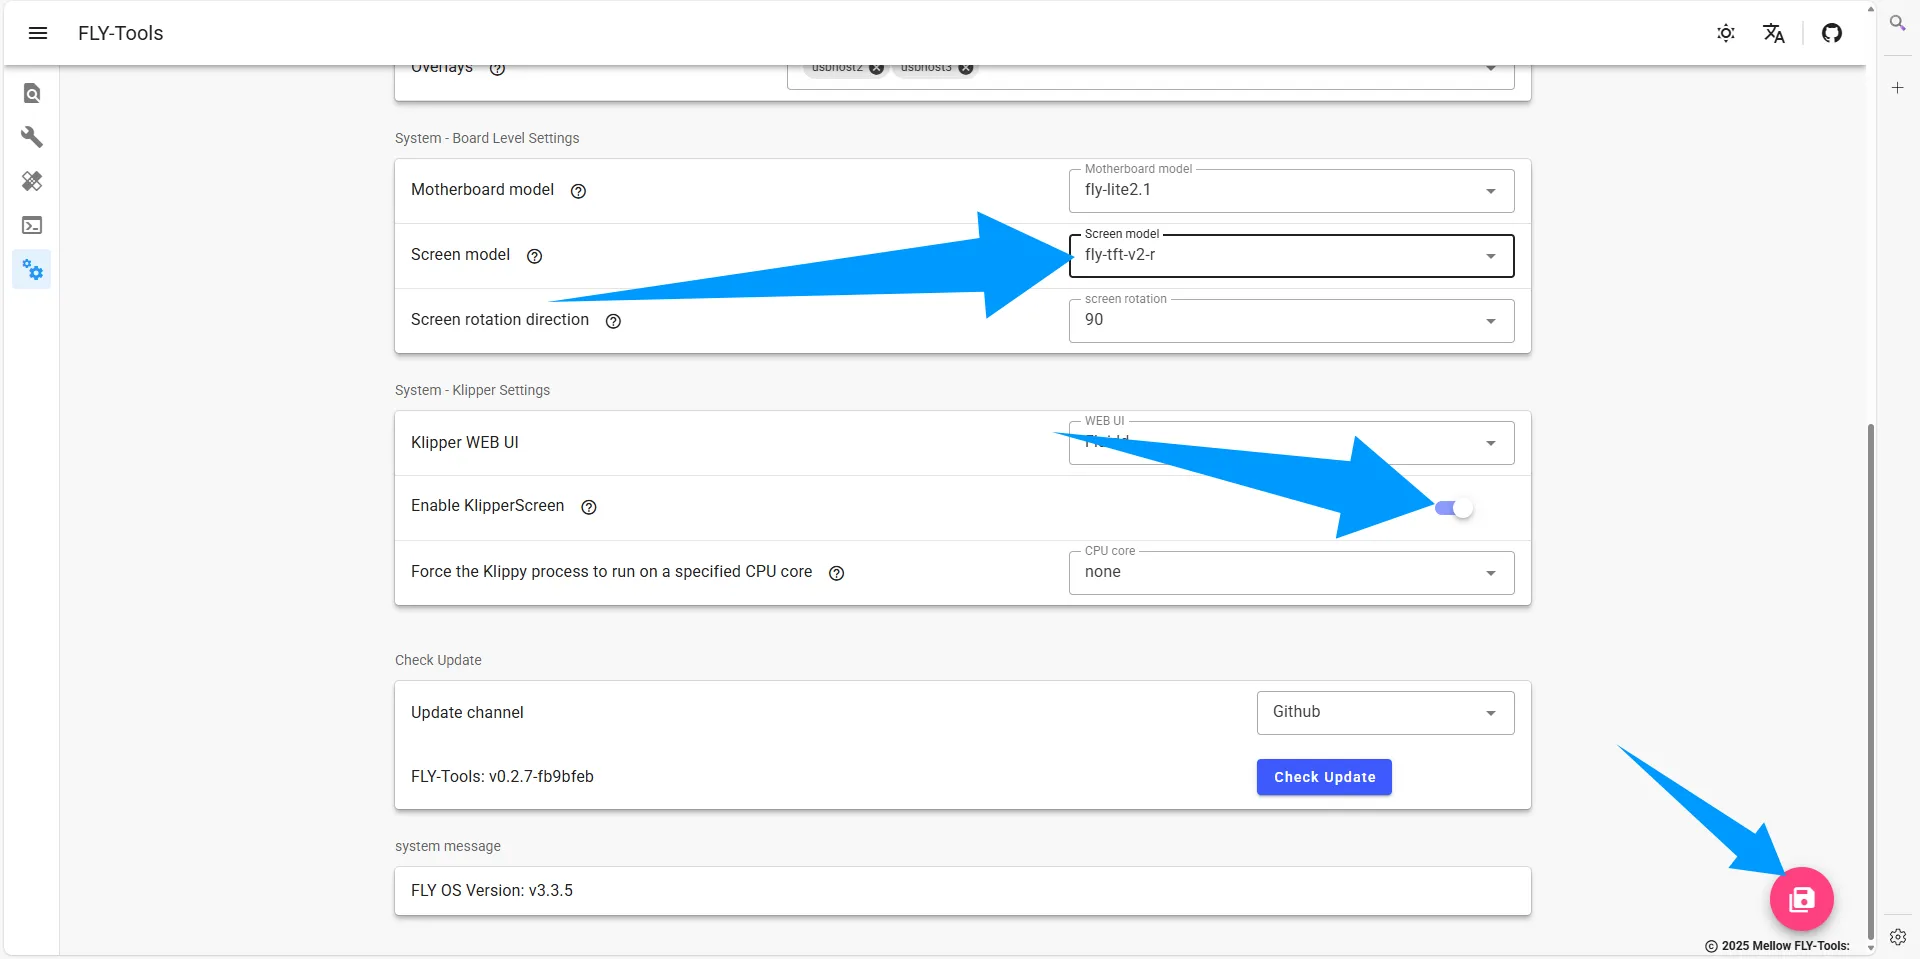
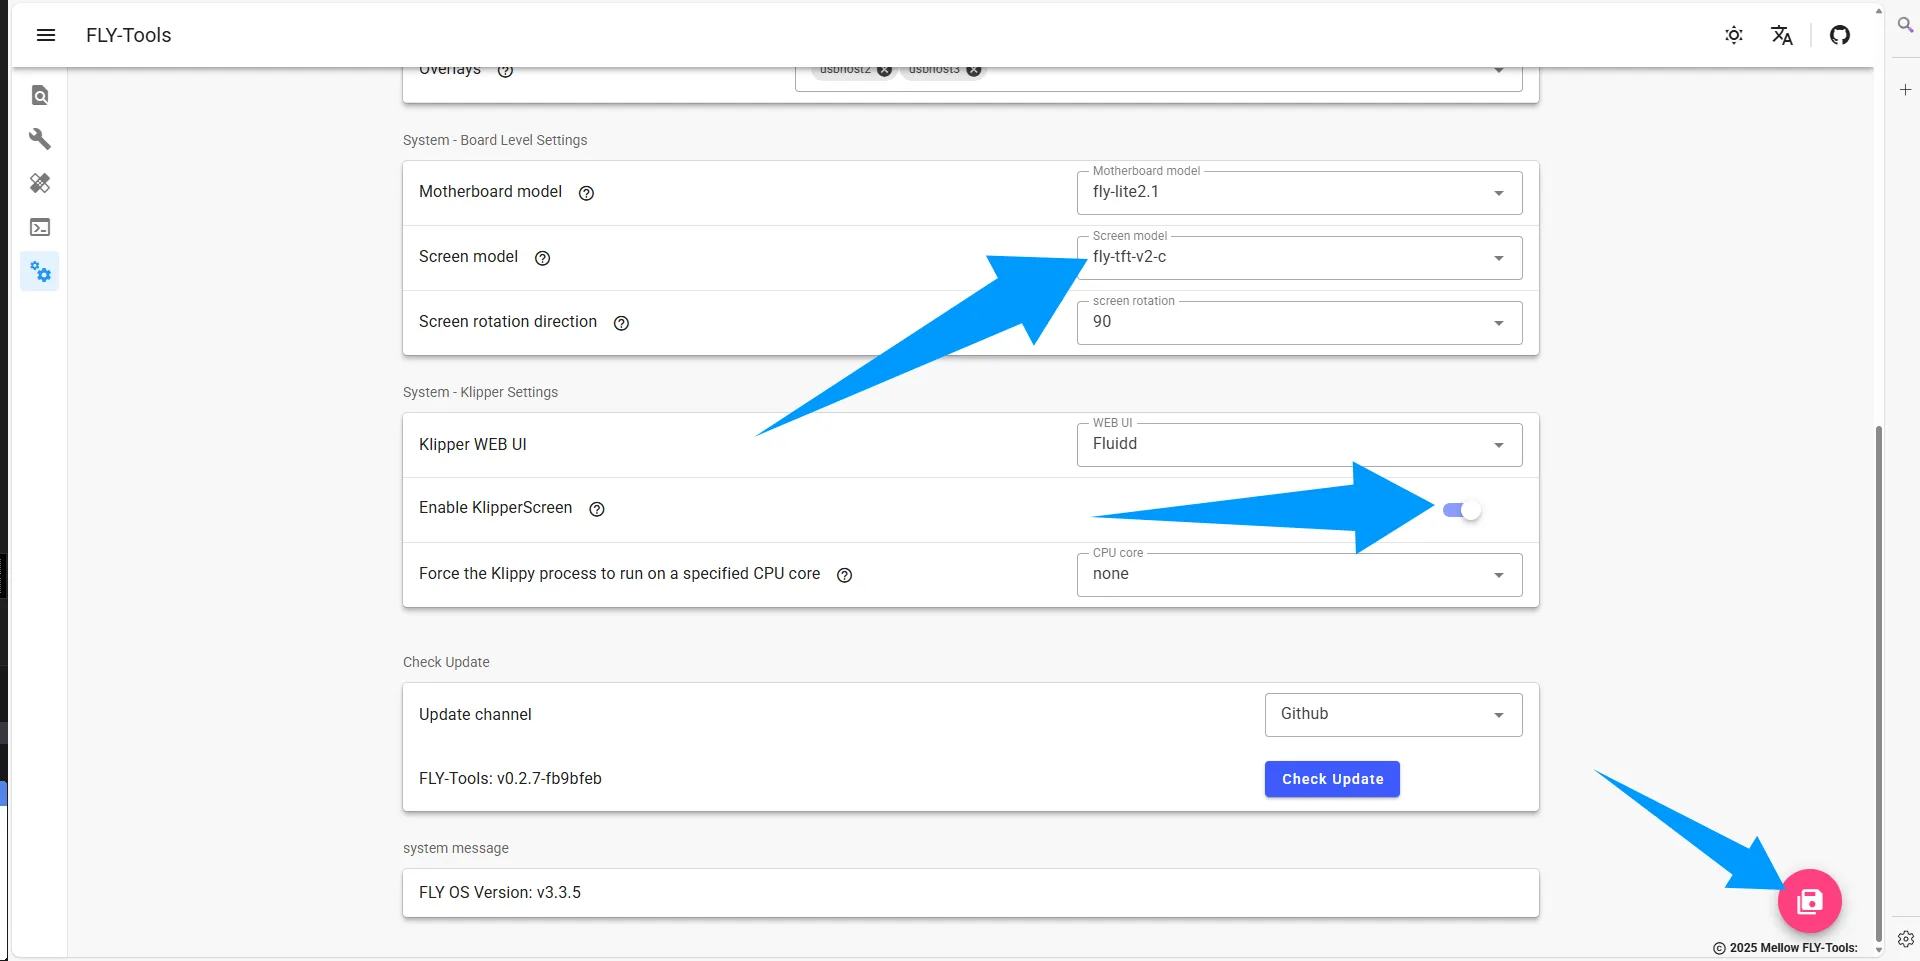
Special Configuration Instructions
For Fly-Lite2.1, you need to connect to the host computer via SSH and execute the following command:
sudo sed -i 's/^board=.*$/board=fly-lite2.1/' /boot/FlyOS-Env.txt
- After executing the above command, restart the system
- Open FLY TOOLS, follow the steps shown in the diagram:
- Enable Klipper Screen
- Select the corresponding screen model
- Click the "Save Configuration" button at the bottom-right corner
- Restart the host computer to apply the configuration
Screen Type Selection
- Resistive Screen: Select
fly-tft-v2-r(ensure the DIP switch on the back of the screen is set toResi) - Capacitive Screen: Select
fly-tft-v2-c(ensure the DIP switch on the back of the screen is set toCap)
 |
 |
 | |
|
|
Loading...