Motherboard ID Reading and Viewing
Note
- This tutorial explains how to read and view motherboard IDs. For tool boards, please refer to the corresponding product ID search tutorial.
- If you are using a CAN tool board or an RS232 tool board, please click the button below to view the instructions.
- Connect Tool Board
- USB ID Retrieval
- CANBus UUID Retrieval
Searching for USB ID
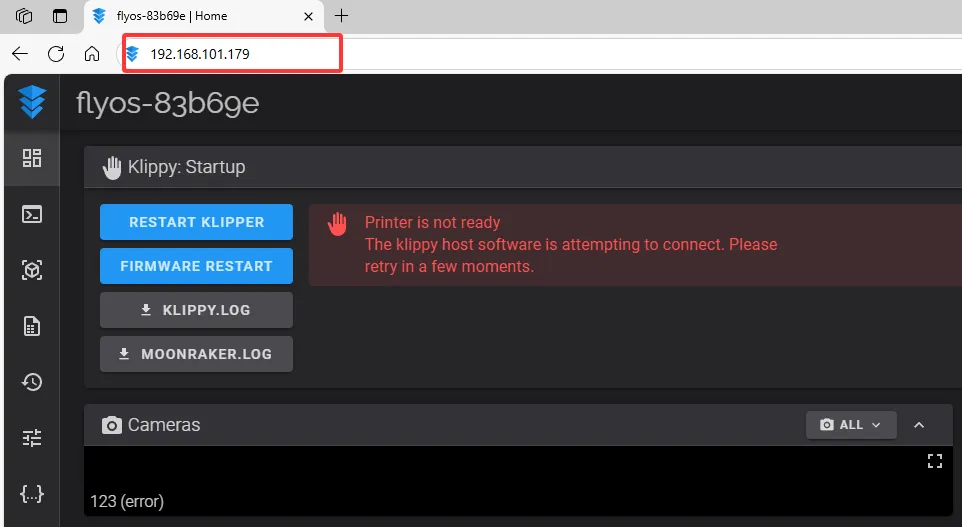
- Open your browser, enter the IP address of the host computer in the address bar. For example, if my host IP is
192.168.101.179, just type it and press Enter.
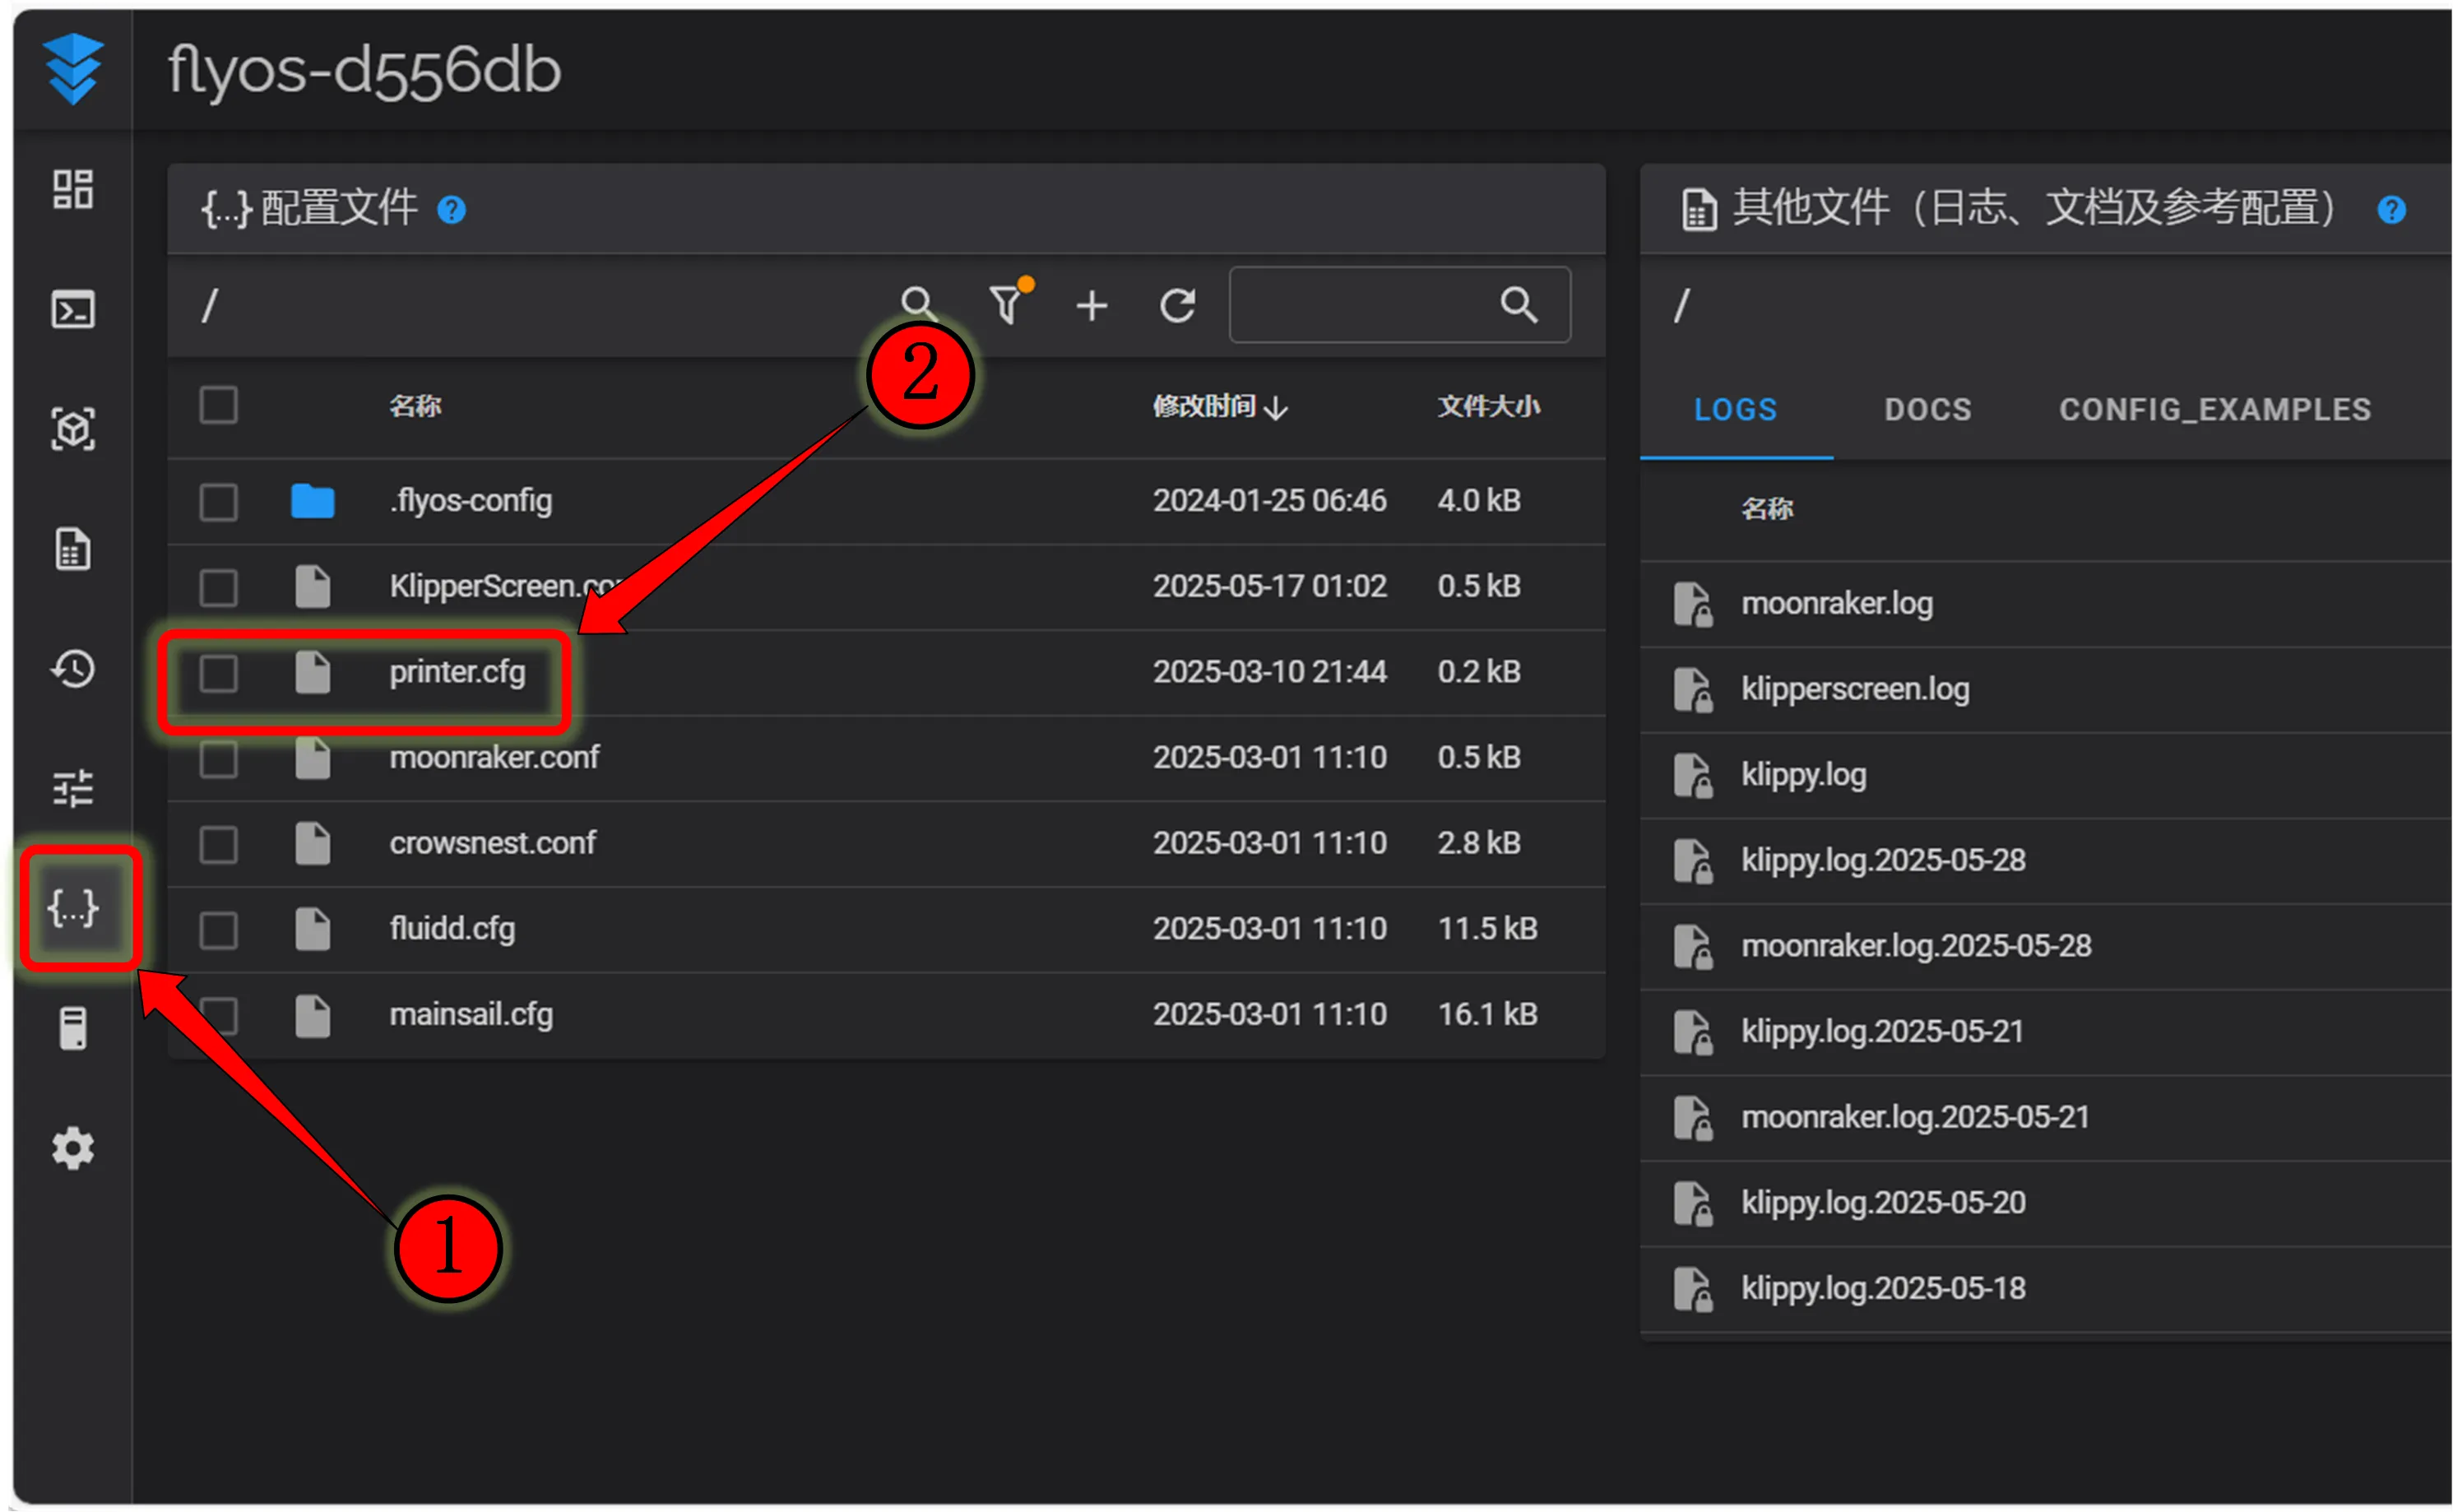
- Open the host's WEB interface. In the left sidebar configuration options, find:
 |
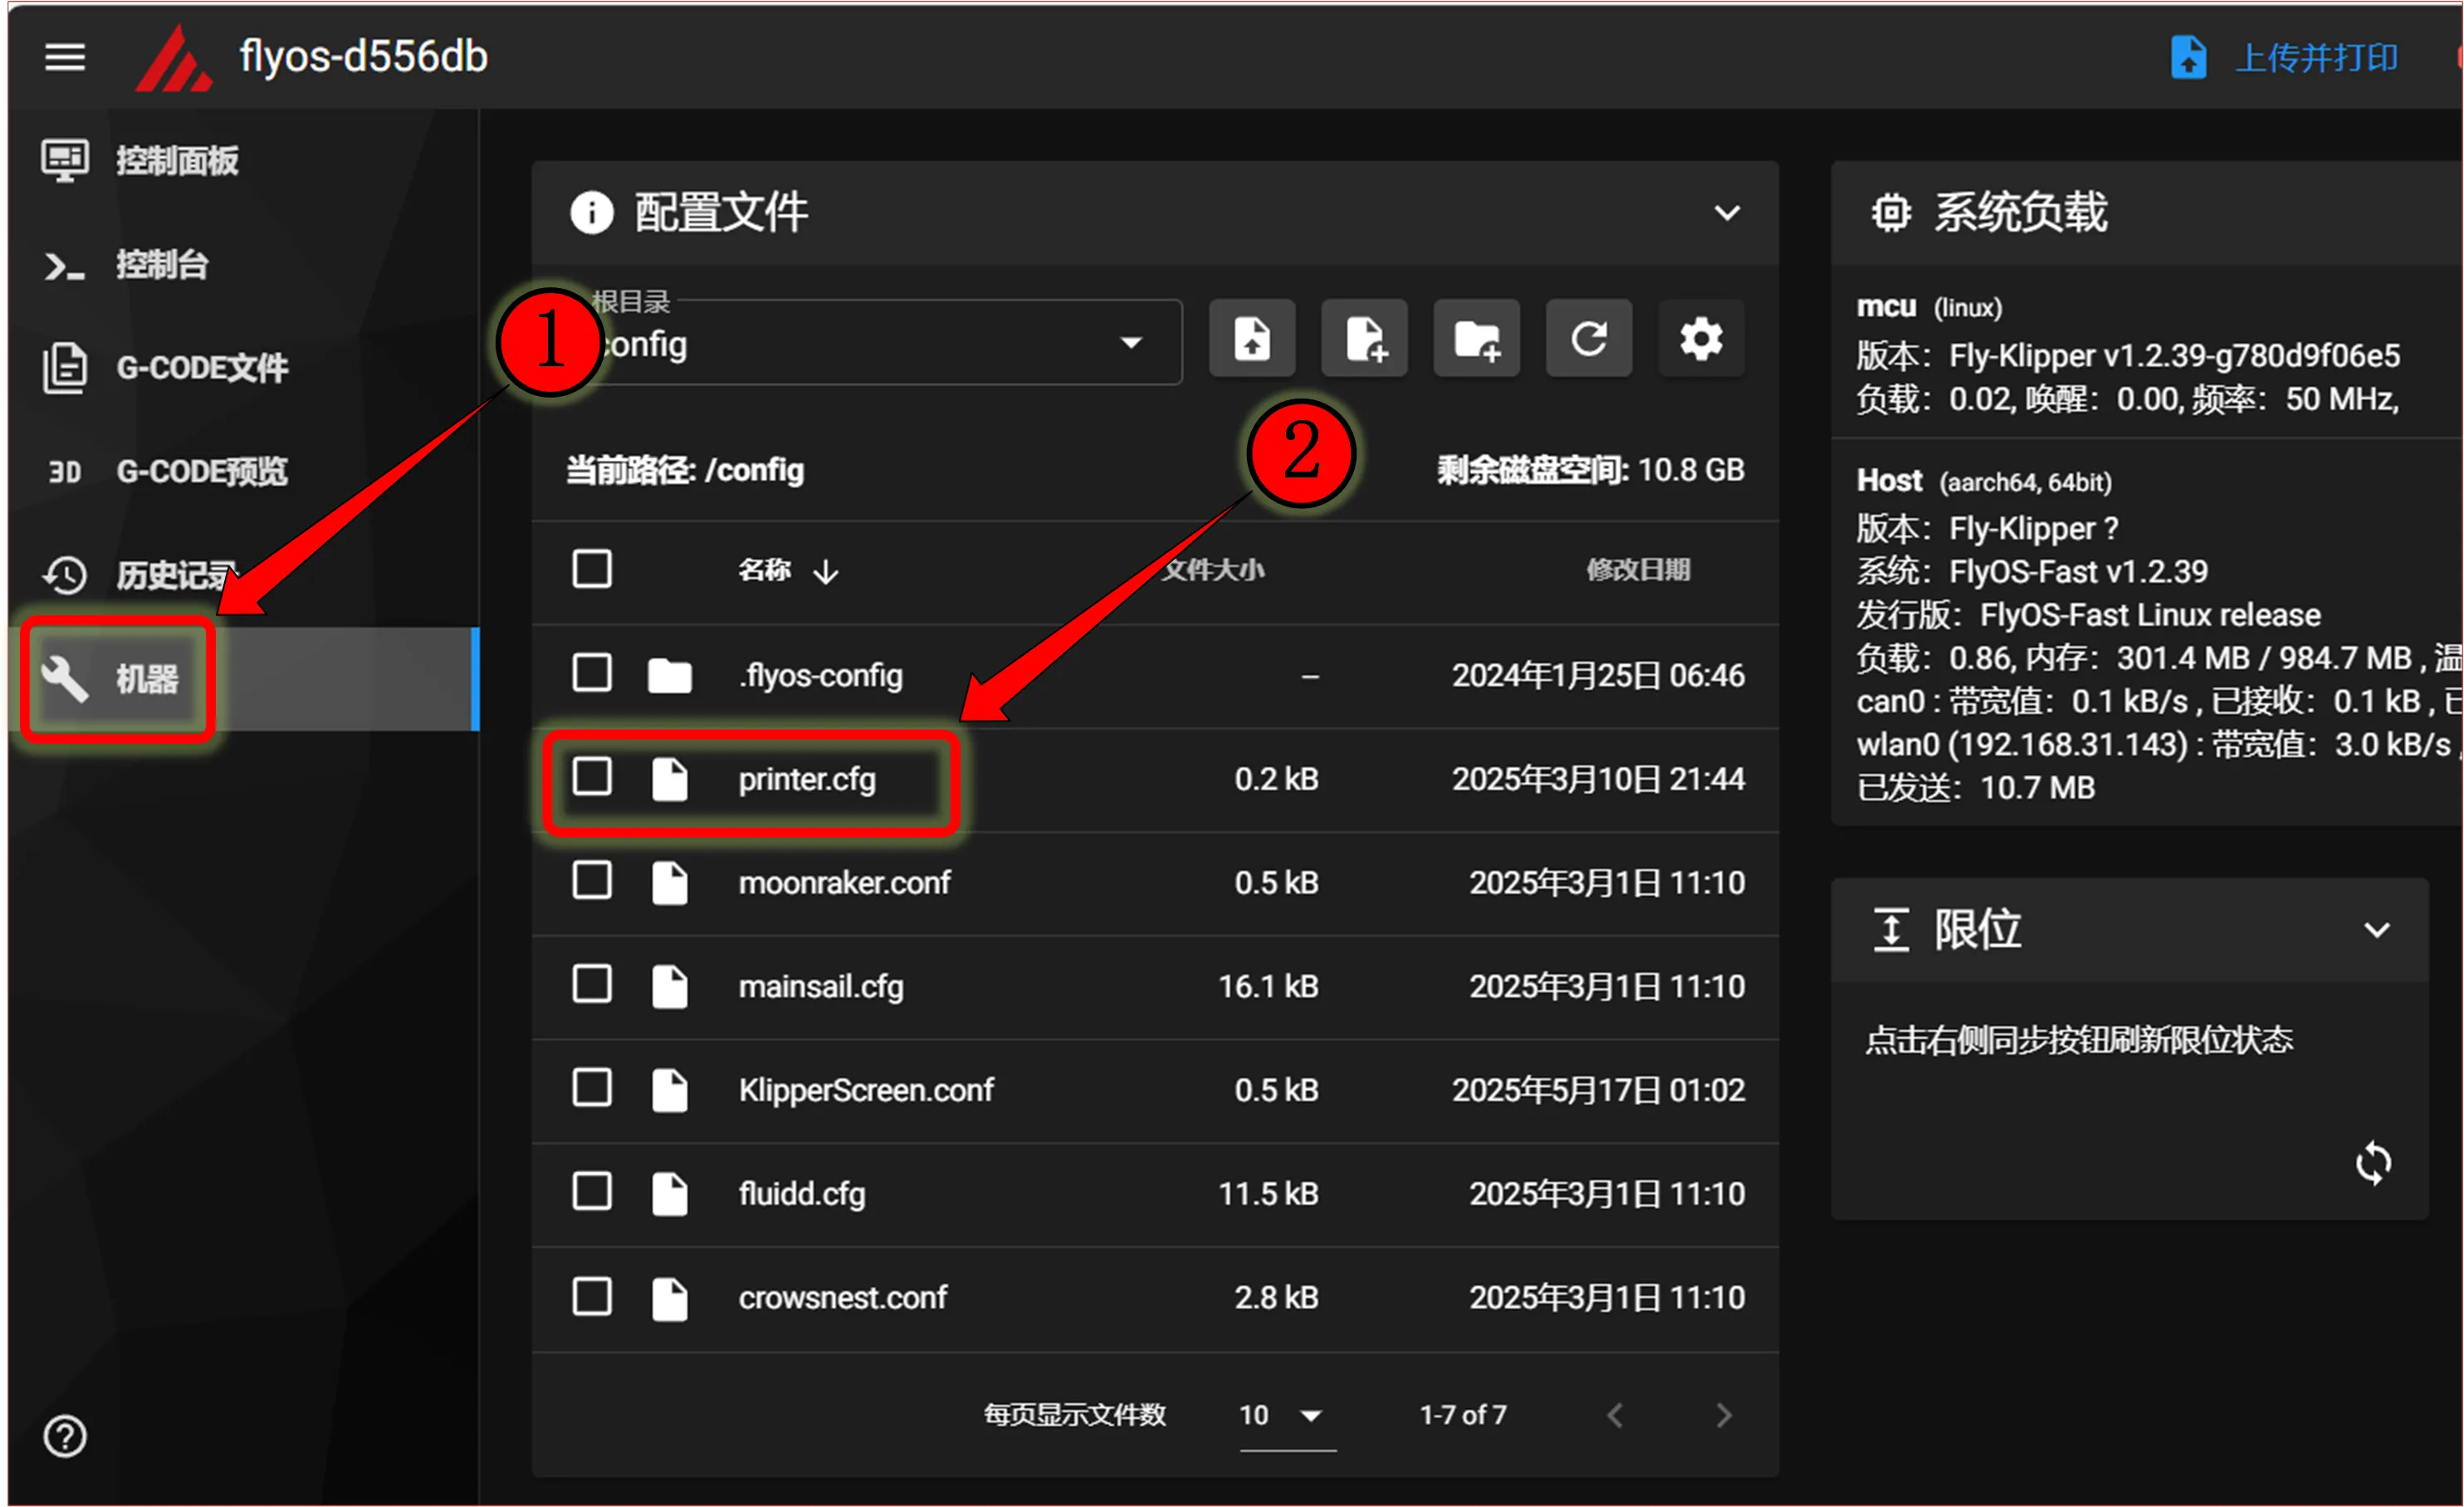 |
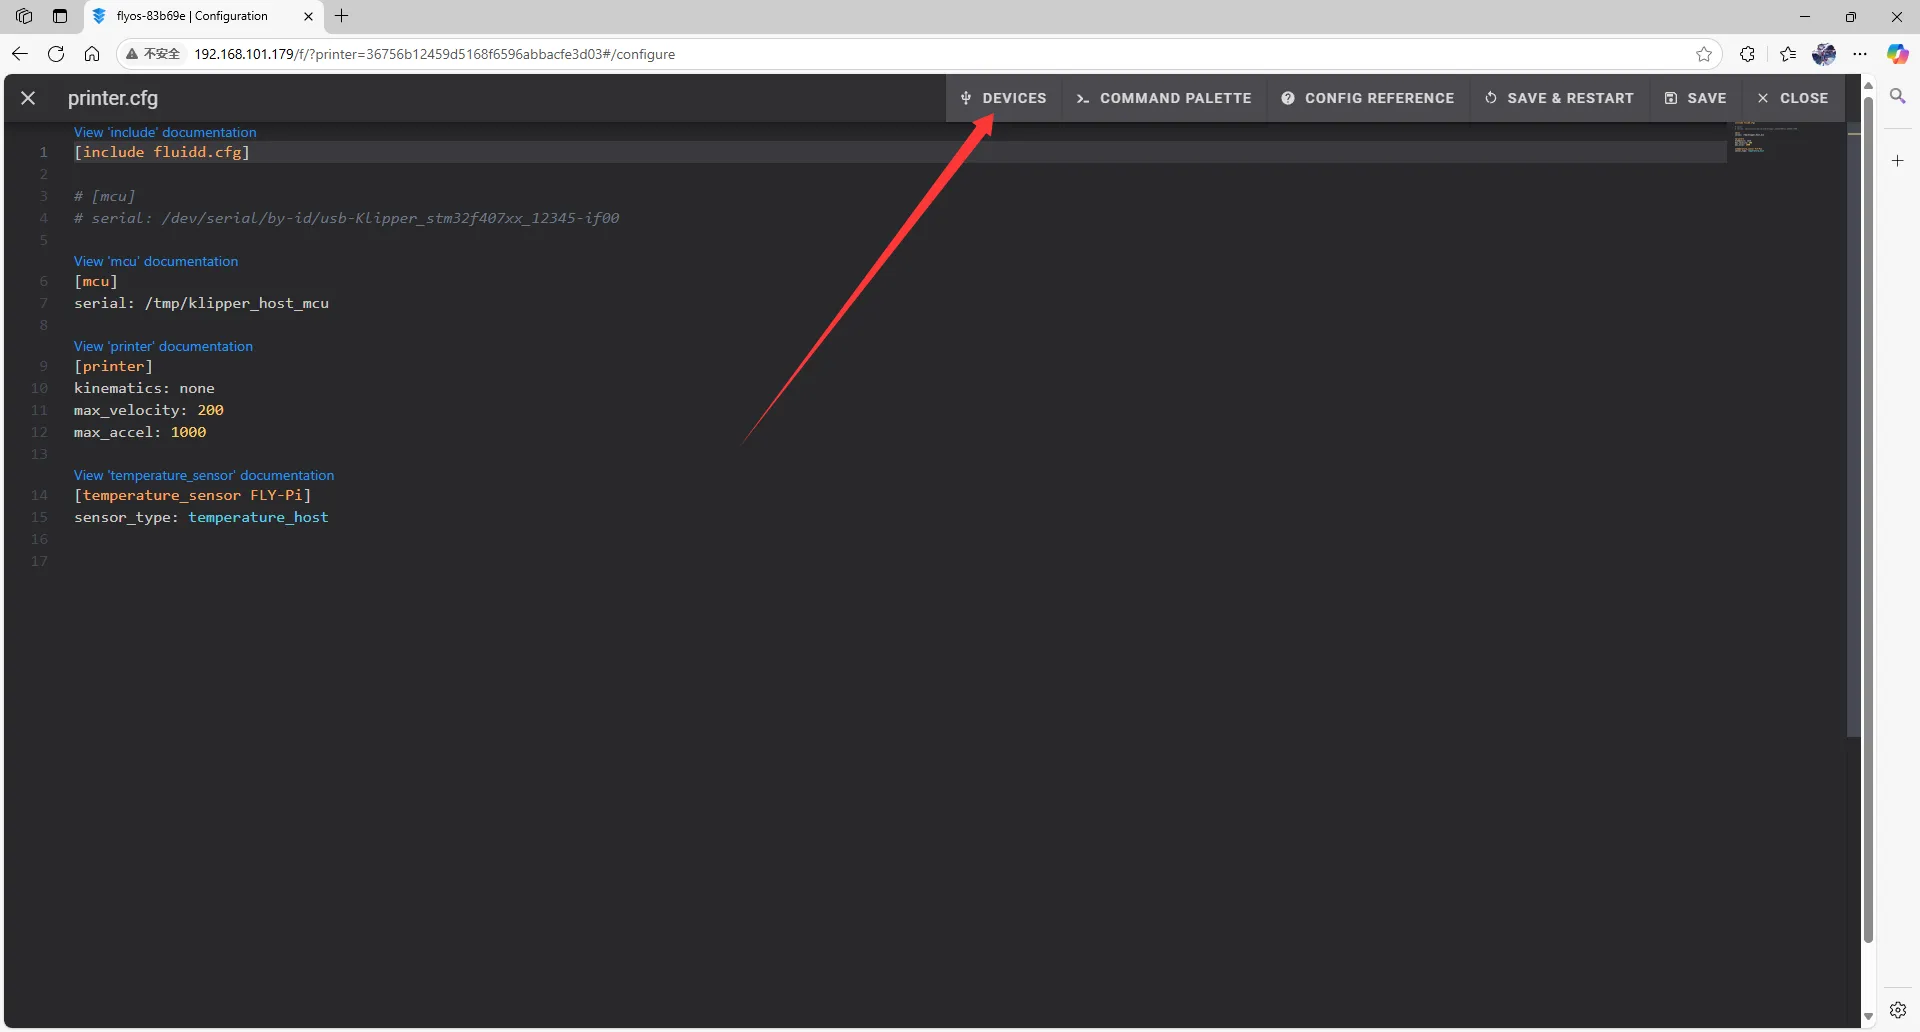
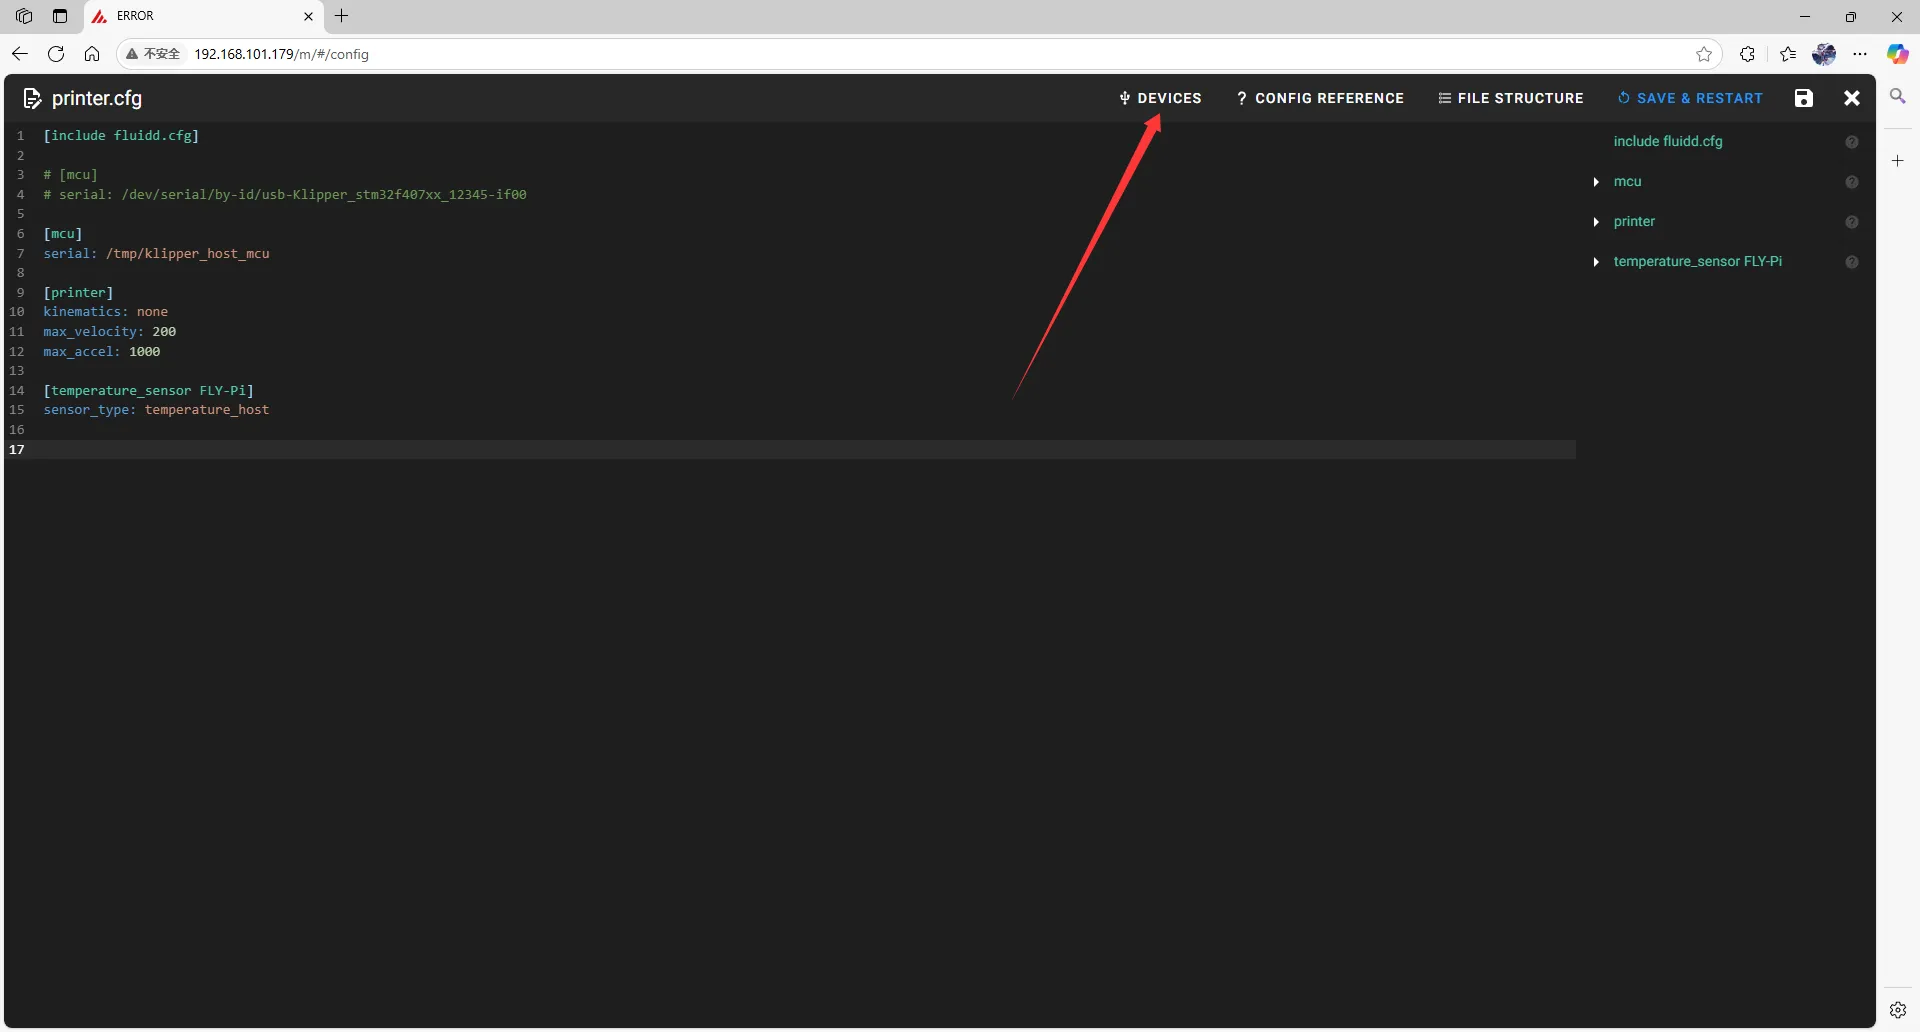
- Click
printer.cfgto enter, then clickDEVICESin the top right corner.
 |  |
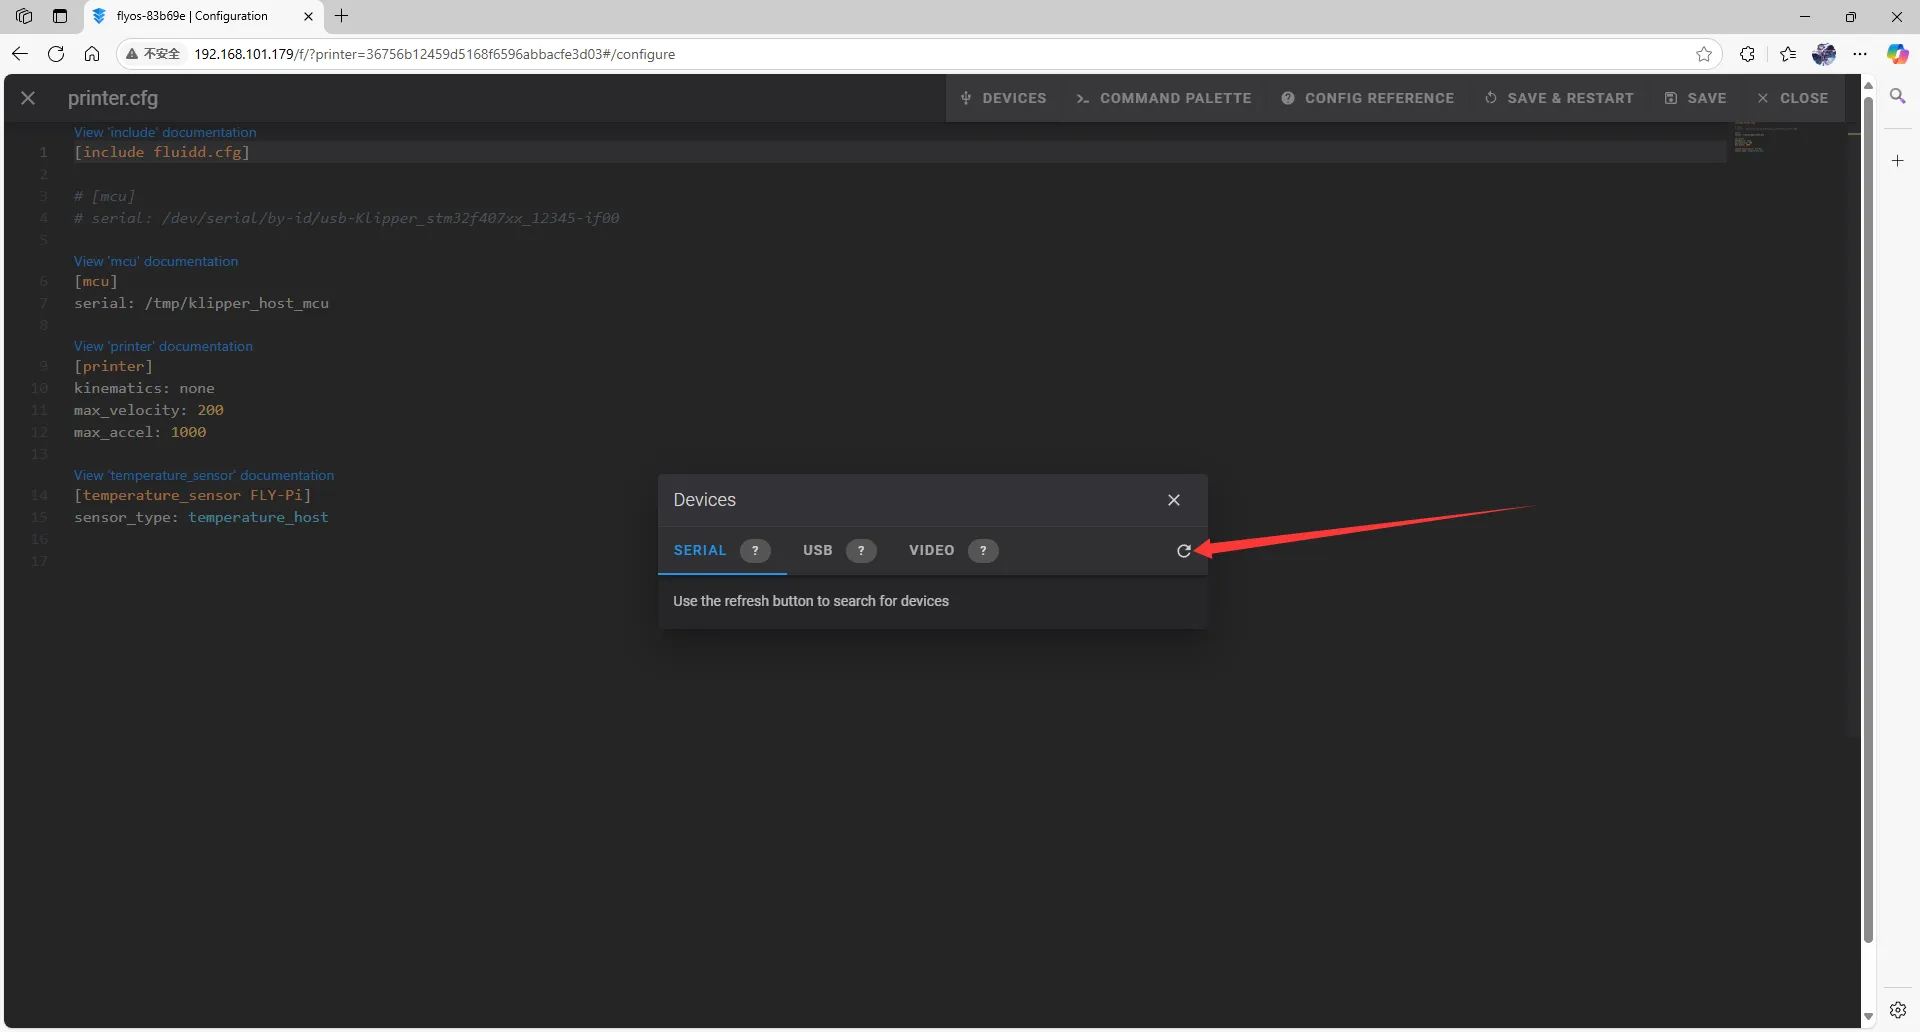
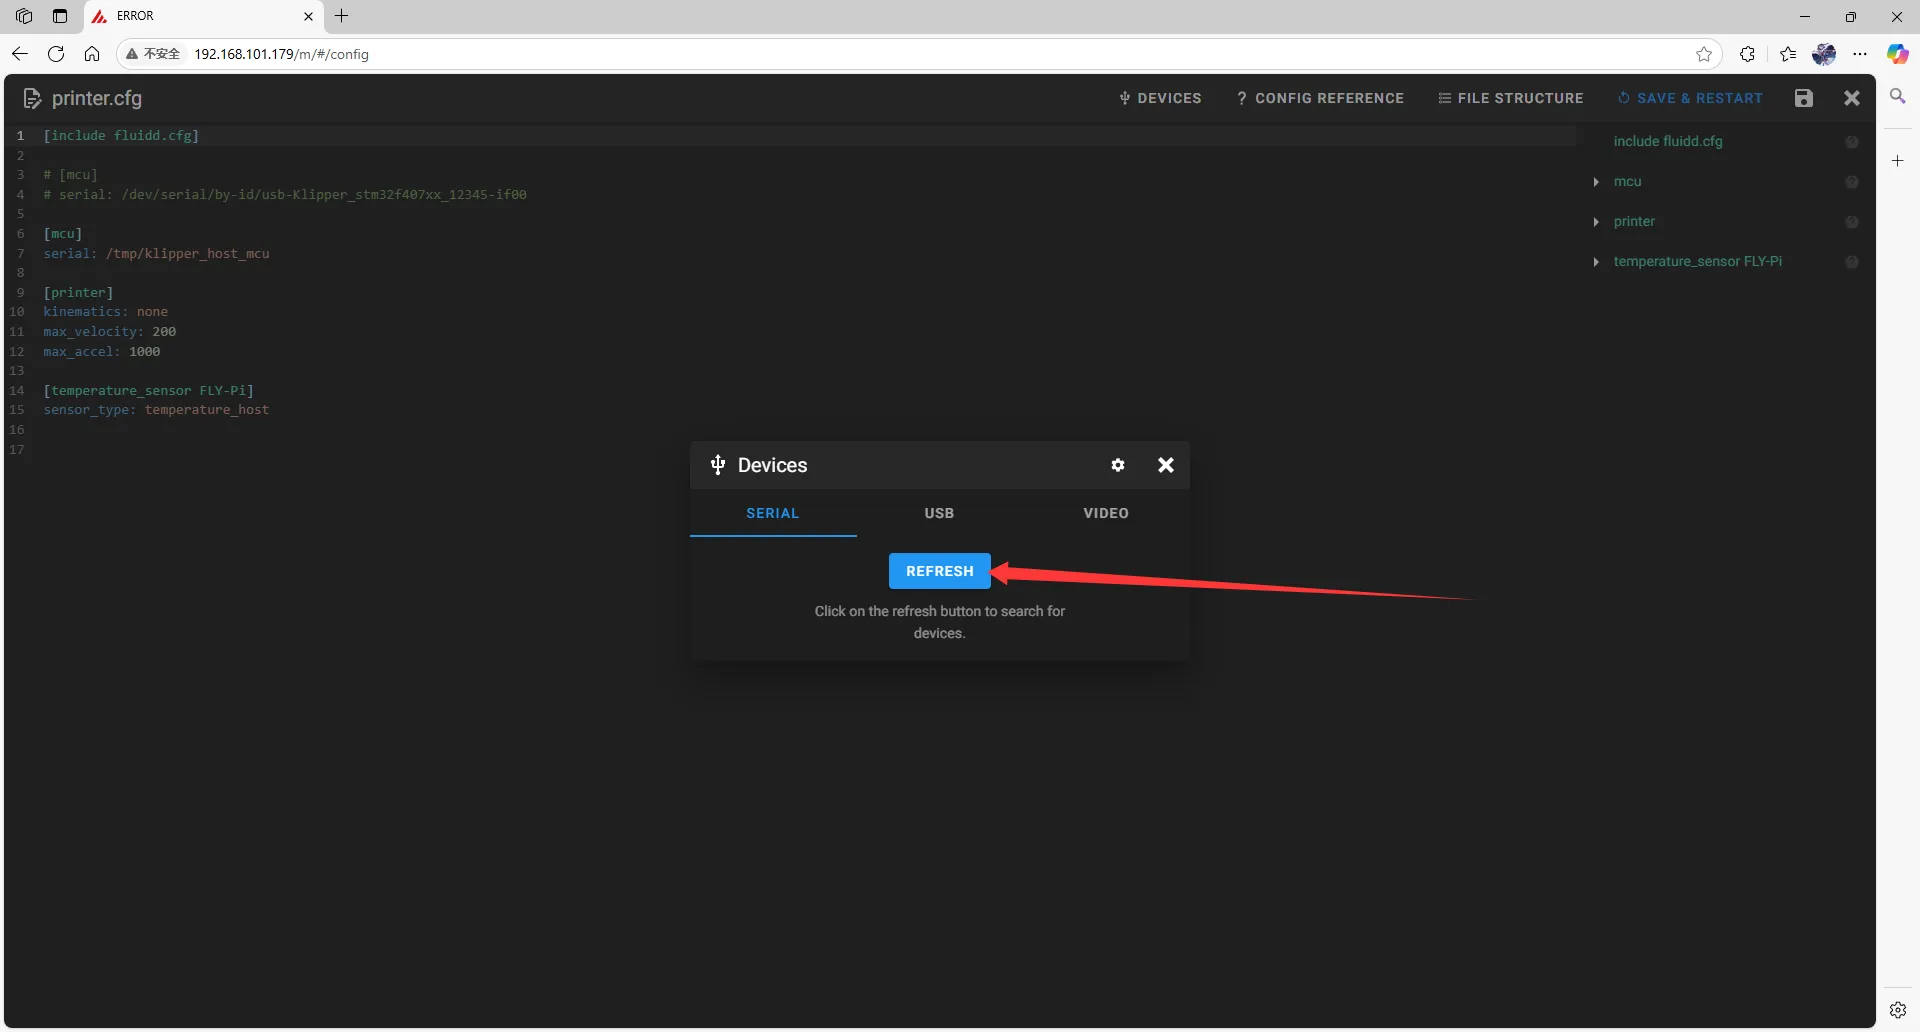
- Click
SERIAL, then refresh.
 |
 |
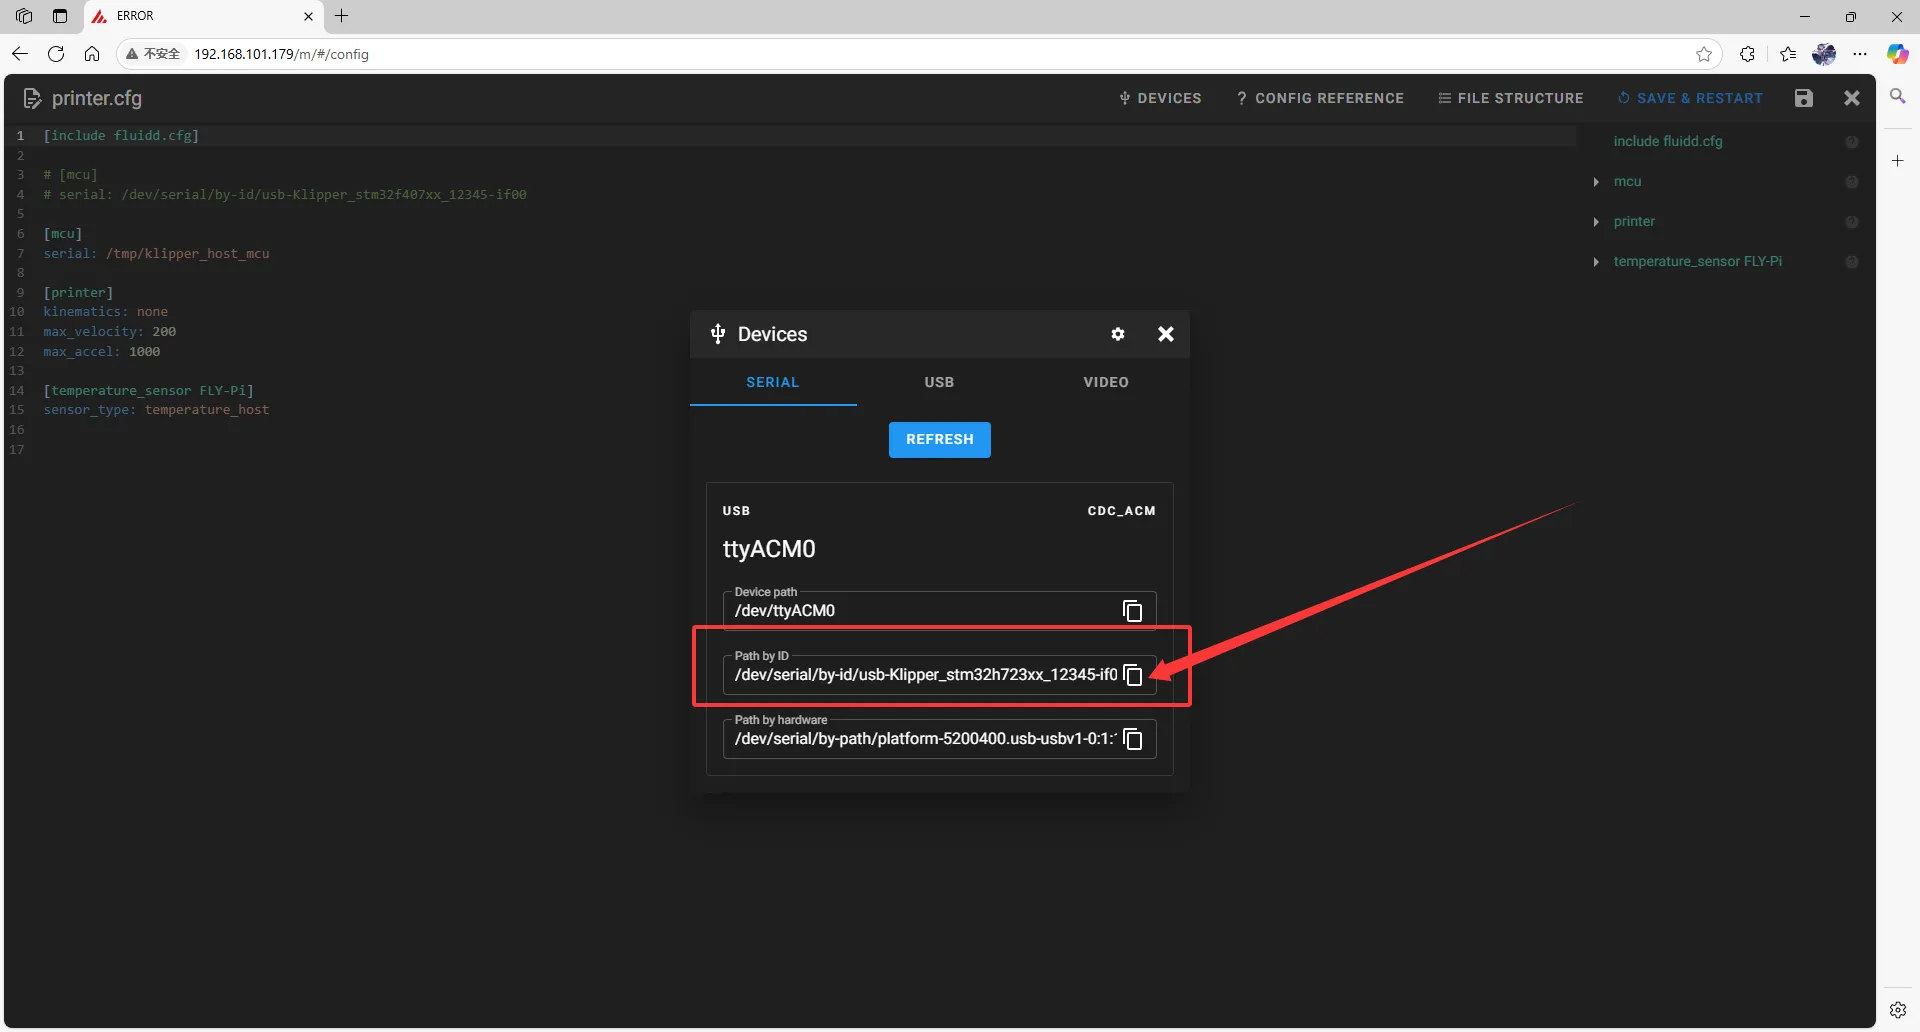
- Copy the ID. Click where the arrow points to copy.
 |
 |
Filling in the USB ID
dangerous
Please note, the ID below cannot be used!!!!
serial: /dev/serial/by-id/usb-1a86_USB_Serial-if00-port0
- Close
DEVICESand fill in the ID.
Important Notes
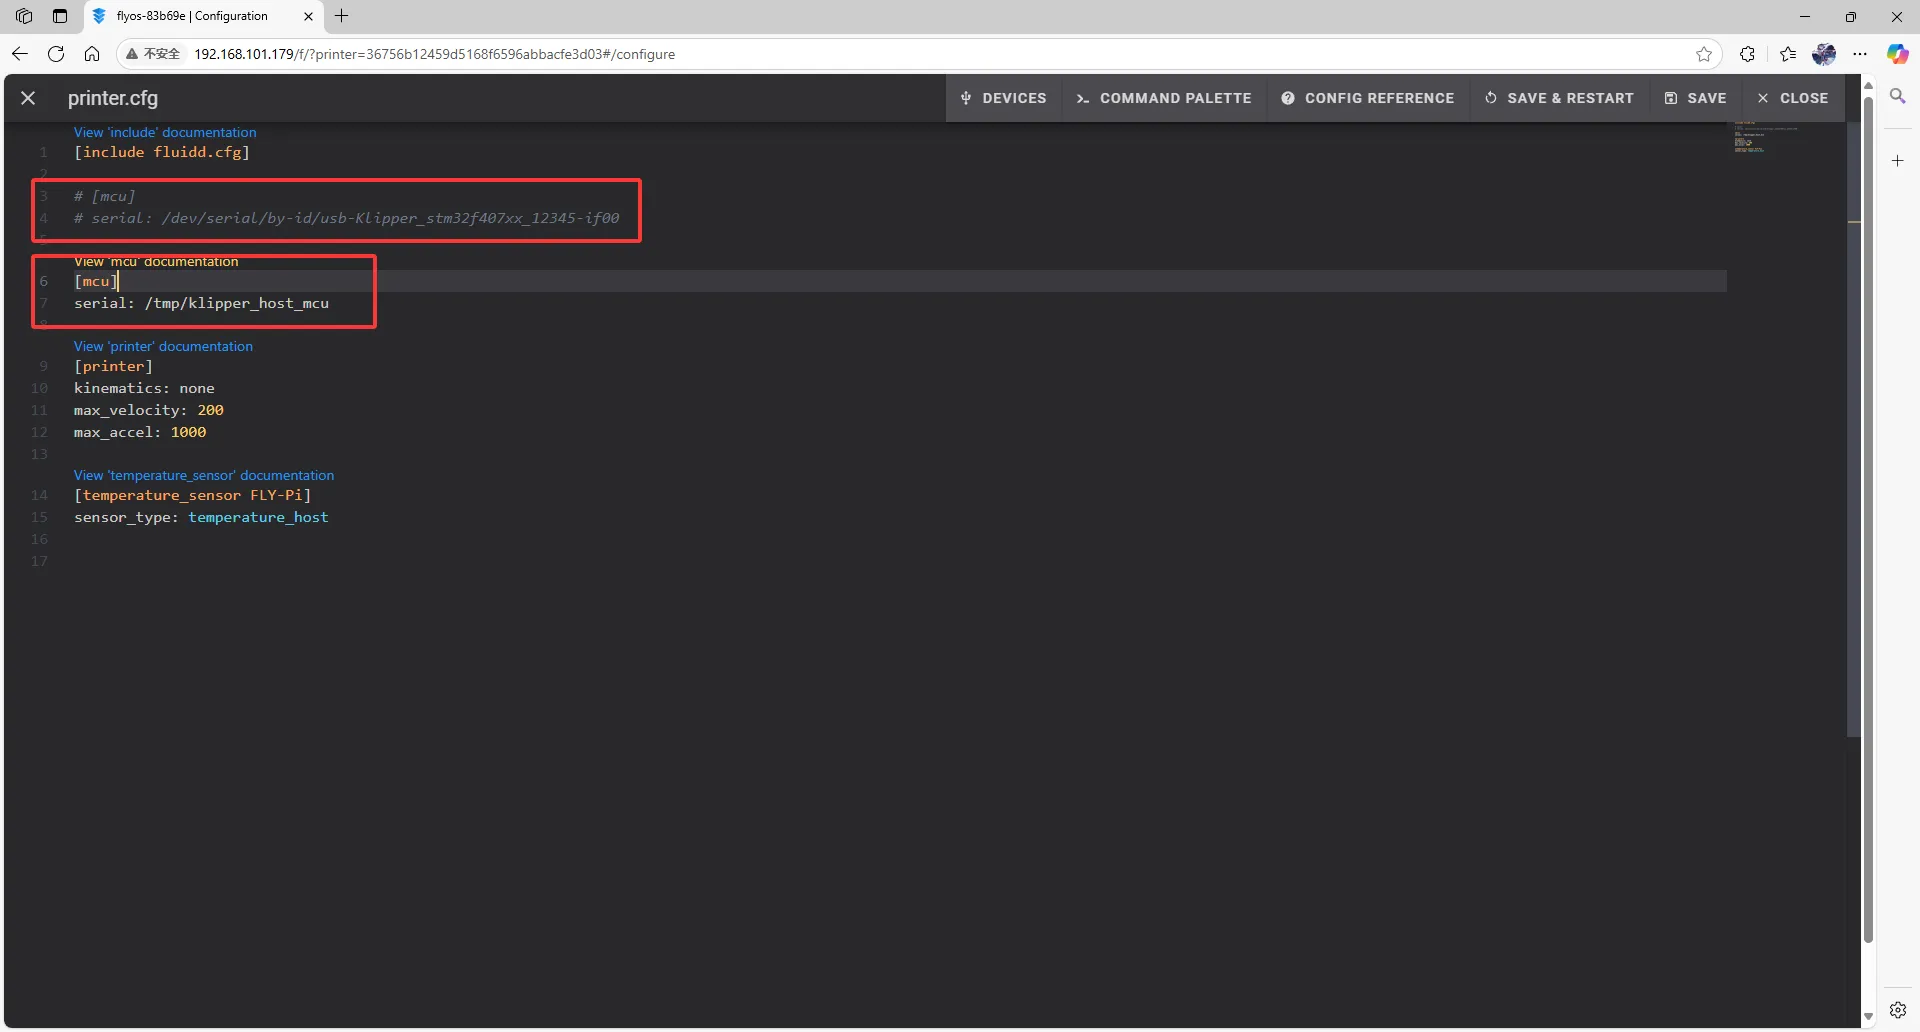
- In the configuration file, change:
[mcu]
serial: /tmp/klipper_host_mcu
to:
[mcu host]
serial: /tmp/klipper_host_mcu
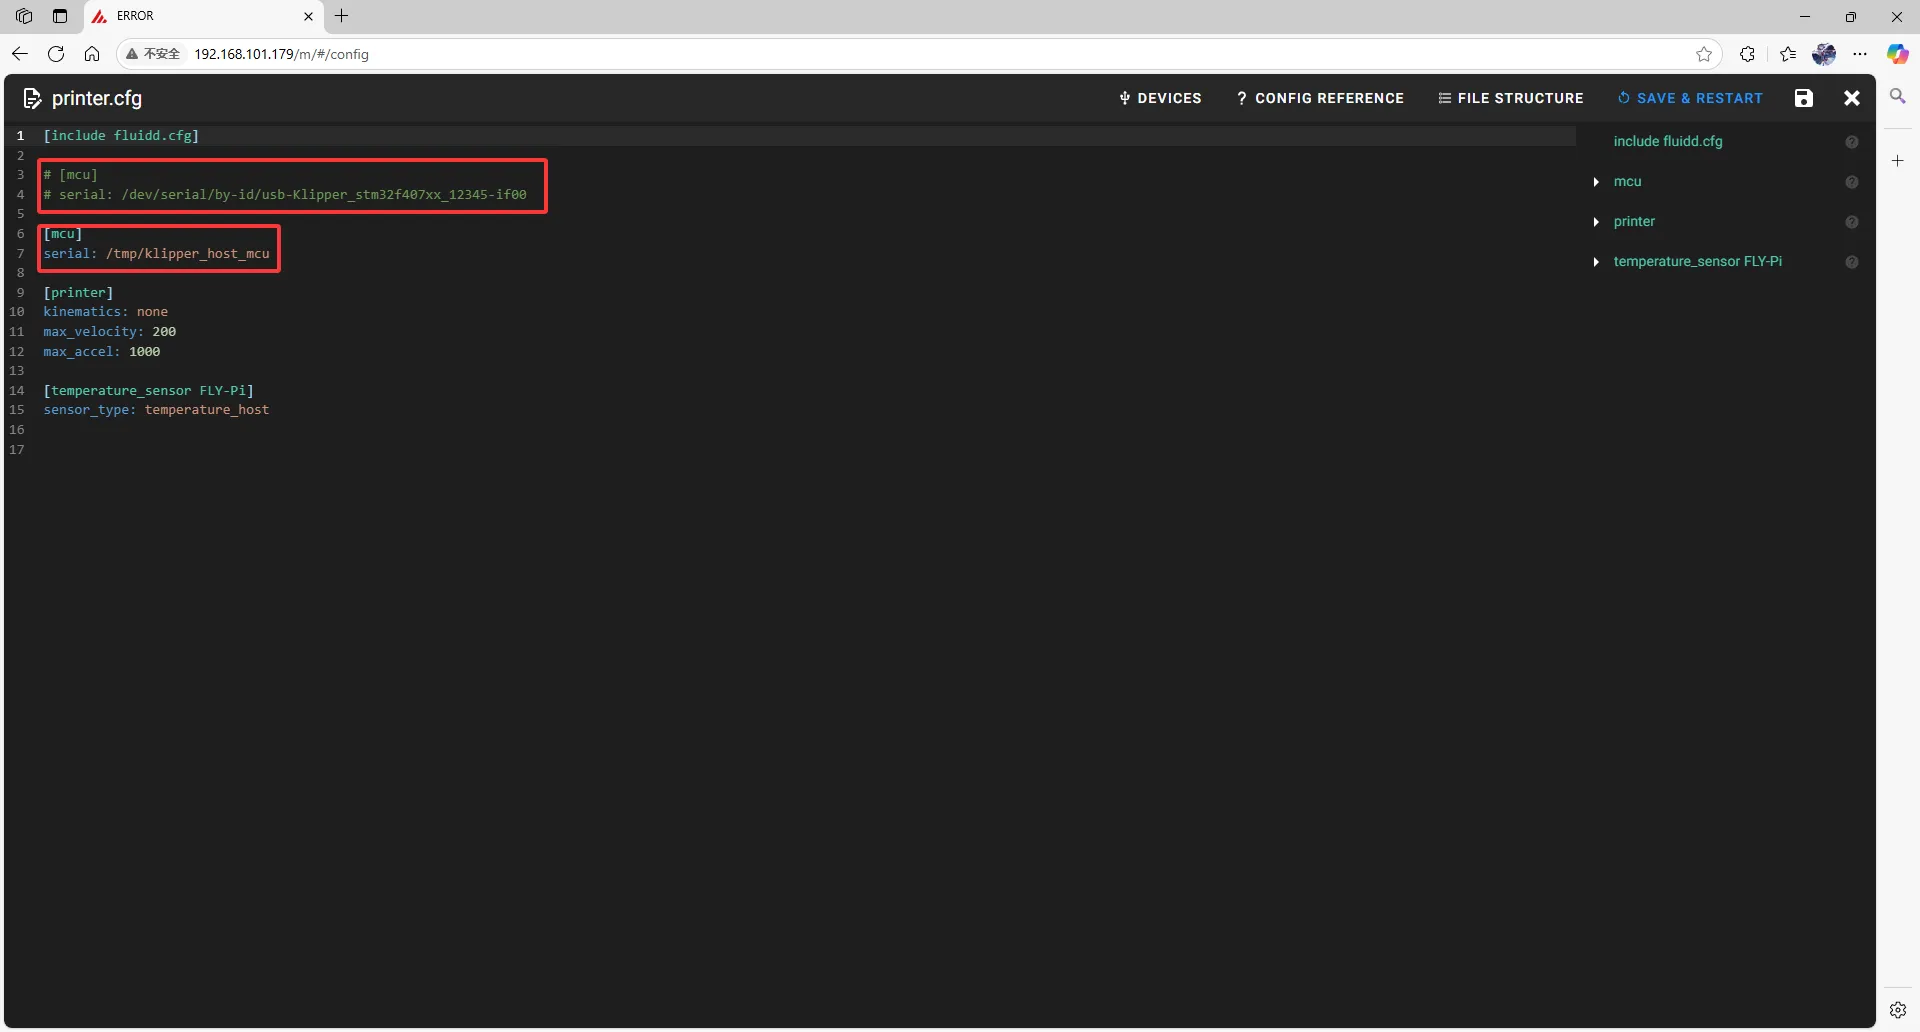
- Add:
[mcu]
serial: <Replace this with the ID you just queried>
 |
 |
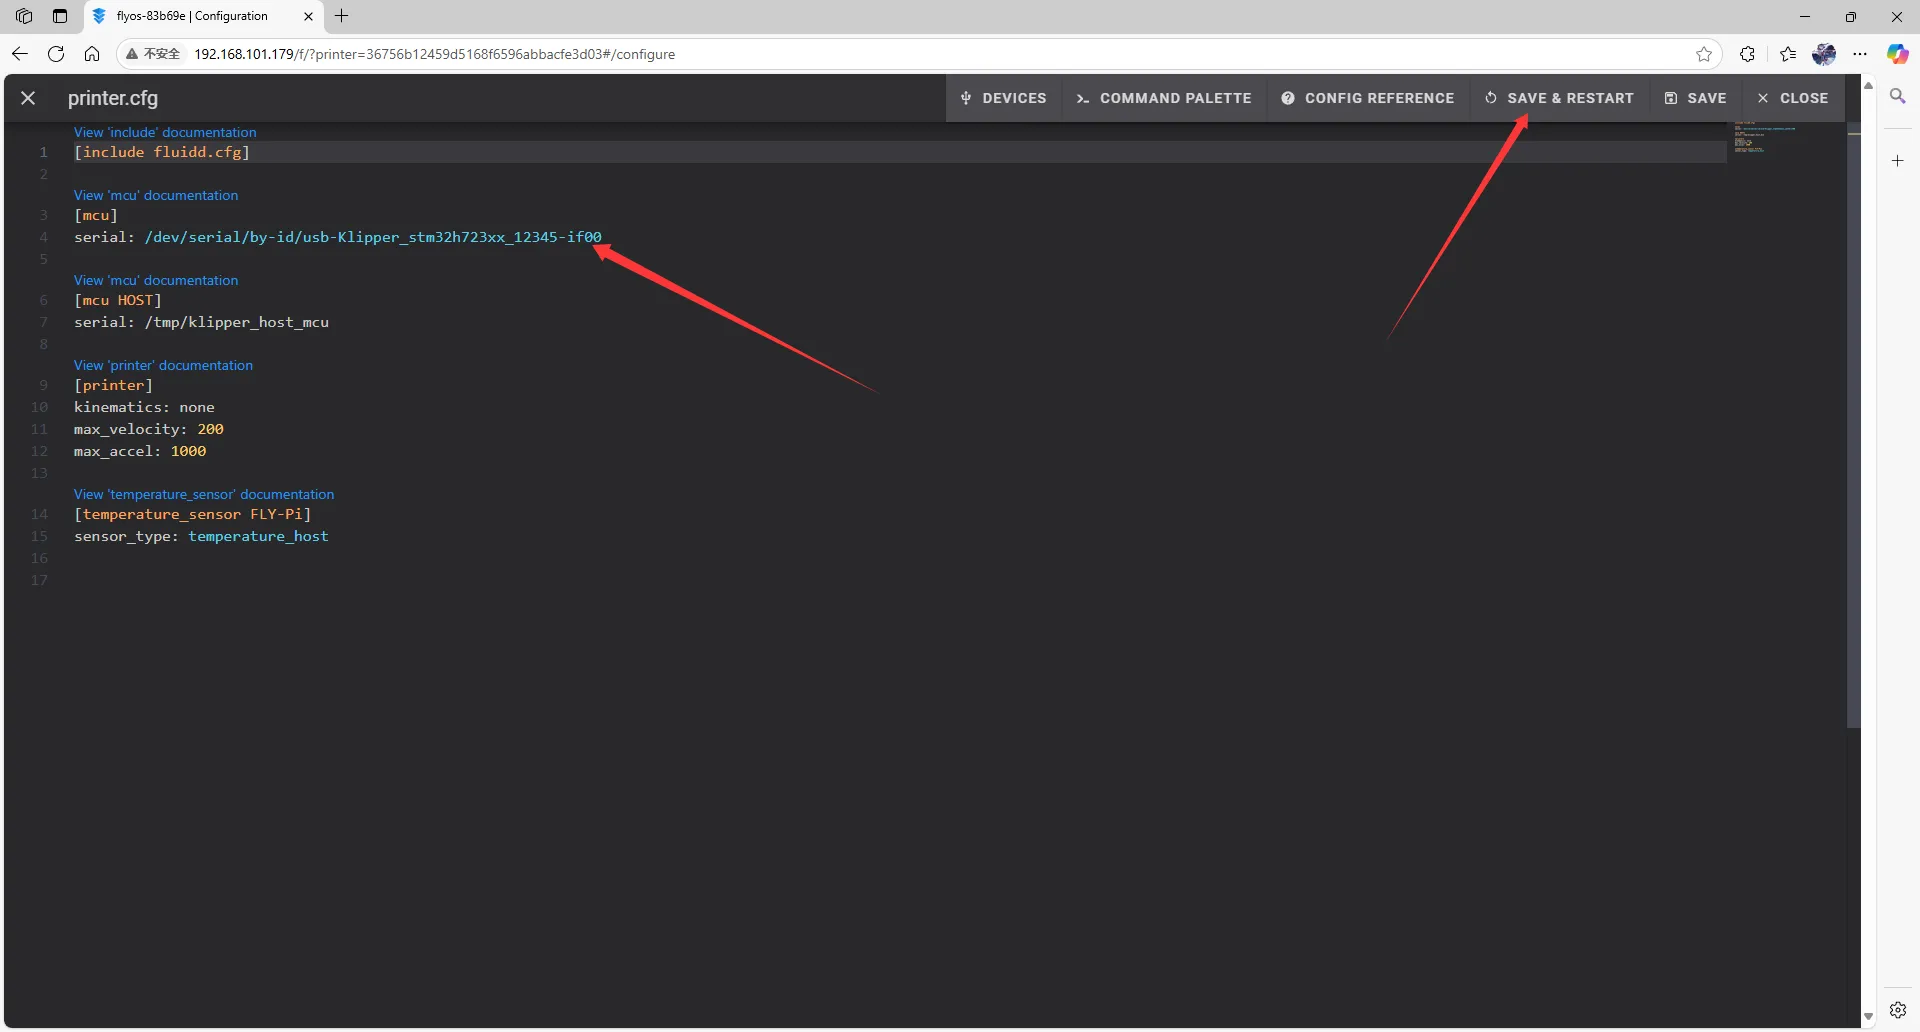
- Fill the ID into the configuration.
tip
- After filling in the ID, click
SAVE & RESTARTin the top right corner.
 | 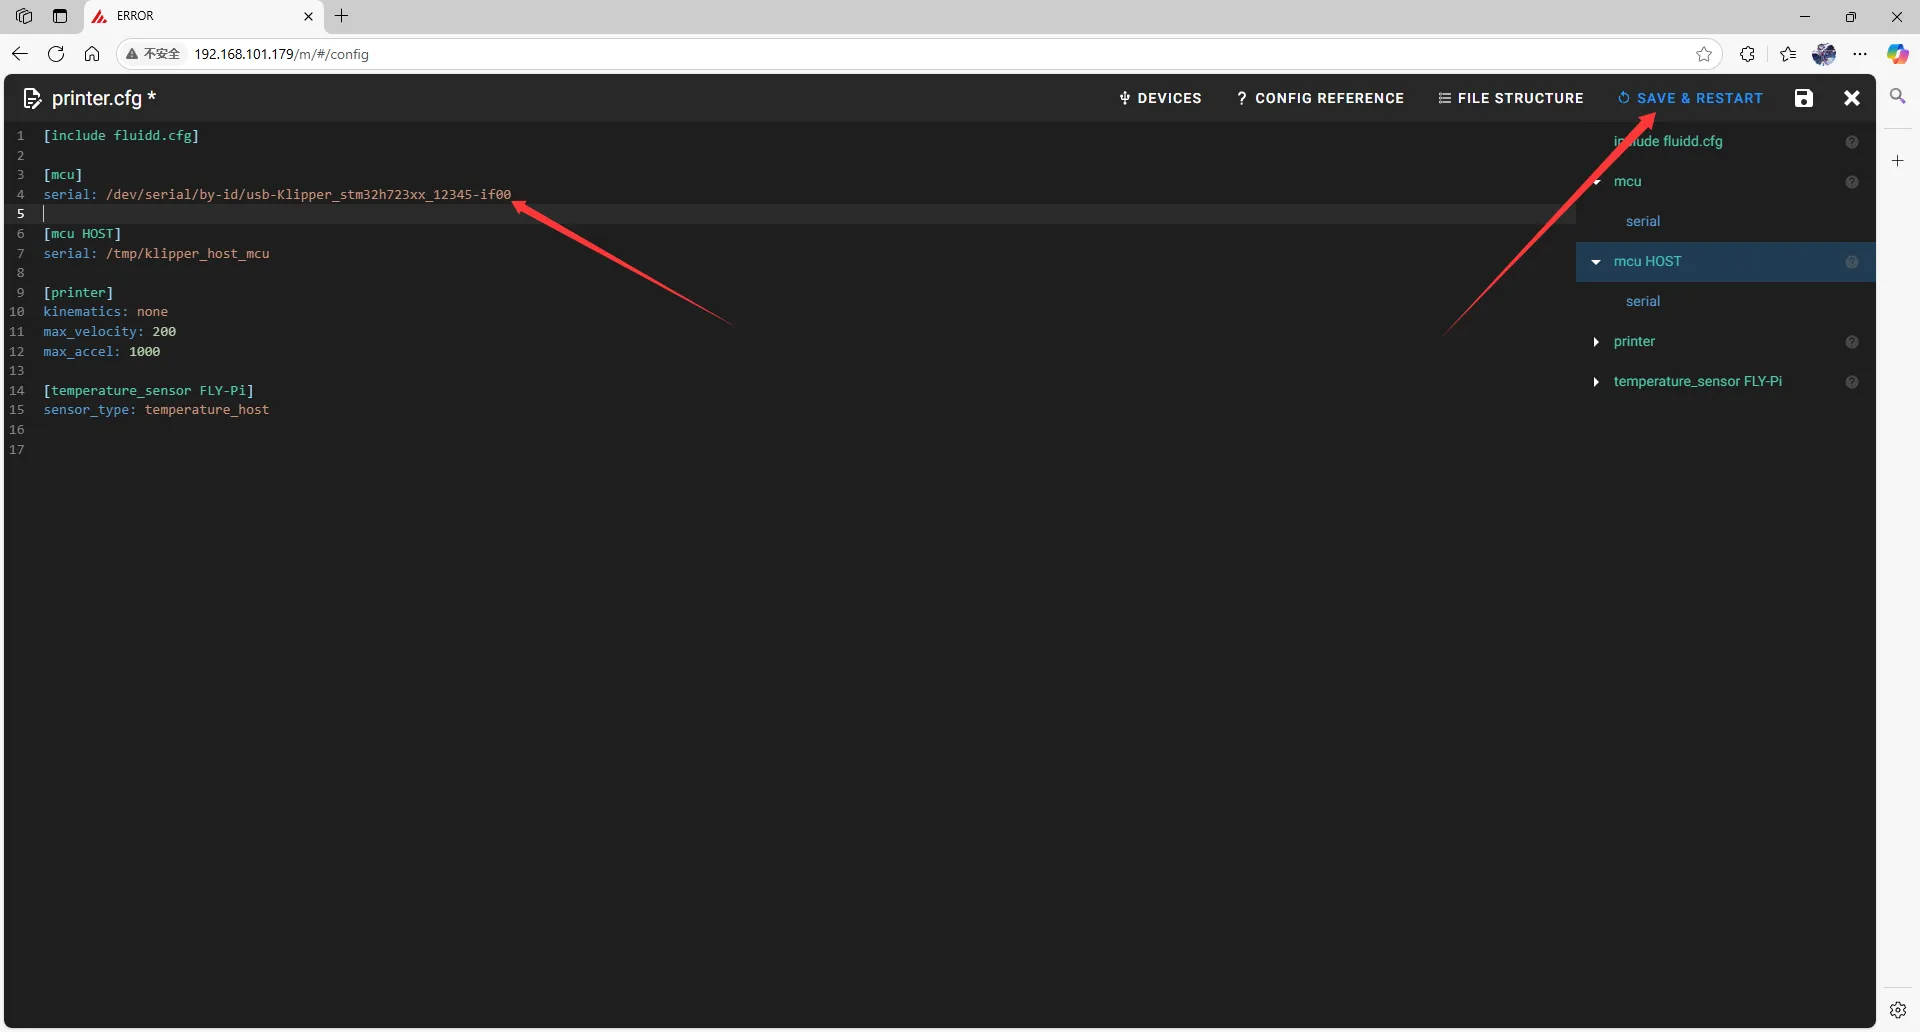 |
- If Klipper prompts
ADC out of range, this is normal. Connect the heated bed and thermistor to the mainboard, configure the thermistor pins for the hotend and heated bed, then save and restart.
dangerous
Note: All IDs appearing in this document are examples. The actual ID for each mainboard is different. Please fill in the ID you actually obtained.
Search for CAN ID
- Open a browser and enter the IP address of the host computer in the address bar. For example, if the IP address of my host computer is
192.168.101.179, simply enter it and press Enter.
- Open the WEB interface of the host computer, and in the configuration options of the left sidebar, find:
|
|
-
After clicking into
printer.cfg, click onDEVICESin the upper right corner. -
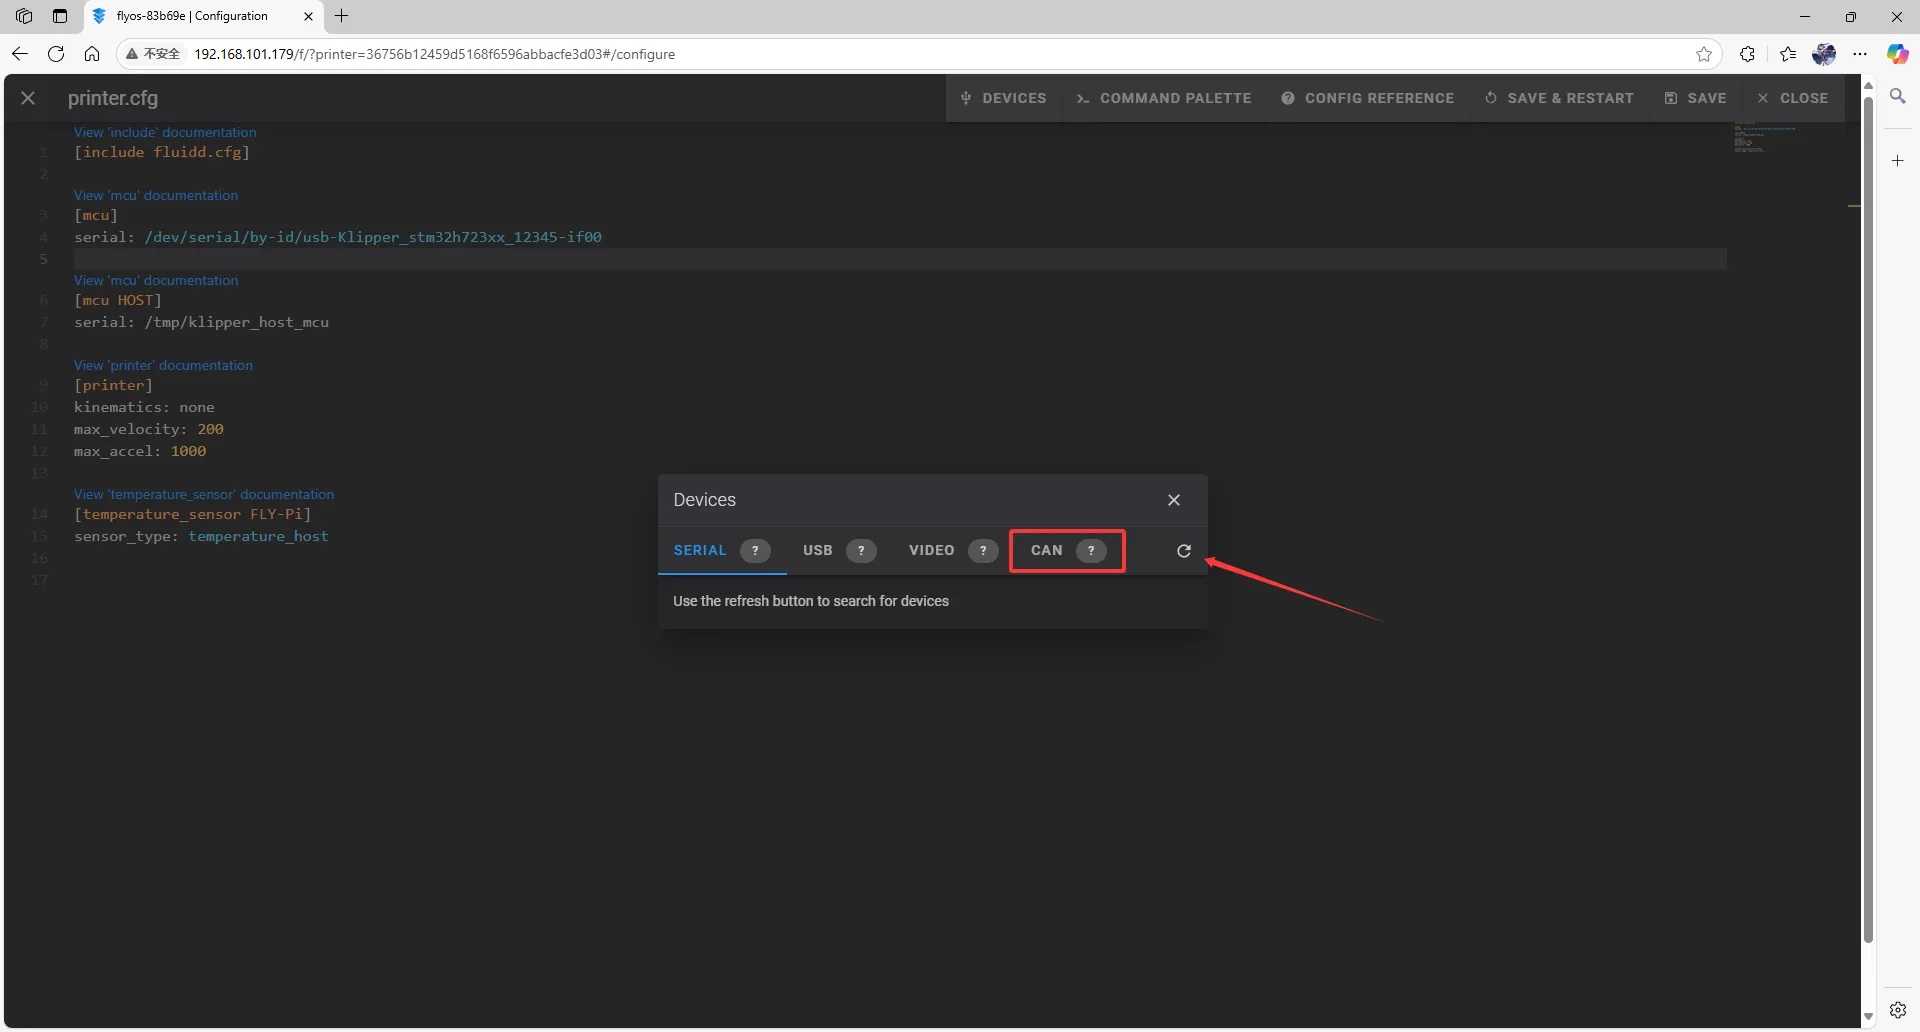
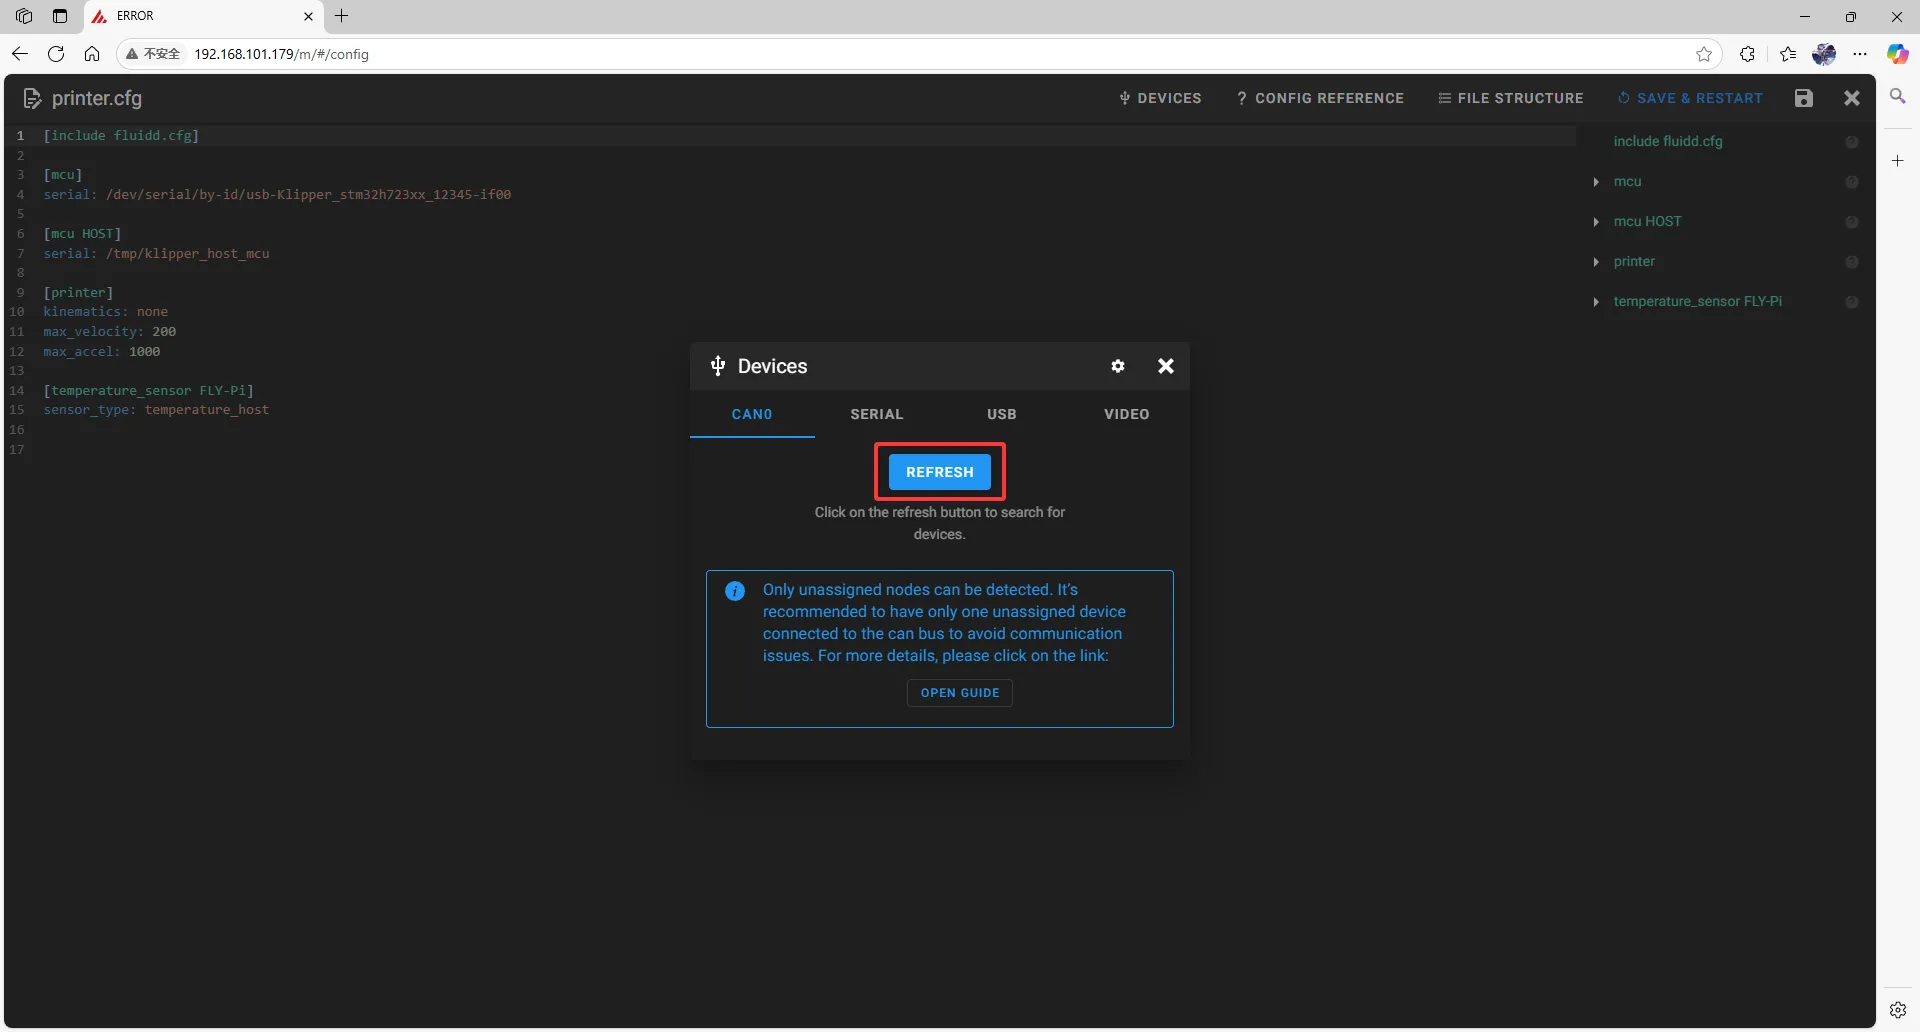
Click
CAN, then refresh.- Refresh in fluidd
- Refresh in mainsail
-
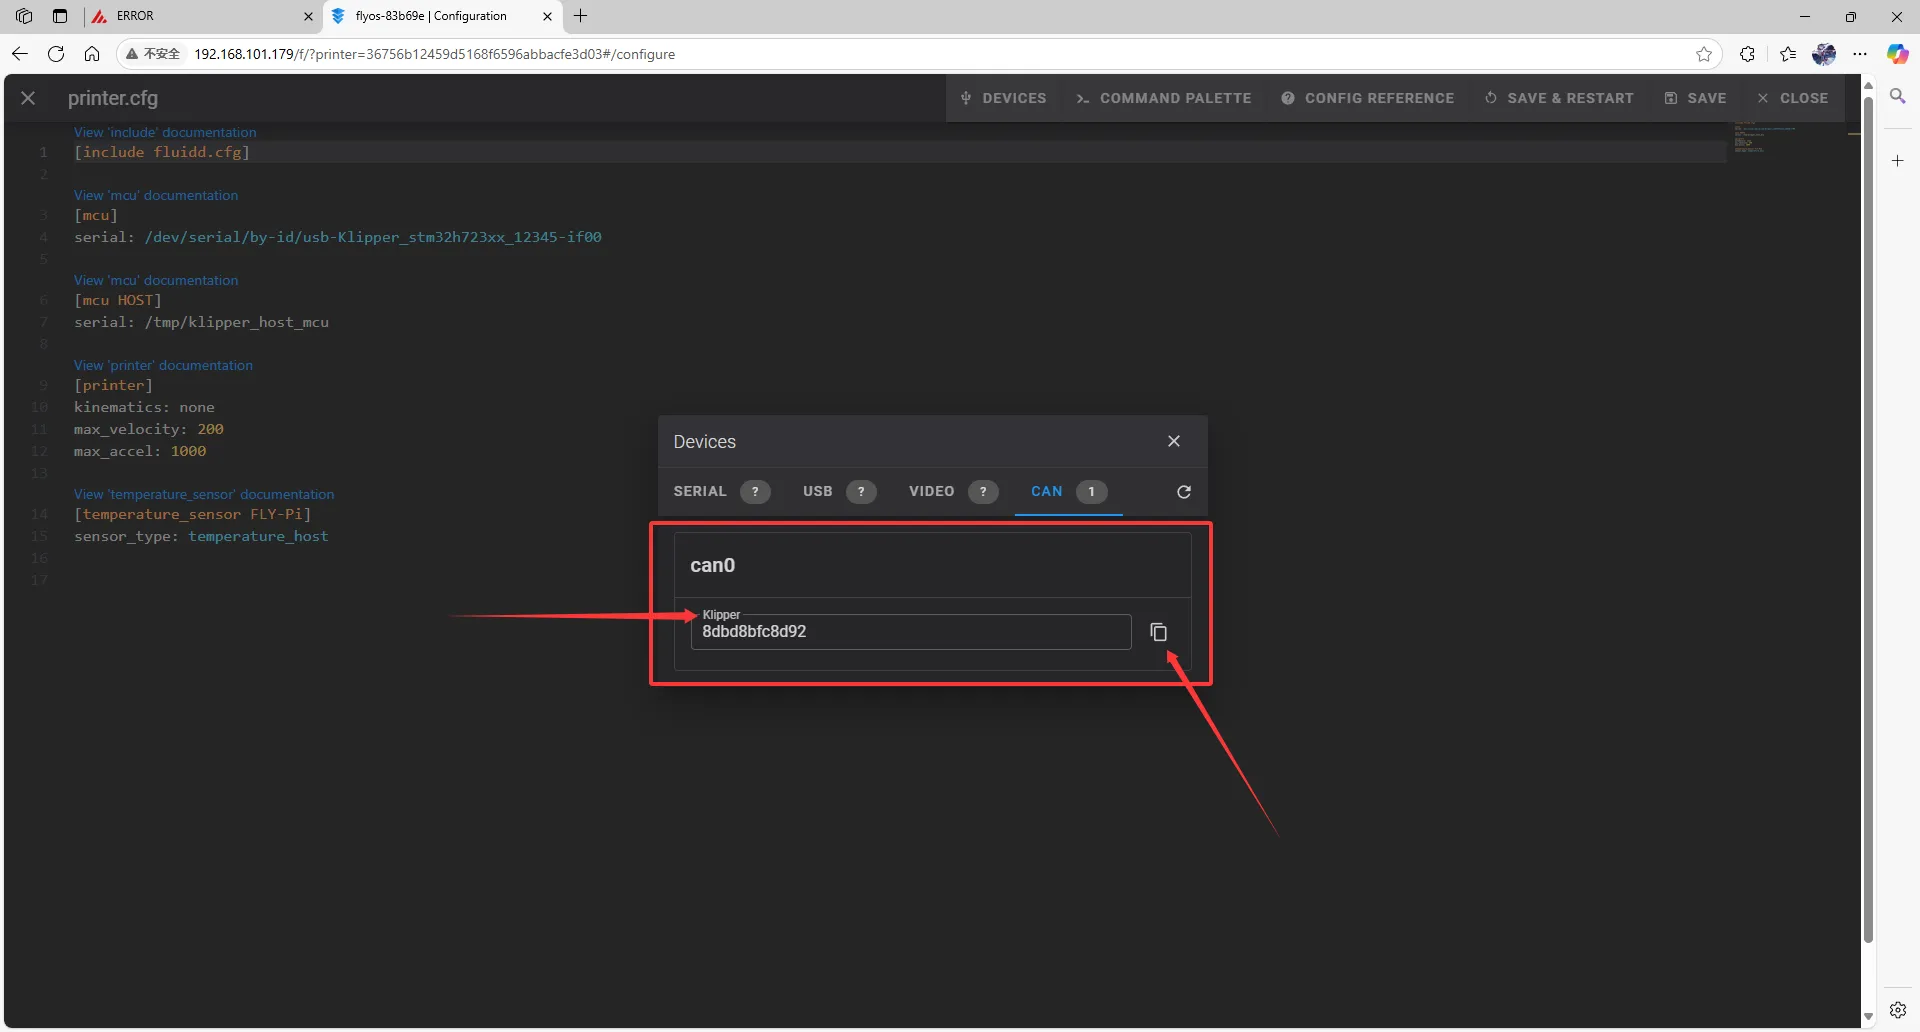
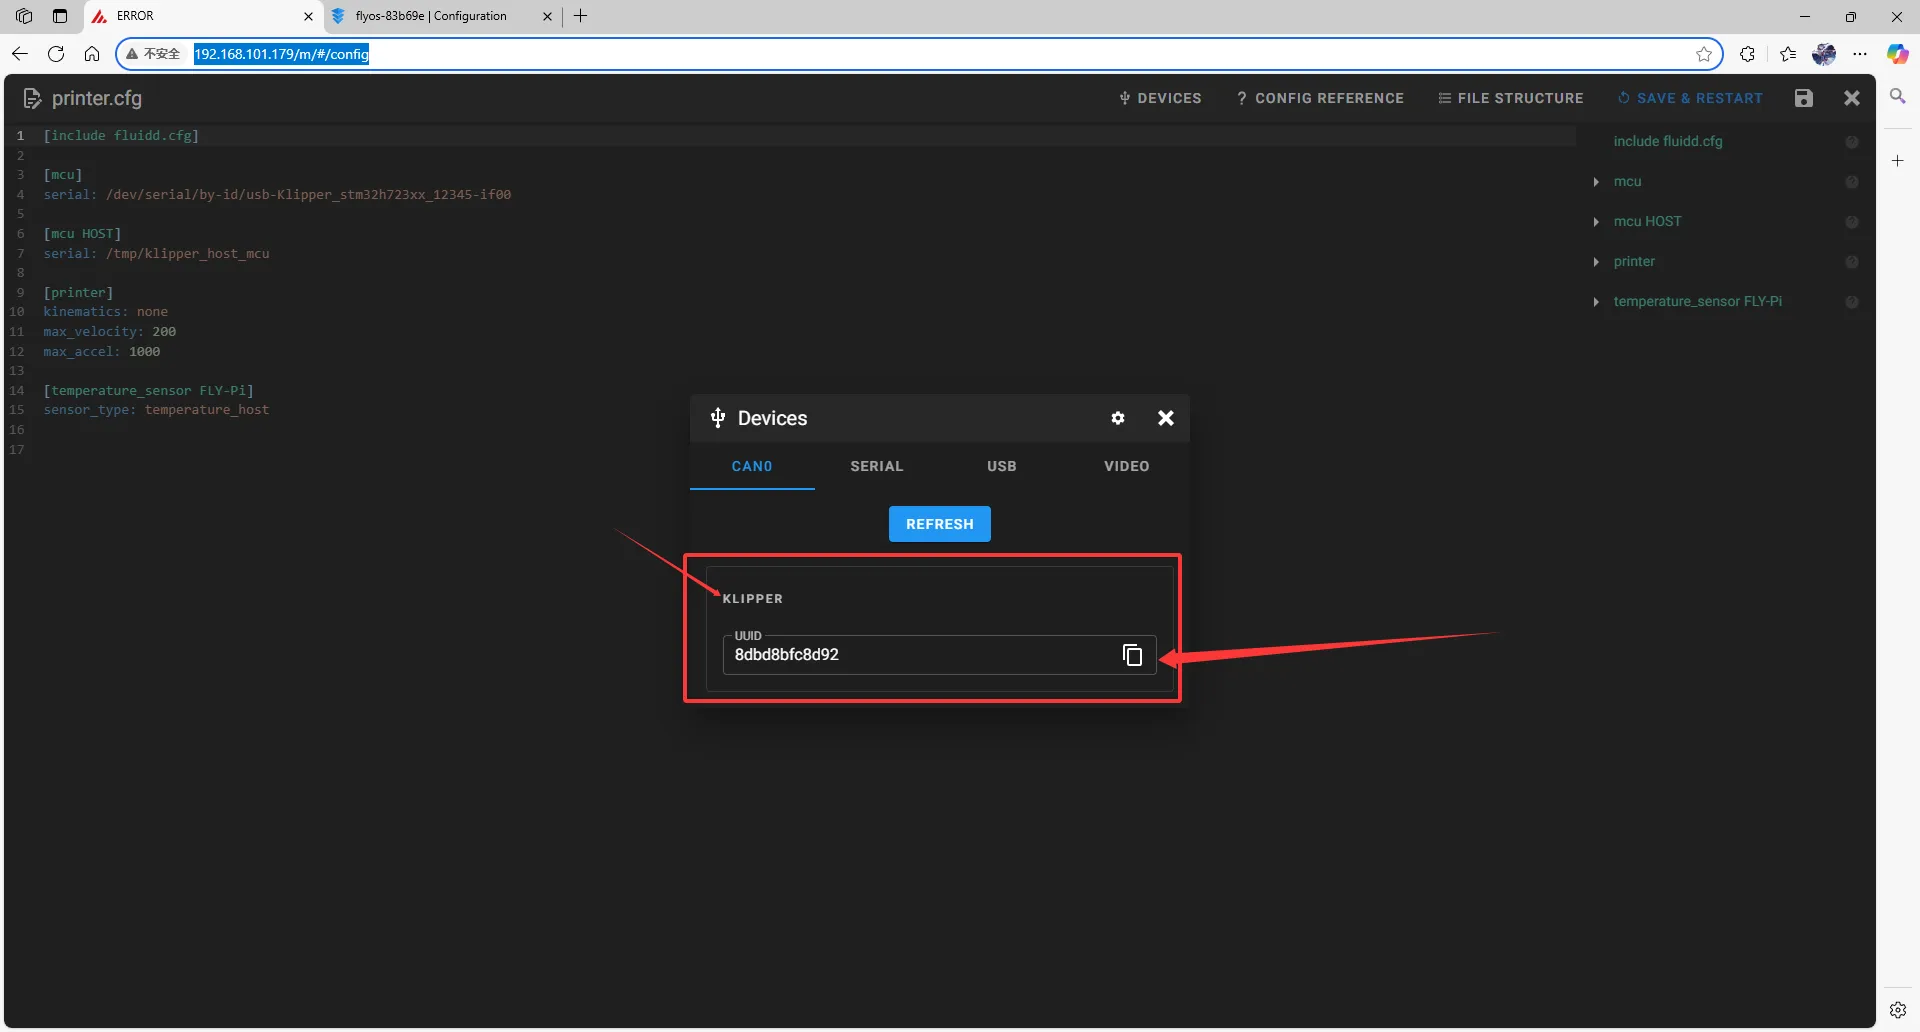
Copy the ID; click the arrow to copy it.
- In fluidd, confirm whether the item pointed to by the first arrow is
Klipper; if so, click the arrow on the right to copy it.
- In mainsail, confirm whether the item pointed to by the first arrow is
Klipper; if so, click the arrow on the right to copy it.
- In fluidd, confirm whether the item pointed to by the first arrow is
Fill in CAN ID
- Close
DEVICESand fill in the ID
Note
- Please change the following in the configuration file:
[mcu]
serial: /tmp/klipper_host_mcu
to
[mcu host]
serial: /tmp/klipper_host_mcu
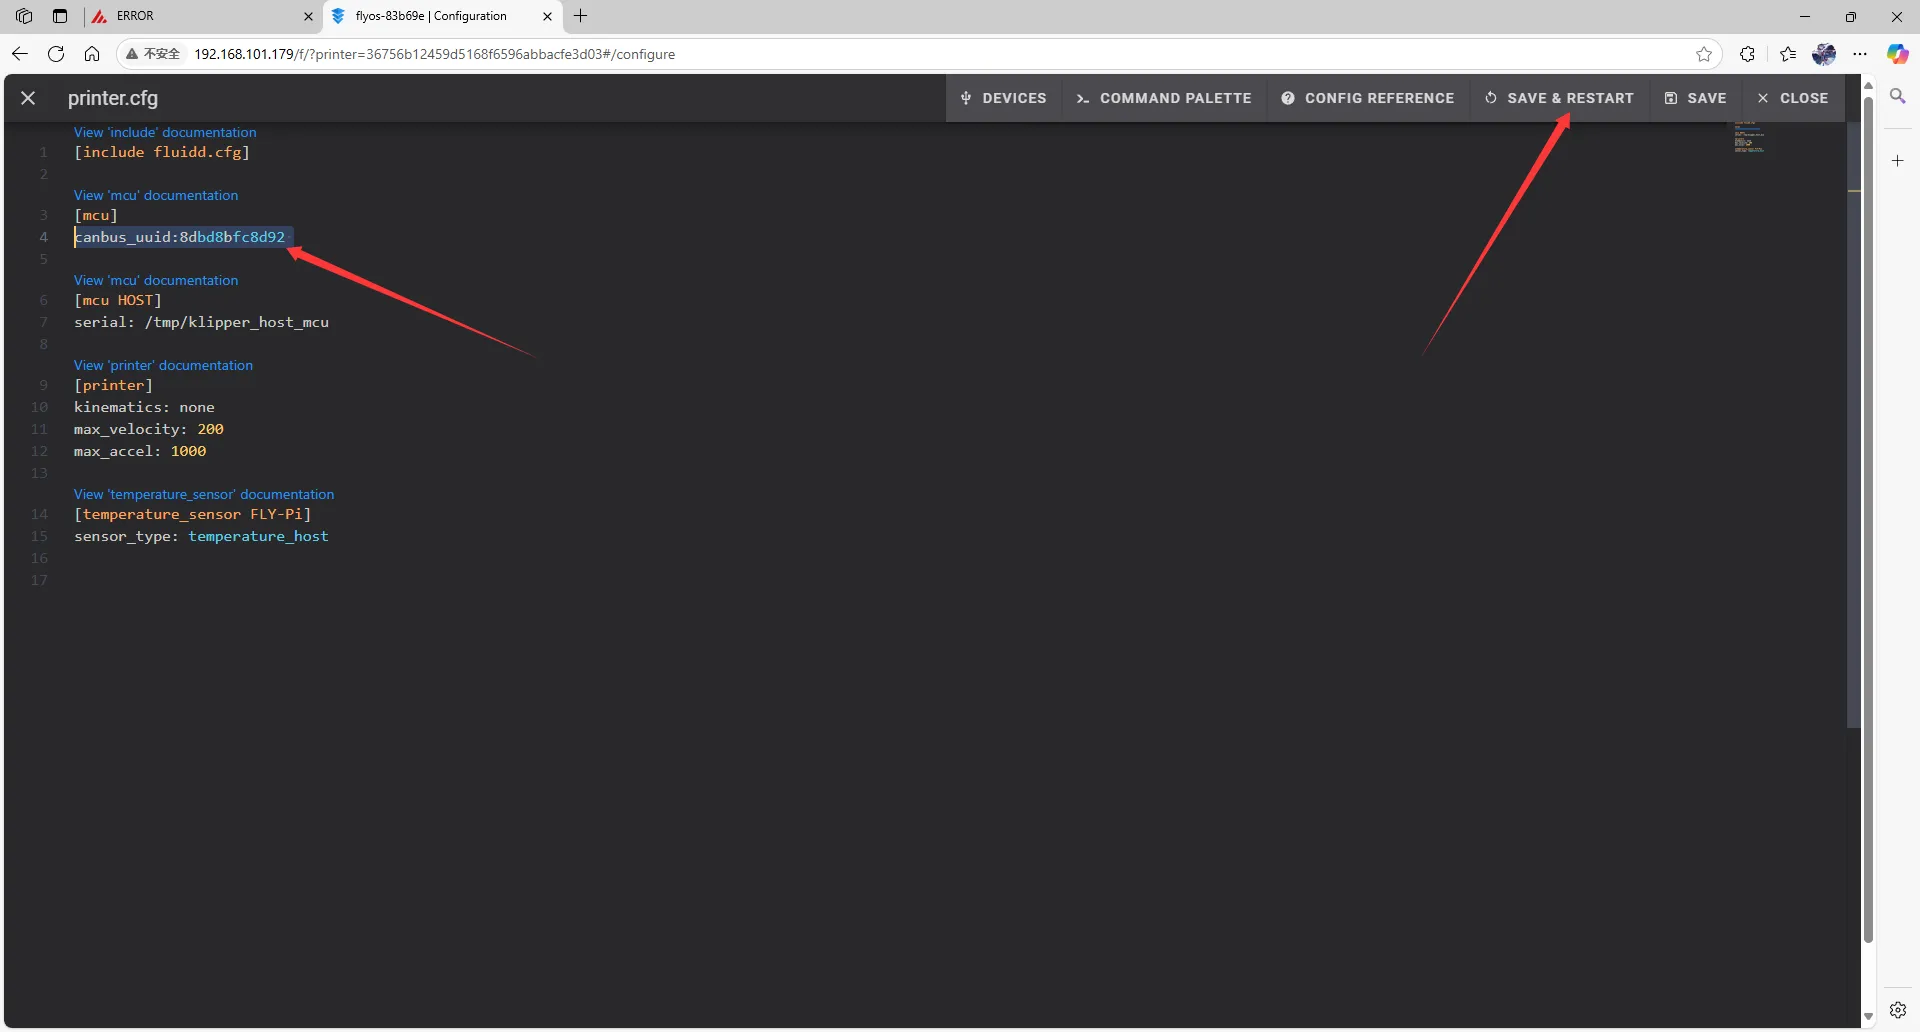
- Add:
[mcu]
canbus_uuid: <Replace this with the ID you just looked up>
|
|
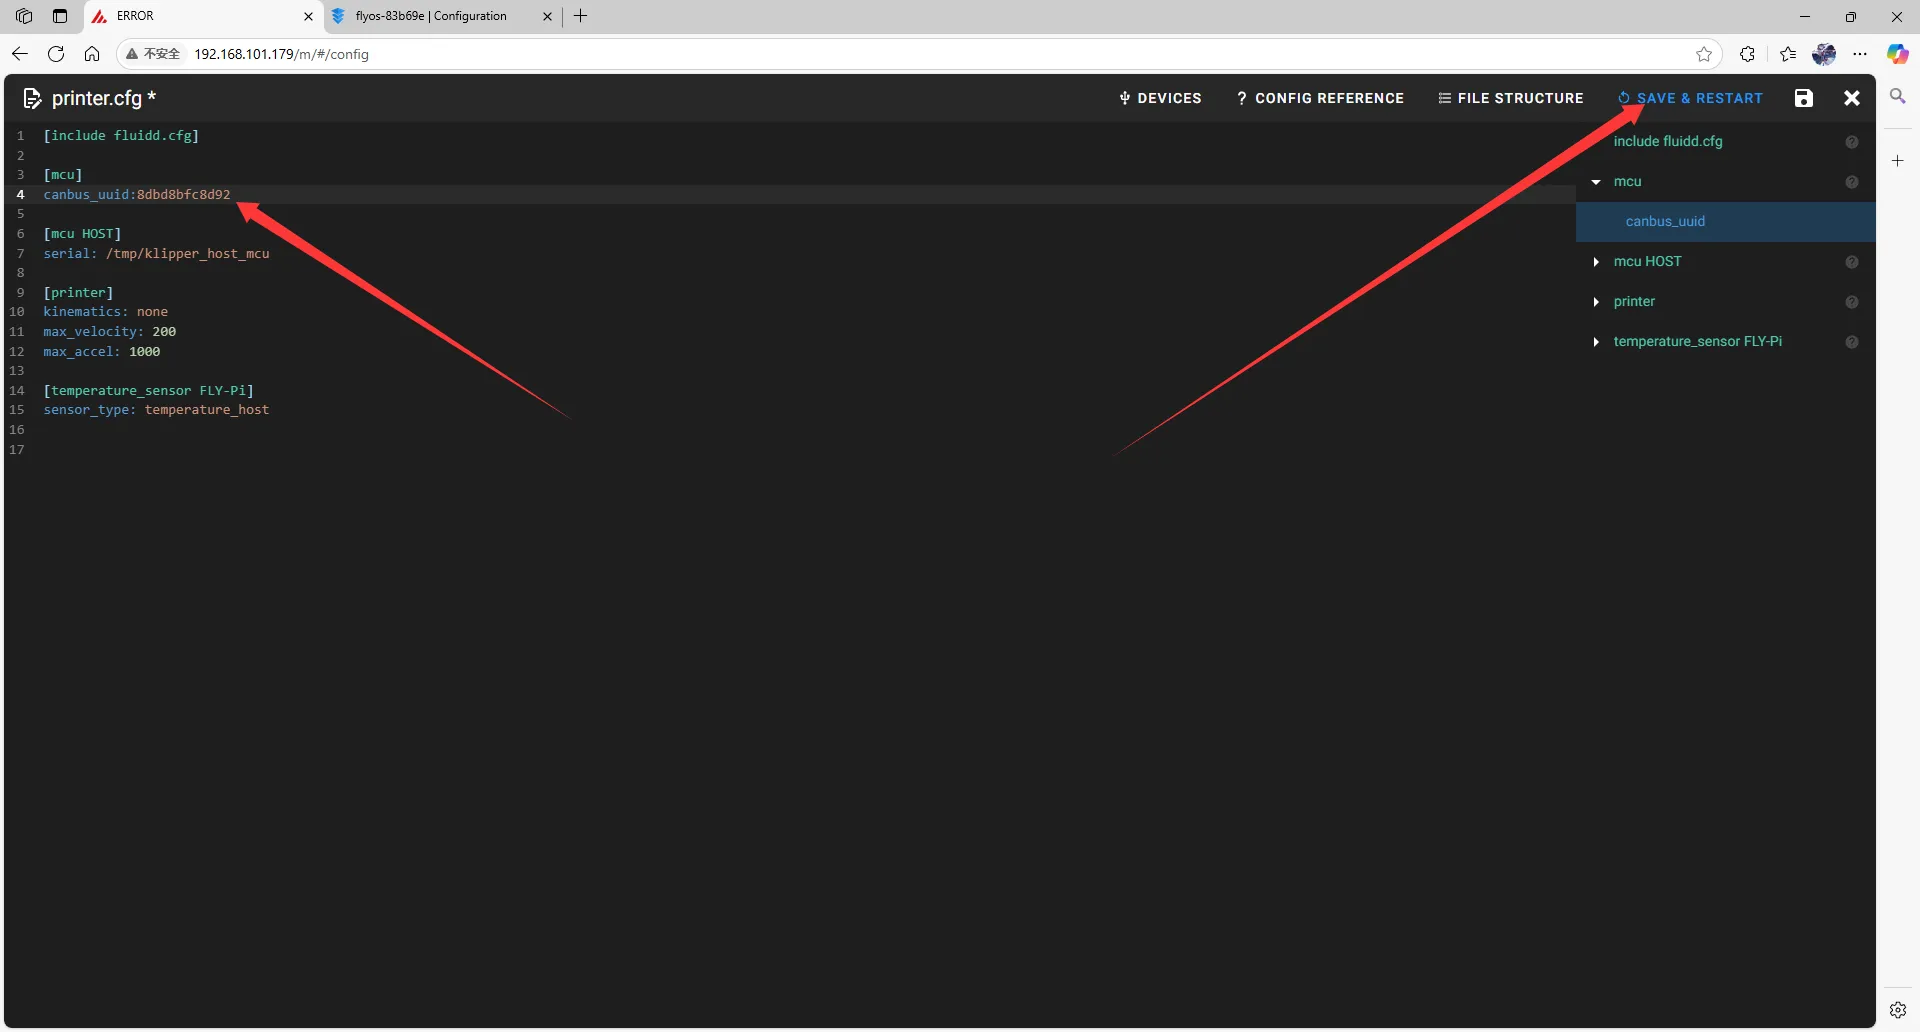
- Fill the ID into the configuration
tip
- After filling in the ID, click
SAVE & RESTARTin the upper right corner.
 |  |
- If Klipper shows a message
ADC out of range, this is normal. Connect the heated bed and thermistor to the mainboard, and configure the thermistor pins for the extruder and heated bed, then save and restart.
dangerous
Note: All IDs shown in the documentation are examples. Each mainboard has a different ID, so please fill in the actual ID you obtained.
Loading...