Onboard MAX31865 Usage Guide
Important Notes
- The standard thermistor interface of the SHT36-V3 only supports PT1000.
- If your tool board has an onboard MAX31865 chip, you can connect 2/3/4-wire PT100 or PT1000 sensors via the PH2.0 4P interface.
How to Determine if the Tool Board Supports MAX31865
Some SHT36 V3 bundles support MAX31865. You can check for the presence of the MAX31865 chip on the tool board to confirm support (refer to the image below for its physical location).

Configuration Method
Prerequisites
- MAX31865 is typically used for high-precision temperature measurement of the extruder or heated bed.
- The following configuration example is based on modifying settings for the extruder.
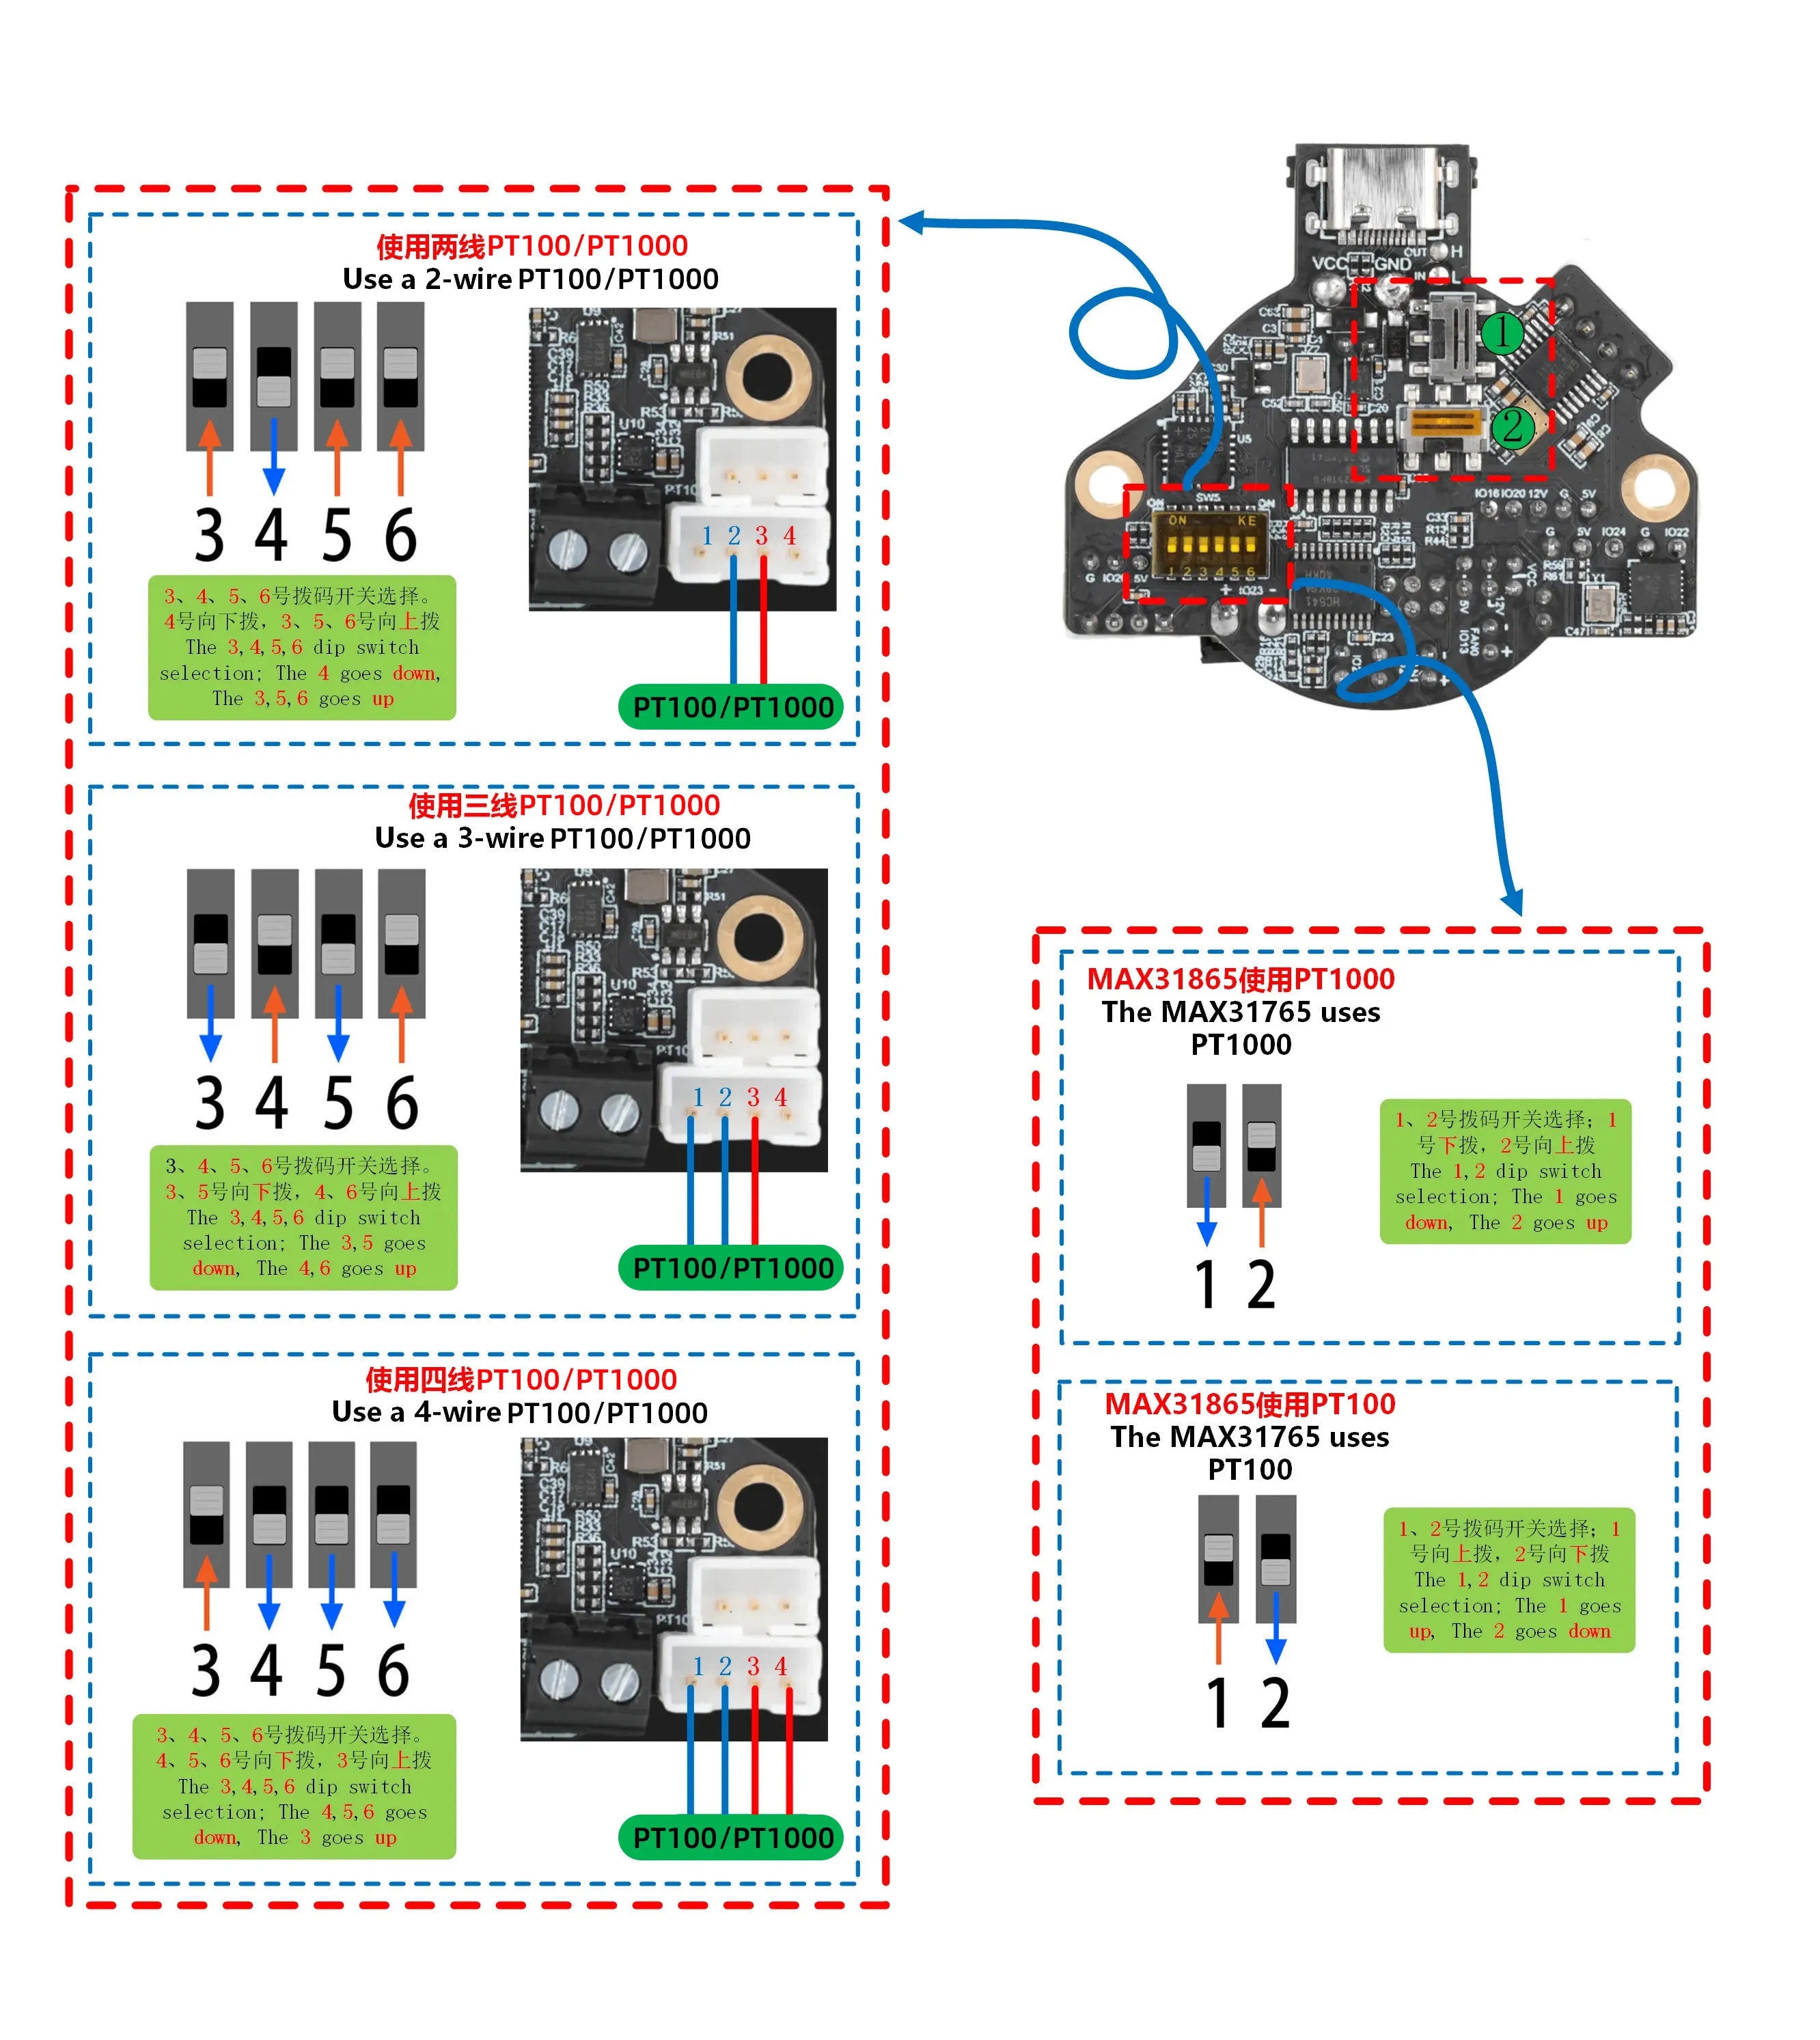
1. Wiring and DIP Switch Settings
- Before using MAX31865, you must first set the 6-PIN DIP switch on the back of the tool board (as shown below). Otherwise, Klipper will not be able to read the temperature correctly.
DIP Switch Setting Rules (switch numbers from left to right are 1-6):
- Sensor Type Selection
- For PT100: Set switch 1 ON, switch 2 OFF.
- For PT1000: Set switch 1 OFF, switch 2 ON.
- Wire Configuration Selection
- Two-wire: Set switches 3, 5, 6 ON, switch 4 OFF.
- Three-wire: Set switches 4, 6 ON, switches 3, 5 OFF.
- Four-wire: Set switch 3 ON, switches 4, 5, 6 OFF.
Default State: All switches are down (OFF), and the MAX31865 function is disabled.
2. Modifying the Klipper Configuration File
Original Configuration Snippet (using standard thermistor):
[extruder]
# ... other configurations ...
sensor_type: ATC Semitec 104GT-2
sensor_pin: SHT36:gpio27
# ... other configurations ...
Modification Steps:
- Comment out or delete the original
sensor_typeandsensor_pinlines. - Add the following MAX31865-specific configuration:
[extruder]
# ... other configurations ...
sensor_type: MAX31865
sensor_pin: SHT36:gpio17
spi_bus: spi0_gpio4_gpio3_gpio2
# Note: The following two parameters must be set correctly according to the sensor model you are using!
rtd_reference_r: 430    # Set to 430 for PT100, set to 4300 for PT1000
rtd_nominal_r: 100      # Set to 100 for PT100, set to 1000 for PT1000
# ... other configurations ...
3. Important Notes
- Parameter Matching: The values for
rtd_reference_randrtd_nominal_rmust match the sensor you are using (PT100 or PT1000). Otherwise, temperature readings will be severely incorrect. - Wiring Check: Ensure the sensor wires are correctly connected to the PH2.0 4P interface and match the wire configuration set on the DIP switch.
- Function Exclusivity: Once MAX31865 is enabled, the standard thermistor interface on the original
gpio27will become unavailable.
Configuring PT1000 Sensor on Standard Thermistor Port
- Important Prerequisite: Before connecting a PT1000 sensor to the standard thermistor port, ensure the corresponding jumper on the tool board is correctly connected.
Original Configuration
Original Configuration Snippet (using standard NTC thermistor):
[extruder]
# ... other configurations ...
sensor_type: ATC Semitec 104GT-2
sensor_pin: SHT36:gpio27
# ... other configurations ...
Modified Configuration
Modification Steps:
- Change the value of
sensor_typetoPT1000. - Add the
pullup_resistorparameter and set it to1000.
Modified Configuration:
[extruder]
# ... other configurations ...
sensor_type: PT1000
sensor_pin: SHT36:gpio27
pullup_resistor: 1000
# ... other configurations ...
Notes
- This configuration is only applicable to the standard thermistor interface (GPIO27) of the SHT36-V3.
- The
pullup_resistor: 1000parameter must be configured.
Loading...