Screen Wiring and Configuration
Screen Wiring
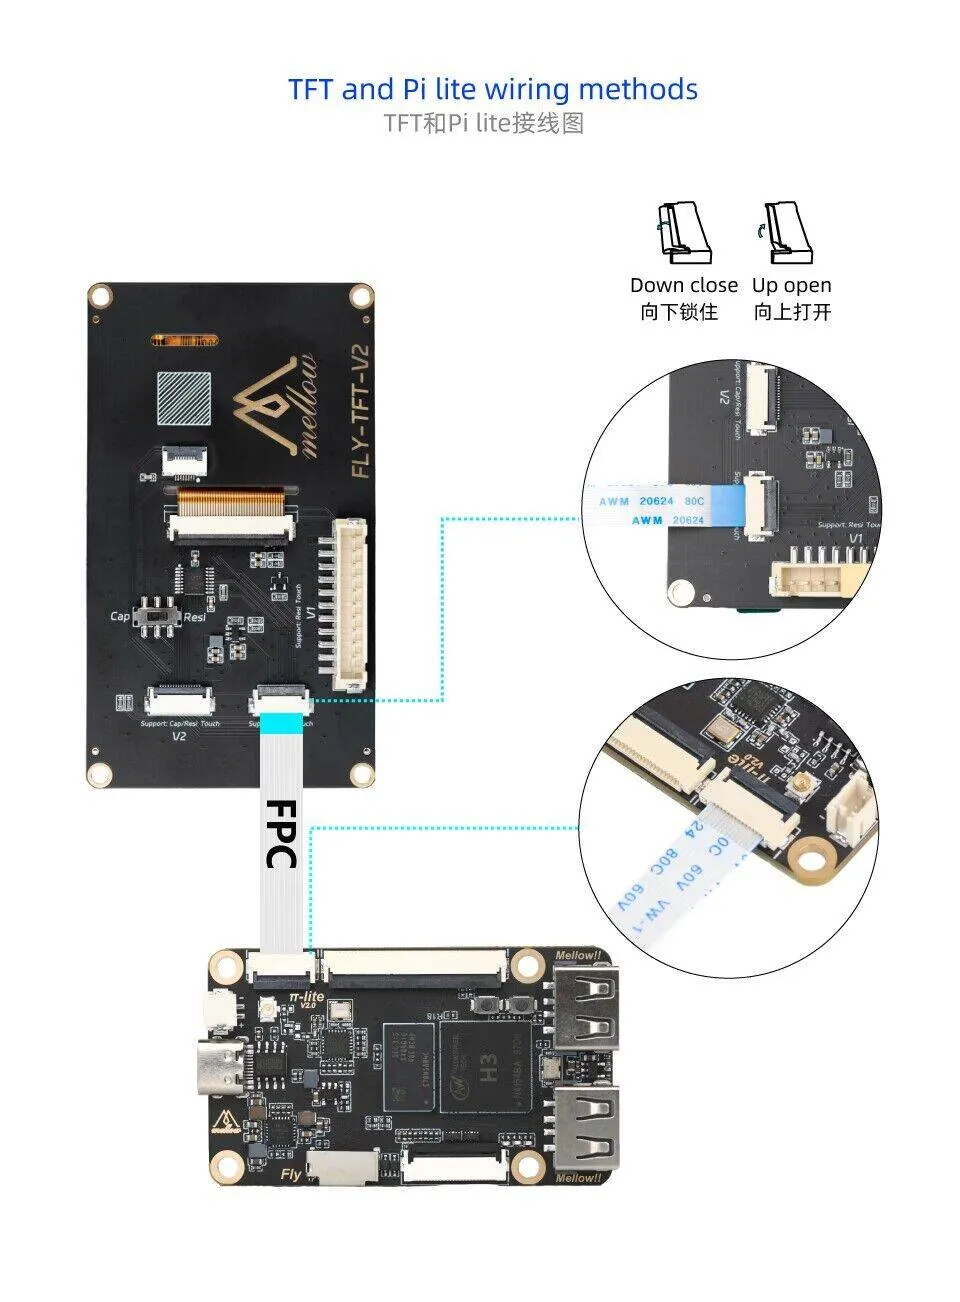
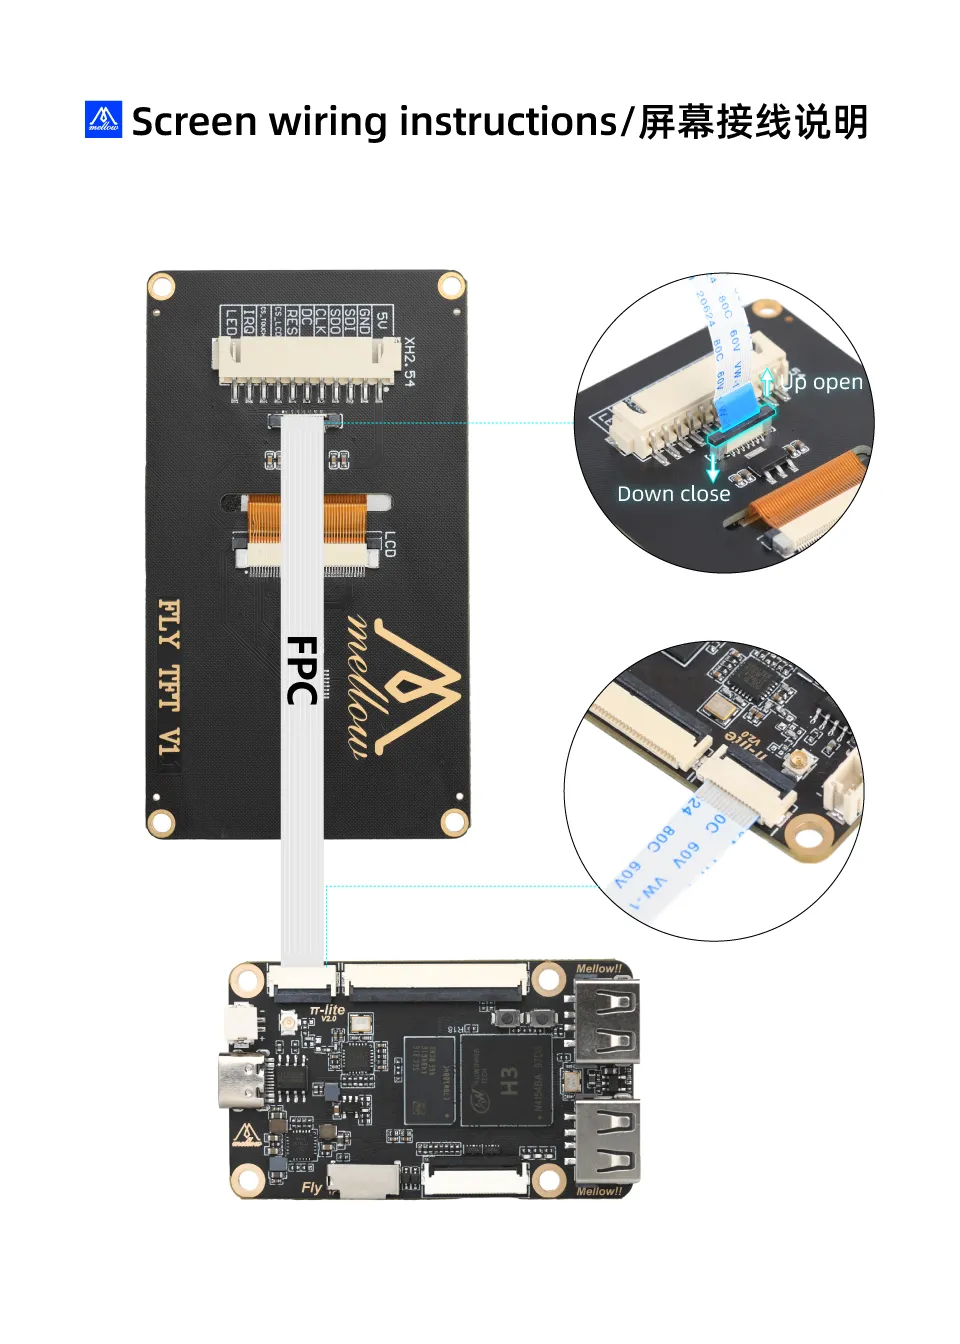
- TFT Resistive Screen Wiring
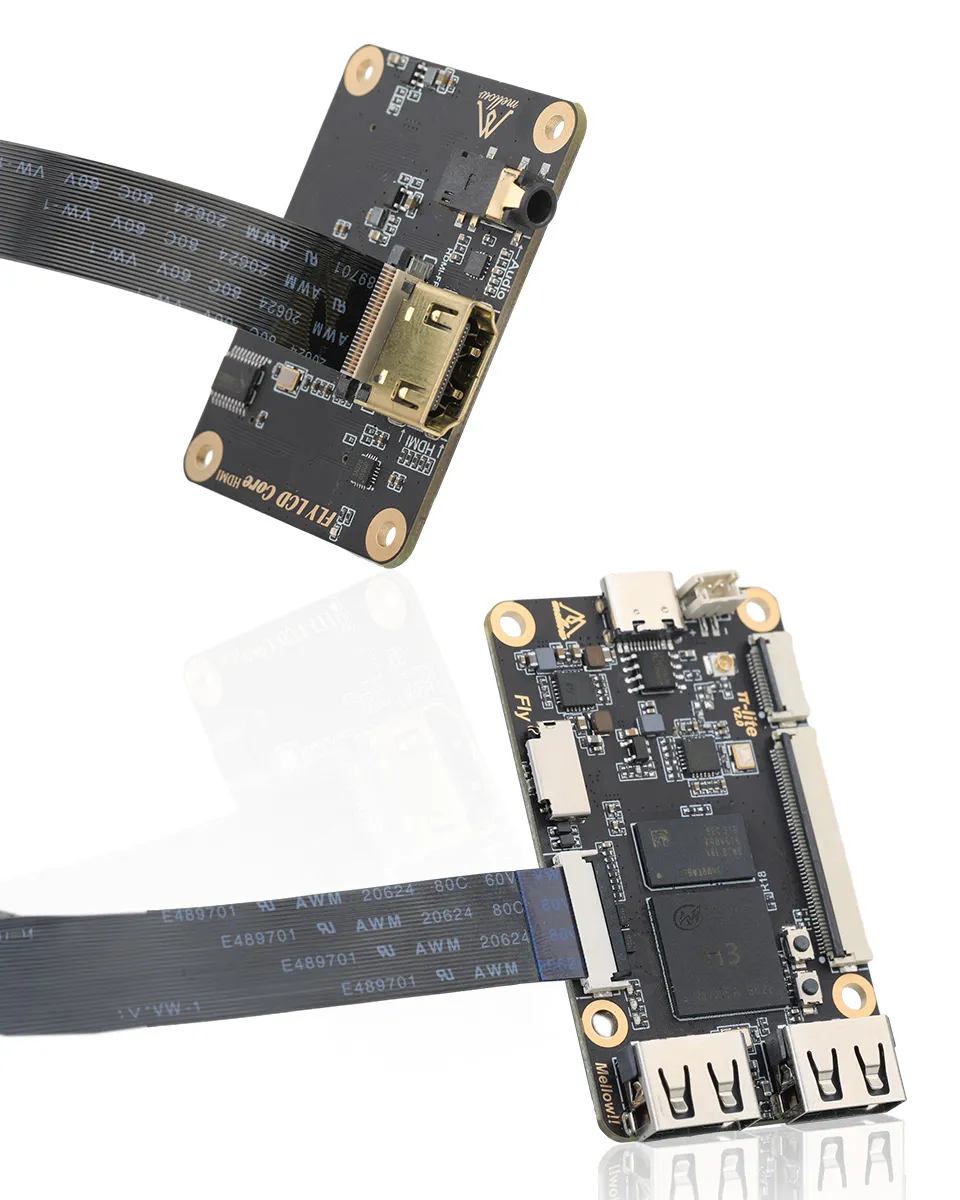
- HDMI Wiring
Screen Configuration
- FLYOS-FAST System - Screen Configuration
- FLYOS-Armbian System - Screen Configuration
FLYOS-FAST System - Screen Configuration
-
Open the device IP address in a browser, for example:
http://192.168.6.110/For
fluidd, as shown in the figure:uncheck->filter hidden files and folders.
For
mainsail, as shown in the figure:check->show hidden files.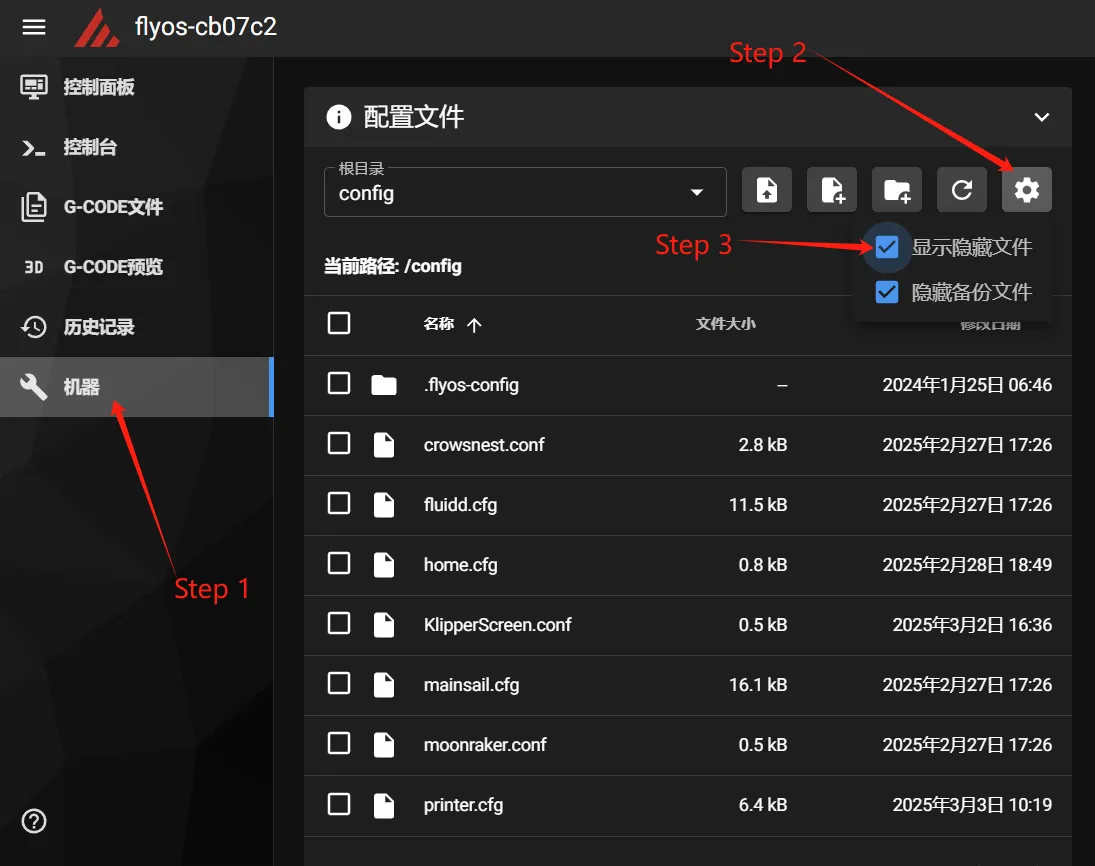
-
You can now see the
.flyos-configfolder. Enter this folder and you will find thesys-config.conffile.
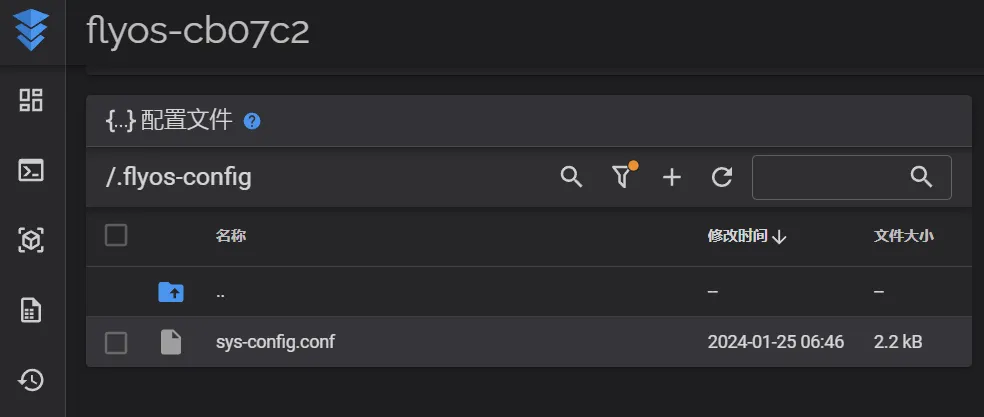
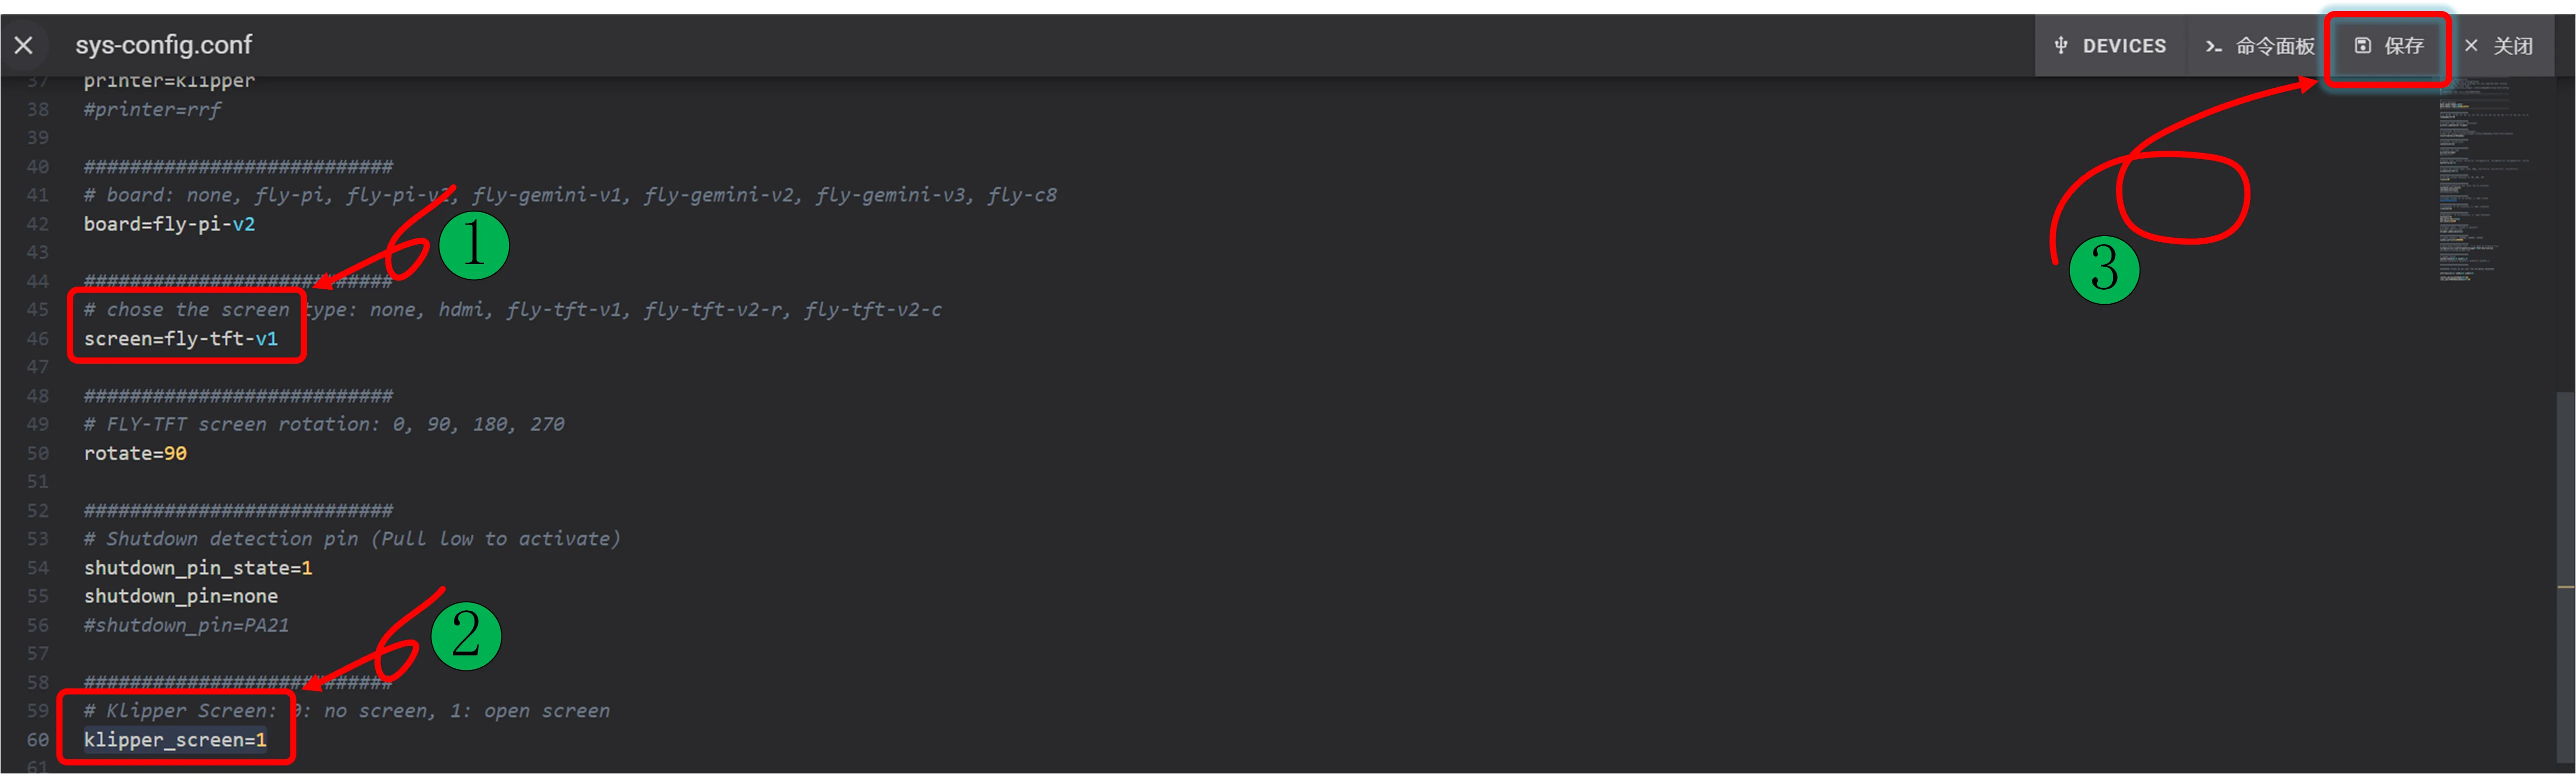
- Open the
sys-config.conffile, modify the required configuration items, thensave->close.
warning
- For
HDMI screen, configure as:hdmi. Note that there must be no space after the=sign!!! - For
resistive screen, configure as:fly-tft-v1. Note that there must be no space after the=sign!!! Ensure the screen DIP switch on the back is set toResi - For
klipper_screen, configure as:1. Note that there must be no space after the=sign!!! - Note: The configuration format in the
sys-config.conffile iskey=value. Do not modify the format!!! Otherwise, the configuration will not take effect!!!
- After saving the modifications,
restart the systemfor the changes to take effect.
FLYOS-Armbian System - Screen Configuration
info
- Connect the host computer to WiFi and obtain the host IP address. Then enter
IP+:9999in the browser to access FLY TOOLS for screen configuration. - For example, if the host IP address is
192.168.6.110, you need to enter192.168.6.110:9999in the browser.
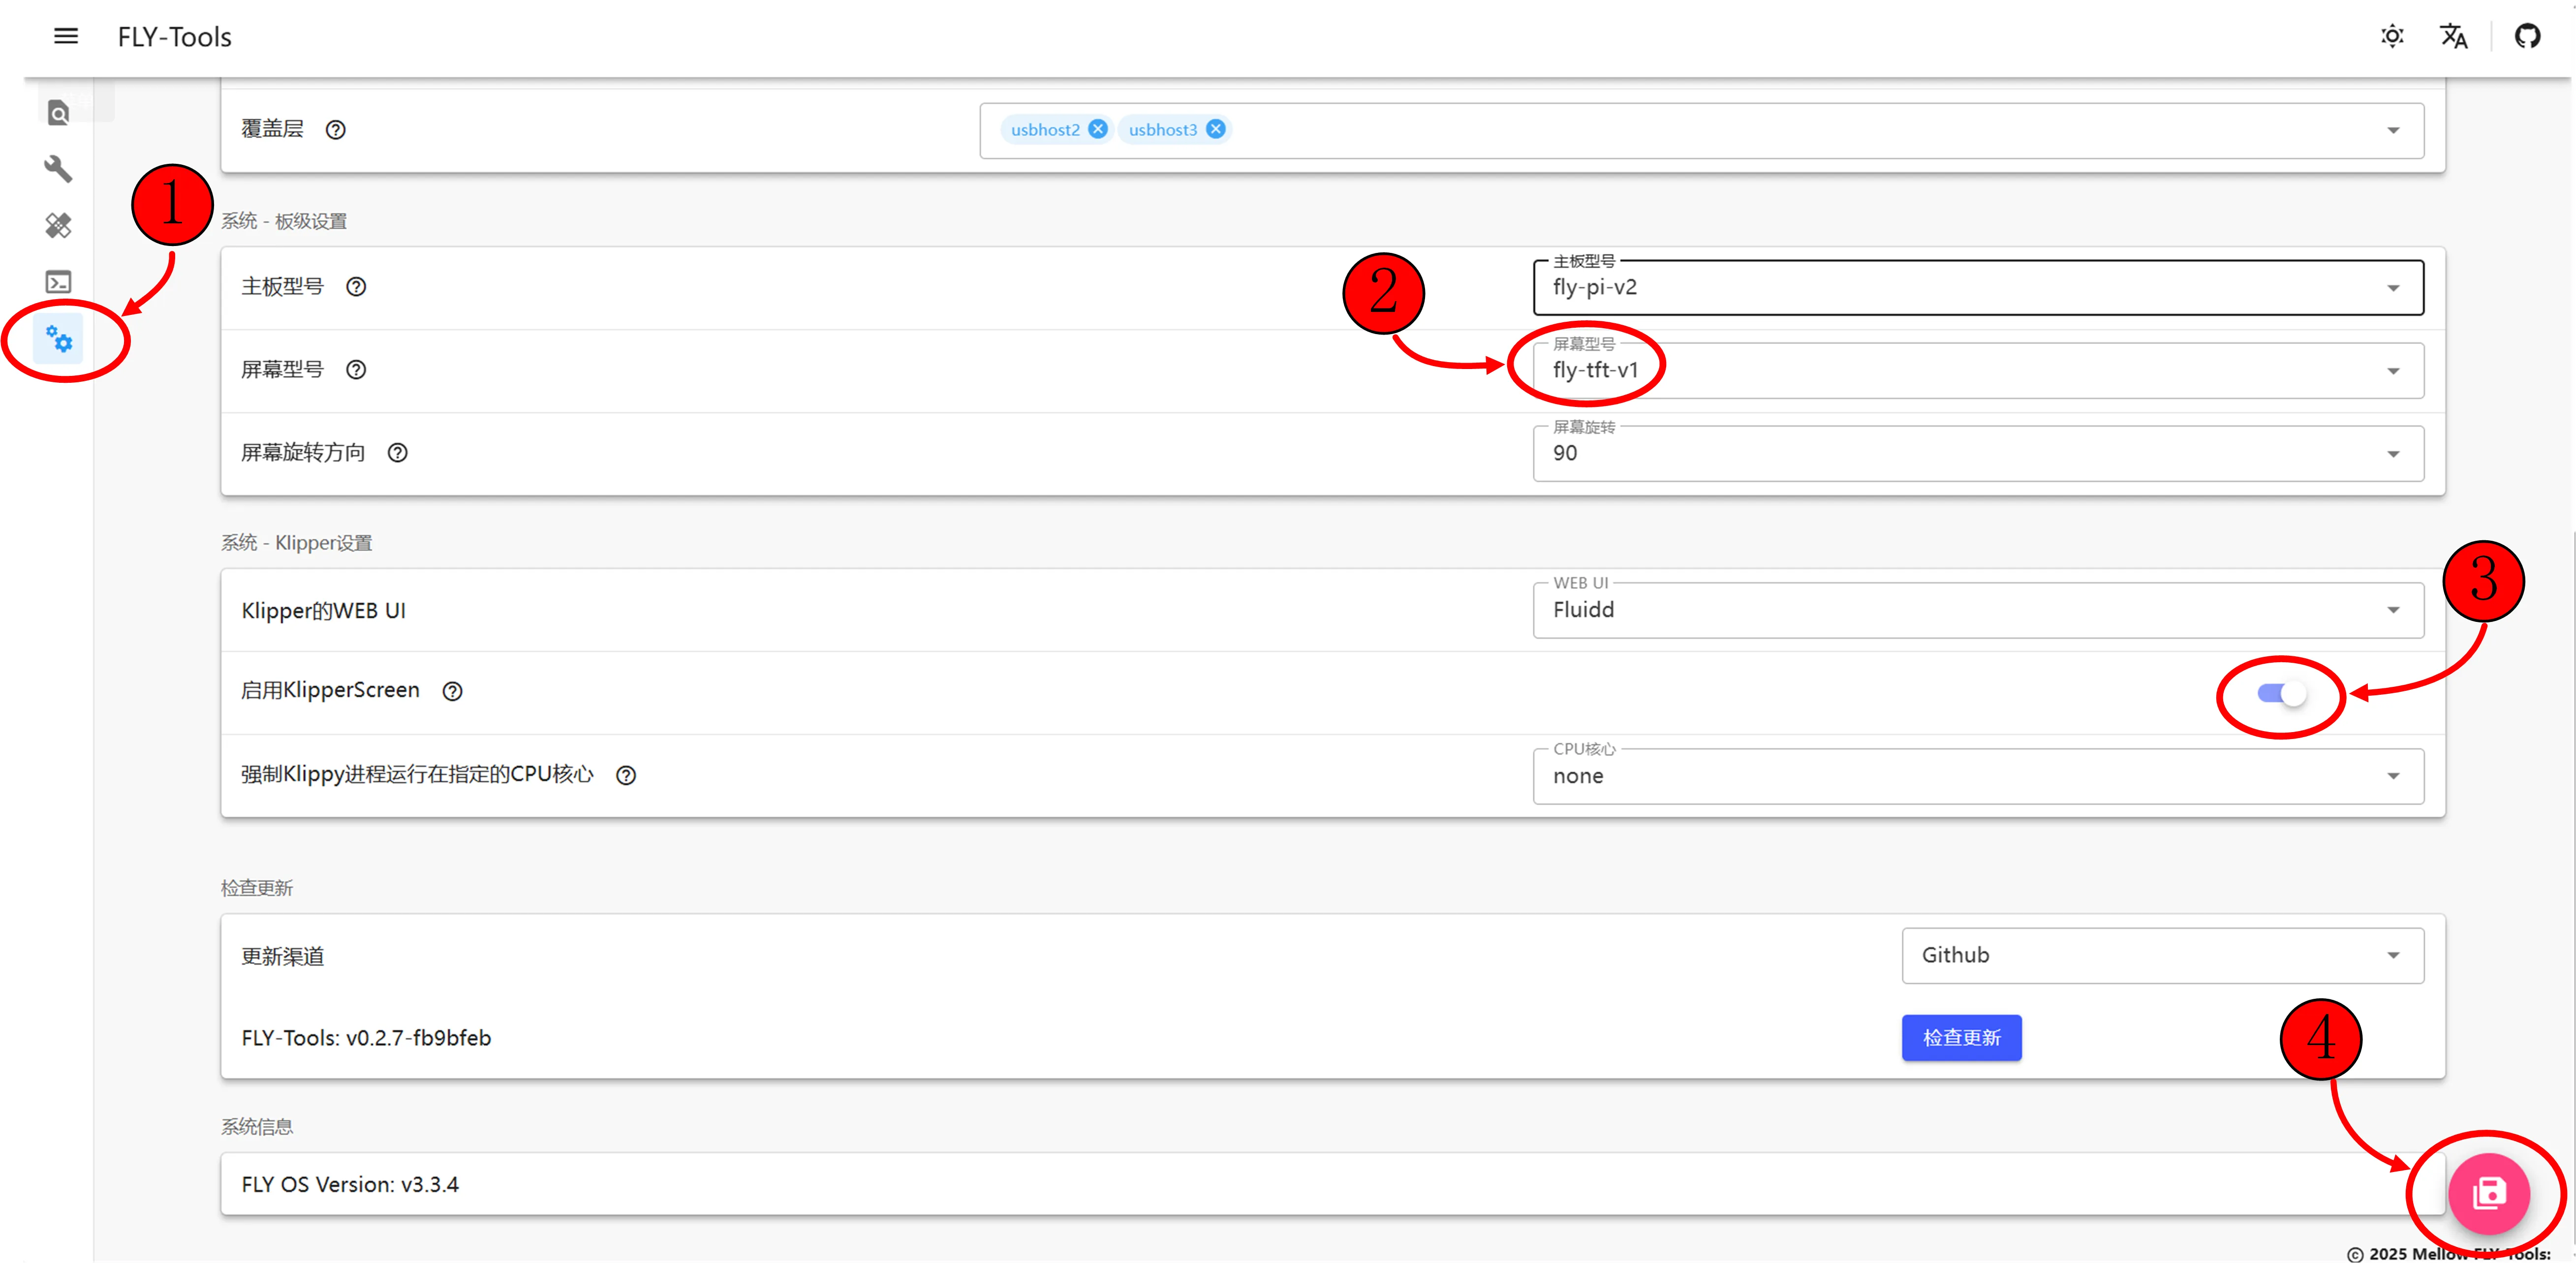
- Open FLY TOOLS. Follow the steps shown in the figure below:
enable Klipper Screen,select the screen model, click the pink button in the lower right corner labeledsave configuration, and then restart the host computer to take effect!
warning
- For
resistive screen, select:fly-tft-v1. Ensure the screen DIP switch on the back is set toResi
 |
 |
- After saving the configuration, restart the host computer to take effect!
Loading...