System Image Flashing
System Image Flashing
System Overview
FlyOS-Fast is a lightweight Linux system specifically customized for 3D printing, supporting all FLY series host platforms. Its features include:
- Fast boot speed, kernel optimization ensures Klipper's real-time performance
- File system optimization reduces the risk of boot failure caused by power outages
- KlipperScreen starts in 30 seconds
- Pre-installed services including Klipper, RRF, Mainsail, Fluidd, Moonraker, KlipperScreen, etc.
- Supports switching between Klipper and RRF systems
- Supports one-click online switching between Mainsail and Fluidd
- Supports USB printing, power failure recovery, serial LCD screens
- Supports automatic firmware flashing at boot (fly-c8, fly-geminiv3)
- Allows setting default language and printer name for Fluidd and other front-end UIs in advance
For more OEM customization features (such as boot logo, preset configuration files, hiding Mainsail tabs, etc.), please contact us.
This system is a lightweight customized system. The built-in components and services such as klipper are not official versions and do not support user modifications or upgrades.
- The system account for FLYOS-FAST is
root, with passwordmellow
Preparations Before System Flashing
- Prepare the required devices
- If using a TF card to boot the system, prepare the following equipment
- If using M2WE to boot the system, prepare the following equipment
- Card reader
- TF card, capacity 16GB-128GB, transfer speed Class10 or higher
- It is recommended to use TF cards from well-known brands such as
SanDisk,Samsung, orKioxia. Do not use unbranded TF cards! - A Windows system computer (Windows 7, 10, or 11)
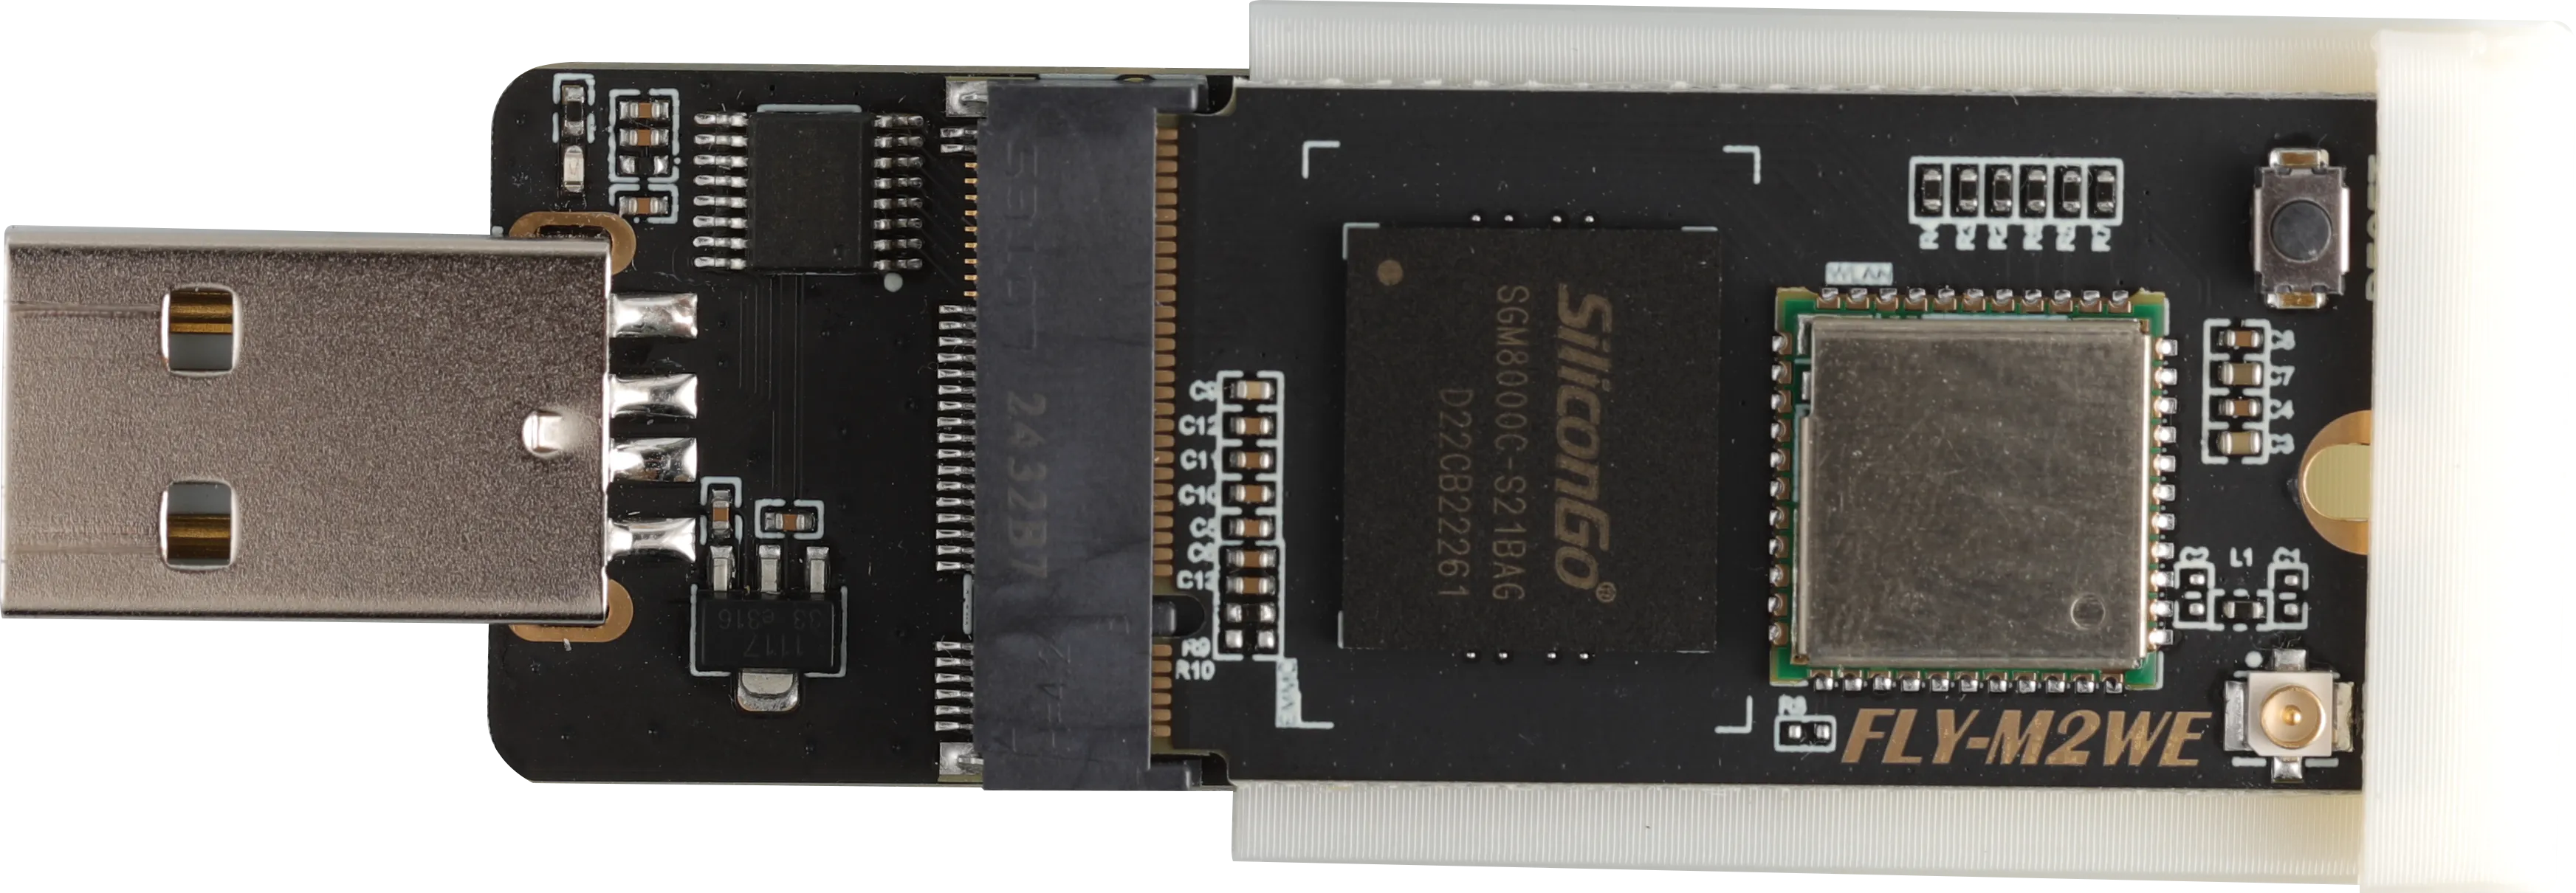
- M2WE (FLY proprietary device)
- M2SD (FLY flashing device)
- A Windows system computer (Windows 7, 10, or 11)
- Installation diagram
- M2WE printing file download, using this print can prevent poor contact issues Loading...
-
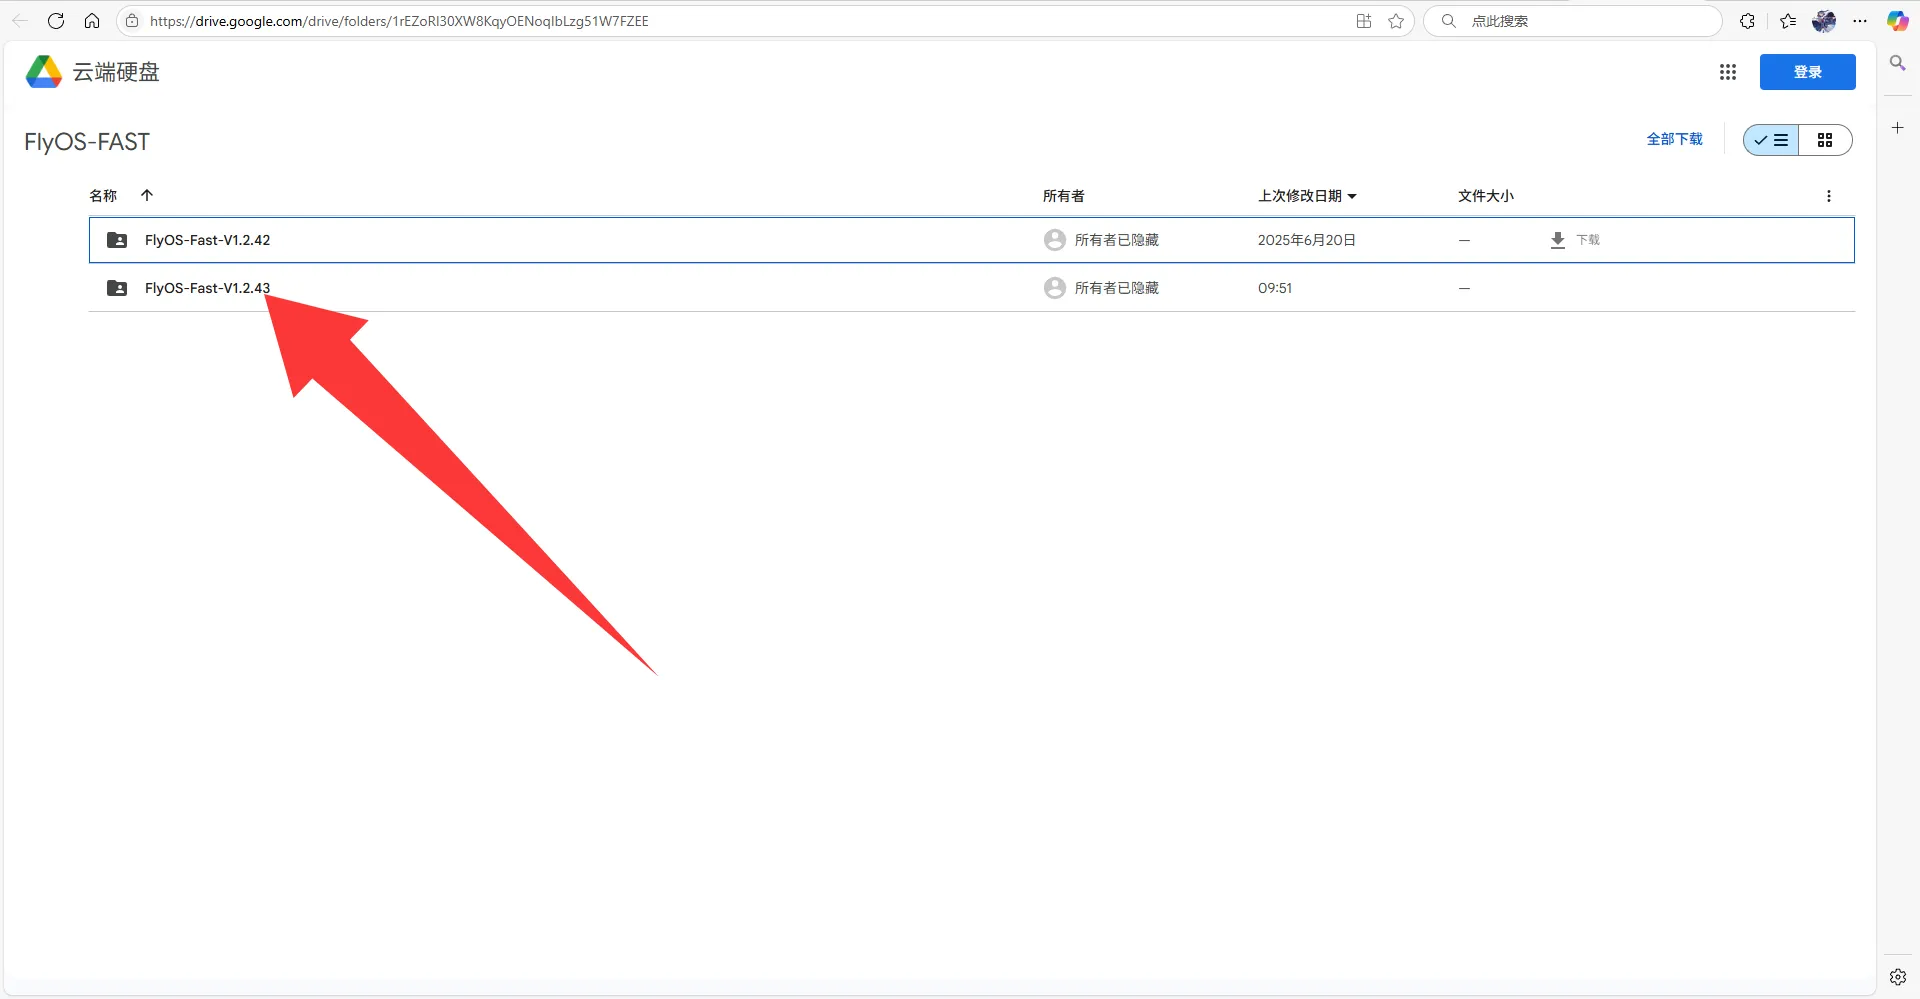
Download the FLY-H5 system image:
- The current FAST version is FlyOS-FAST-V1.2.48
- Please note that you need to download the FLY-H5 image within the FlyOS-FAST-V1.2.48 folder
- Click the link below to go to the system image download page
-
System Image
tip
- System file naming rule:
FlyOS-Fast-[chip series]-[version number].img, for example: FlyOS-Fast-H5-v1.0.0.img - Windows system download
.exefile, this is a 7z self-extracting archive. After download completes, double-click to extract and get the.imgfile (can only be extracted on Windows) - For other systems like MacOS or Linux, download the
.7zfile, which is a 7z compressed file. After download completes, use tools that support 7z format to extract and get the.imgfile - Due to large file size, other compression formats and source images are not provided currently
- This tutorial uses
.exeand Google Drive as examples
- System file naming rule:
- Access the cloud drive, click FlyOS-FAST-V1.2.48
- Click the image you need to download
- In this tutorial, you need to download Fly_FAST-H5.exe
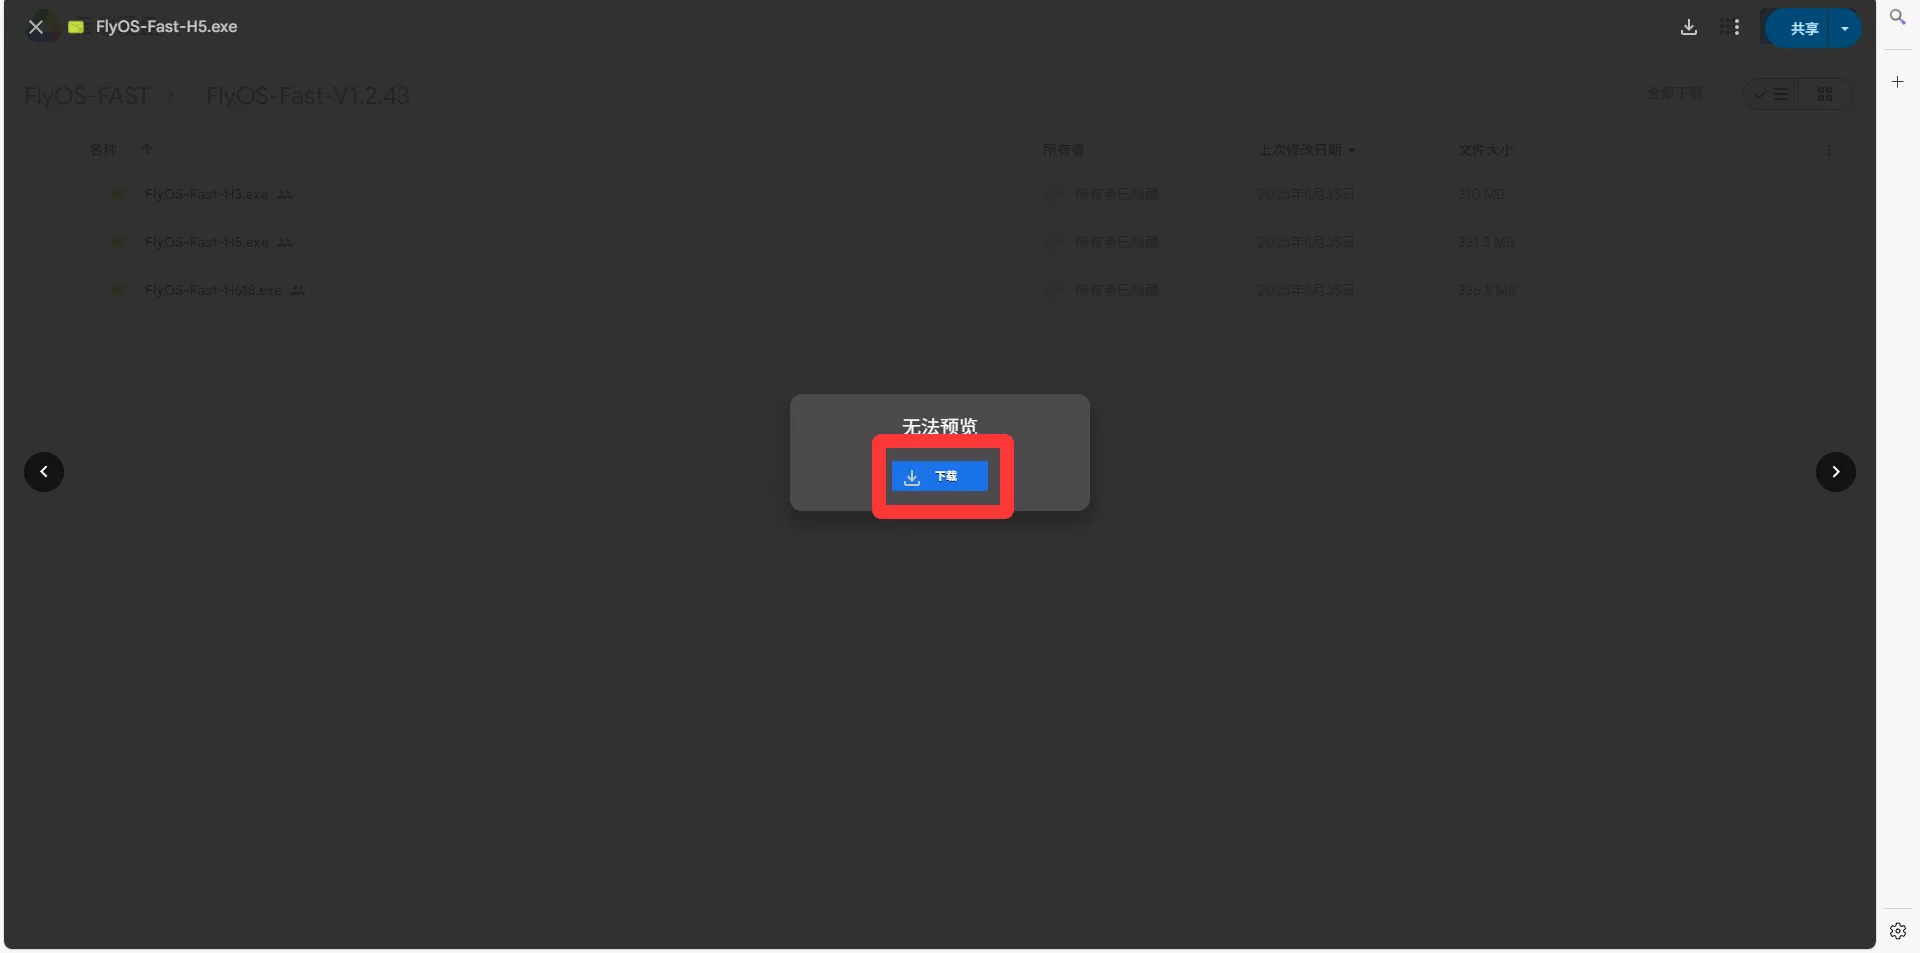
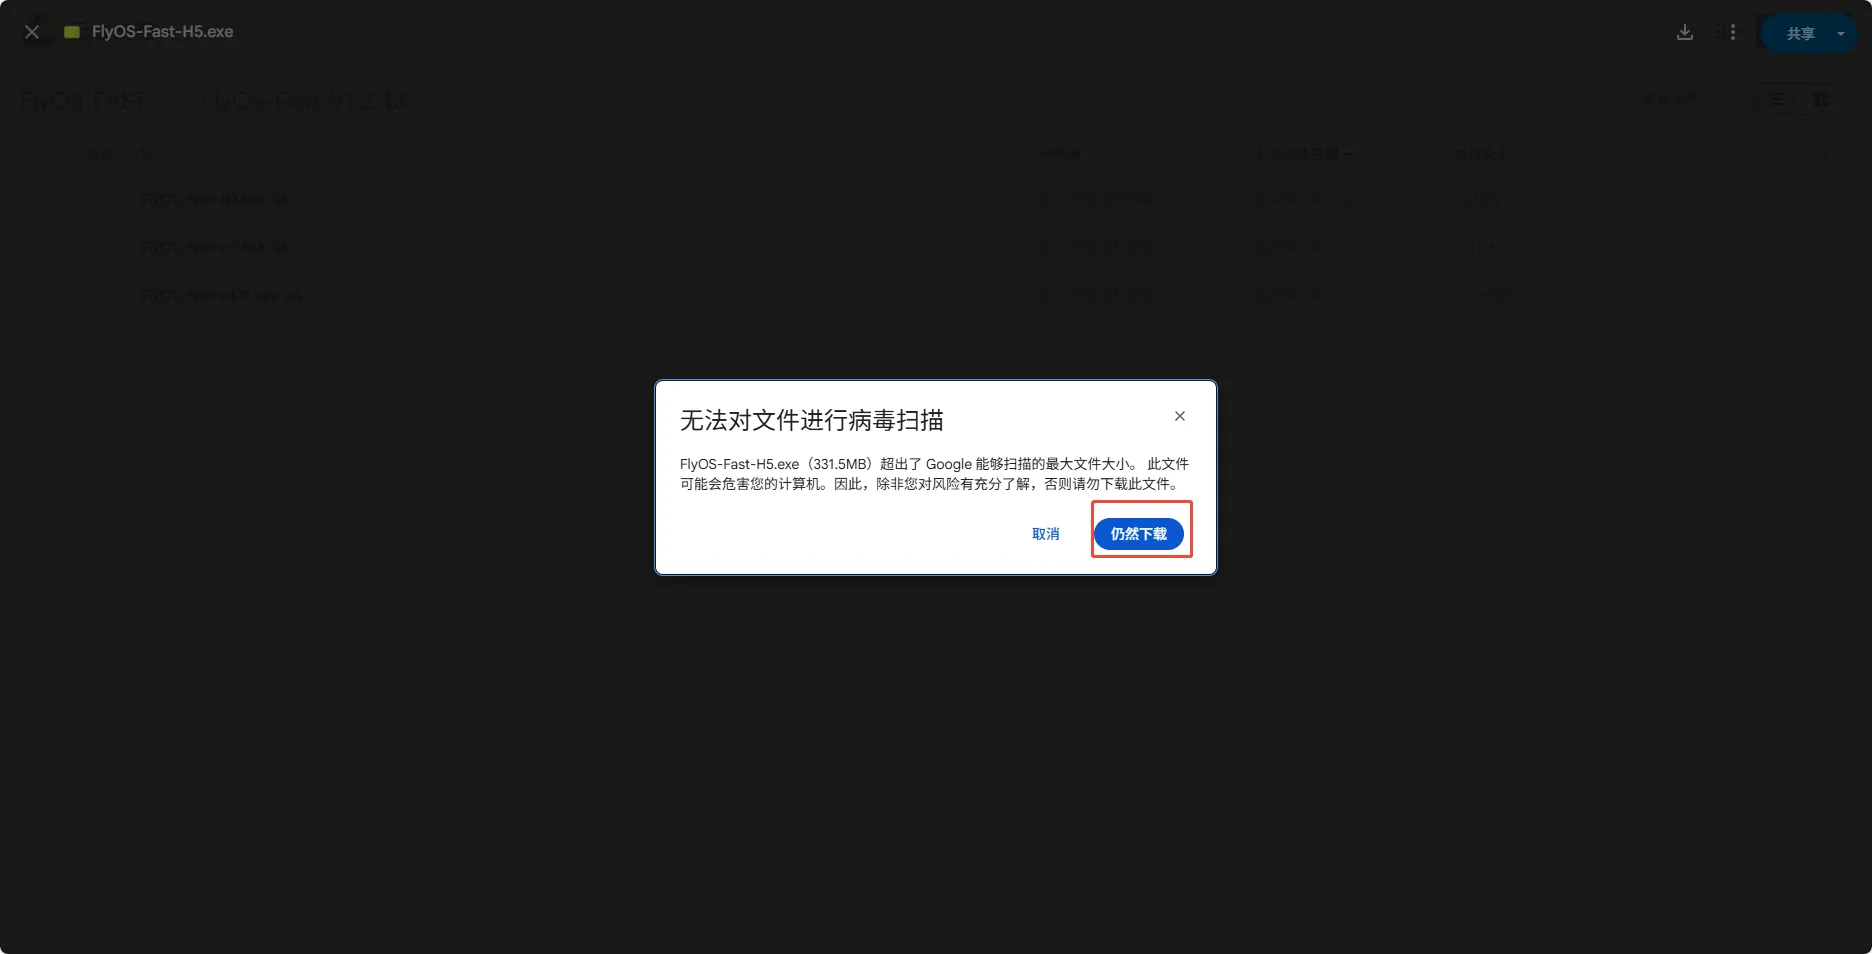
- Click "Download Anyway"
-
Extract the system image file to get the
.imgfile.- Double-click or right-click to open FlyOS-Fast-H5.exe, wait a few seconds and the following window will pop up (if the system warns about security, choose "More info" -> "Run")
- You can choose the extraction directory, then click the
Extractbutton and wait for extraction to complete.

- After extraction completes, the FlyOS-Fast-H5-vx.x.x.img file will be generated in the extraction directory.
x.x.xis the system version number.
-
Install the device to be flashed on the computer
Flashing the System
-
Open Rufus, select the device. The displayed capacity should match the capacity of the inserted flash card.
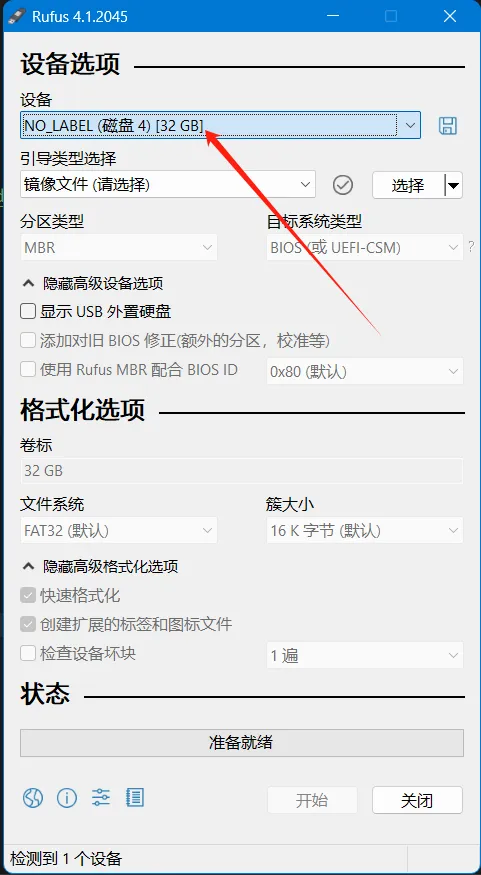
-
Select
Boot selection, this can be left as default set toImage file. -
To select the image file, click the
Selectbutton on the right side ofBoot selection, and choose the extracted.imgfile. -
After selecting the image file,
Boot selectionwill display the filename of the image.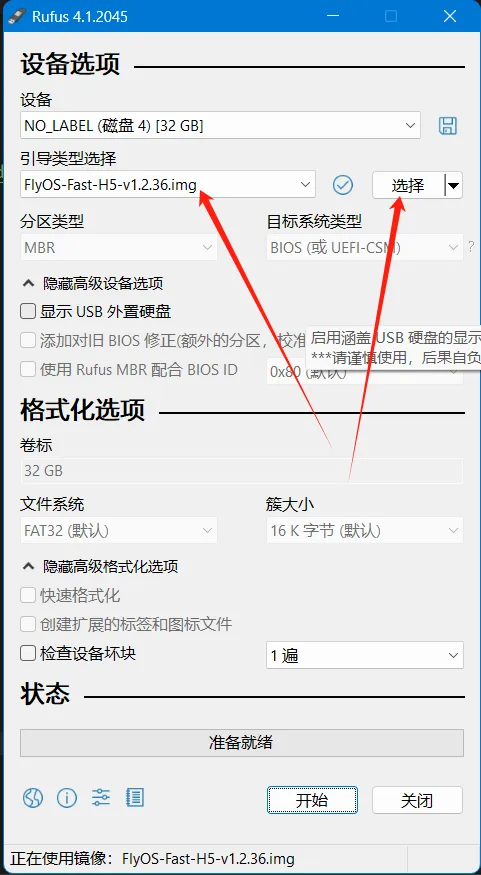
-
Click the
Startbutton. If a window pops up prompting that disk data needs to be cleared, clickOK.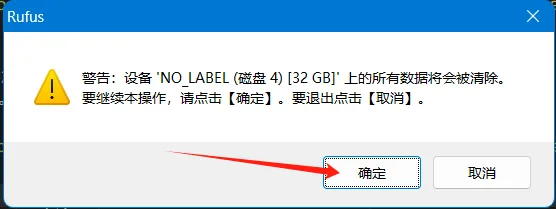
-
When flashing completes, the computer will emit a beep sound and the progress bar will display
Ready.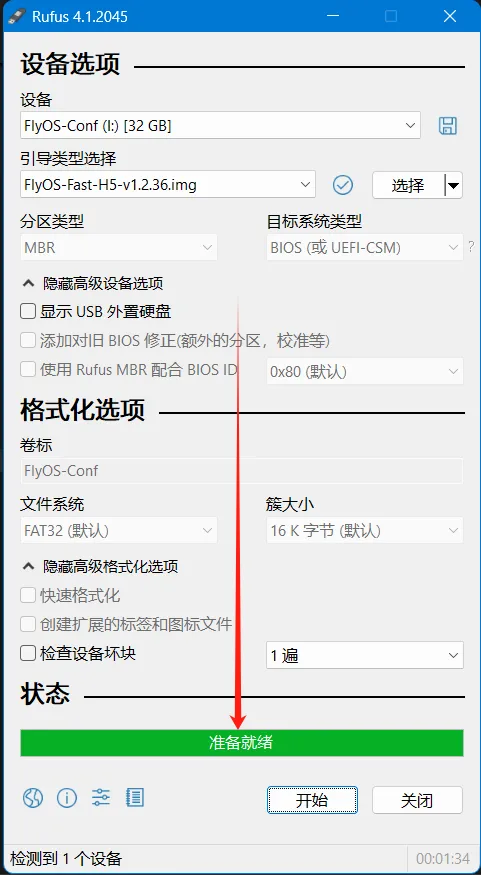
-
After flashing completes, there's no need to immediately remove the flash card.
-
Open File Explorer and check if there is a USB drive or removable disk named
FlyOS-Conf.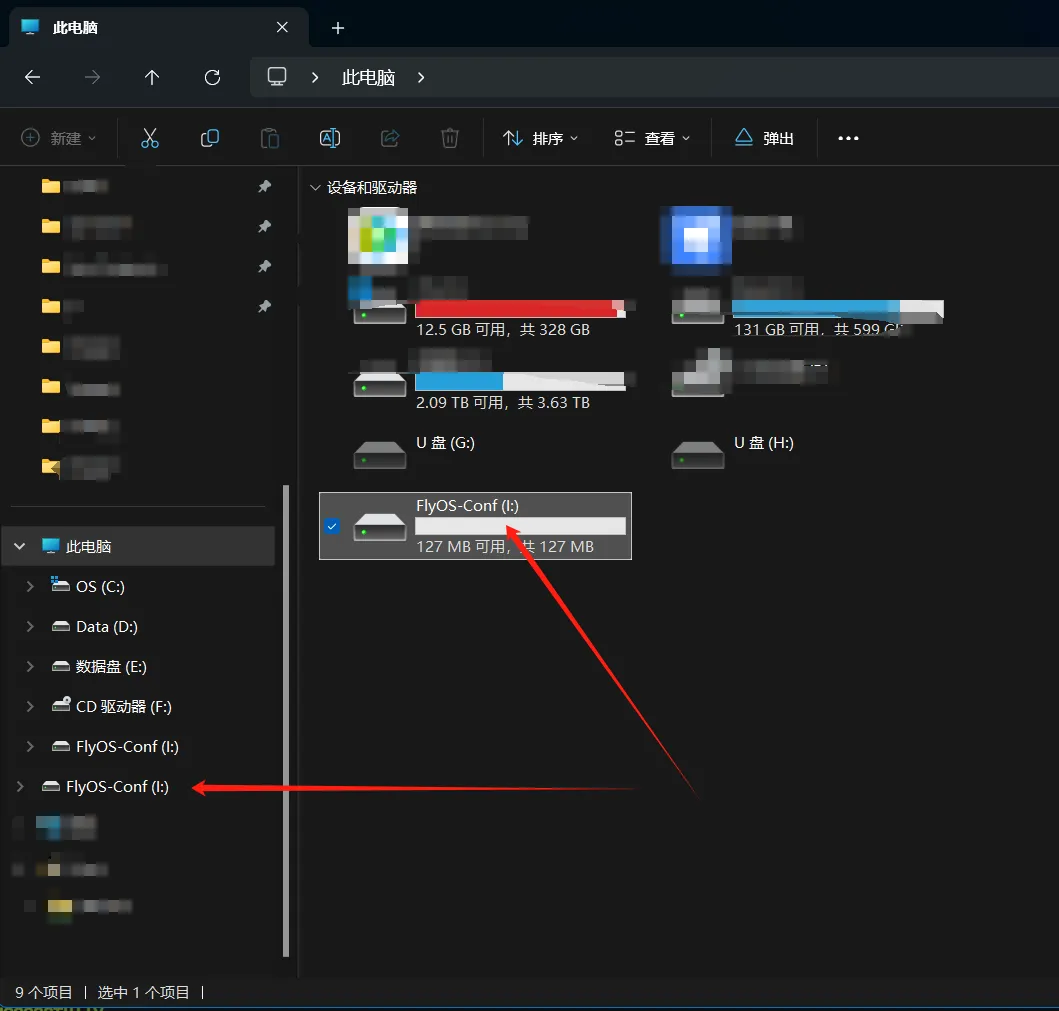
-
Open
FlyOS-Conf, if the two files shown in the image below exist, the flashing was successful.
-
Install the system card onto the motherboard.
Installing System Card
- Install TF Card onto C8
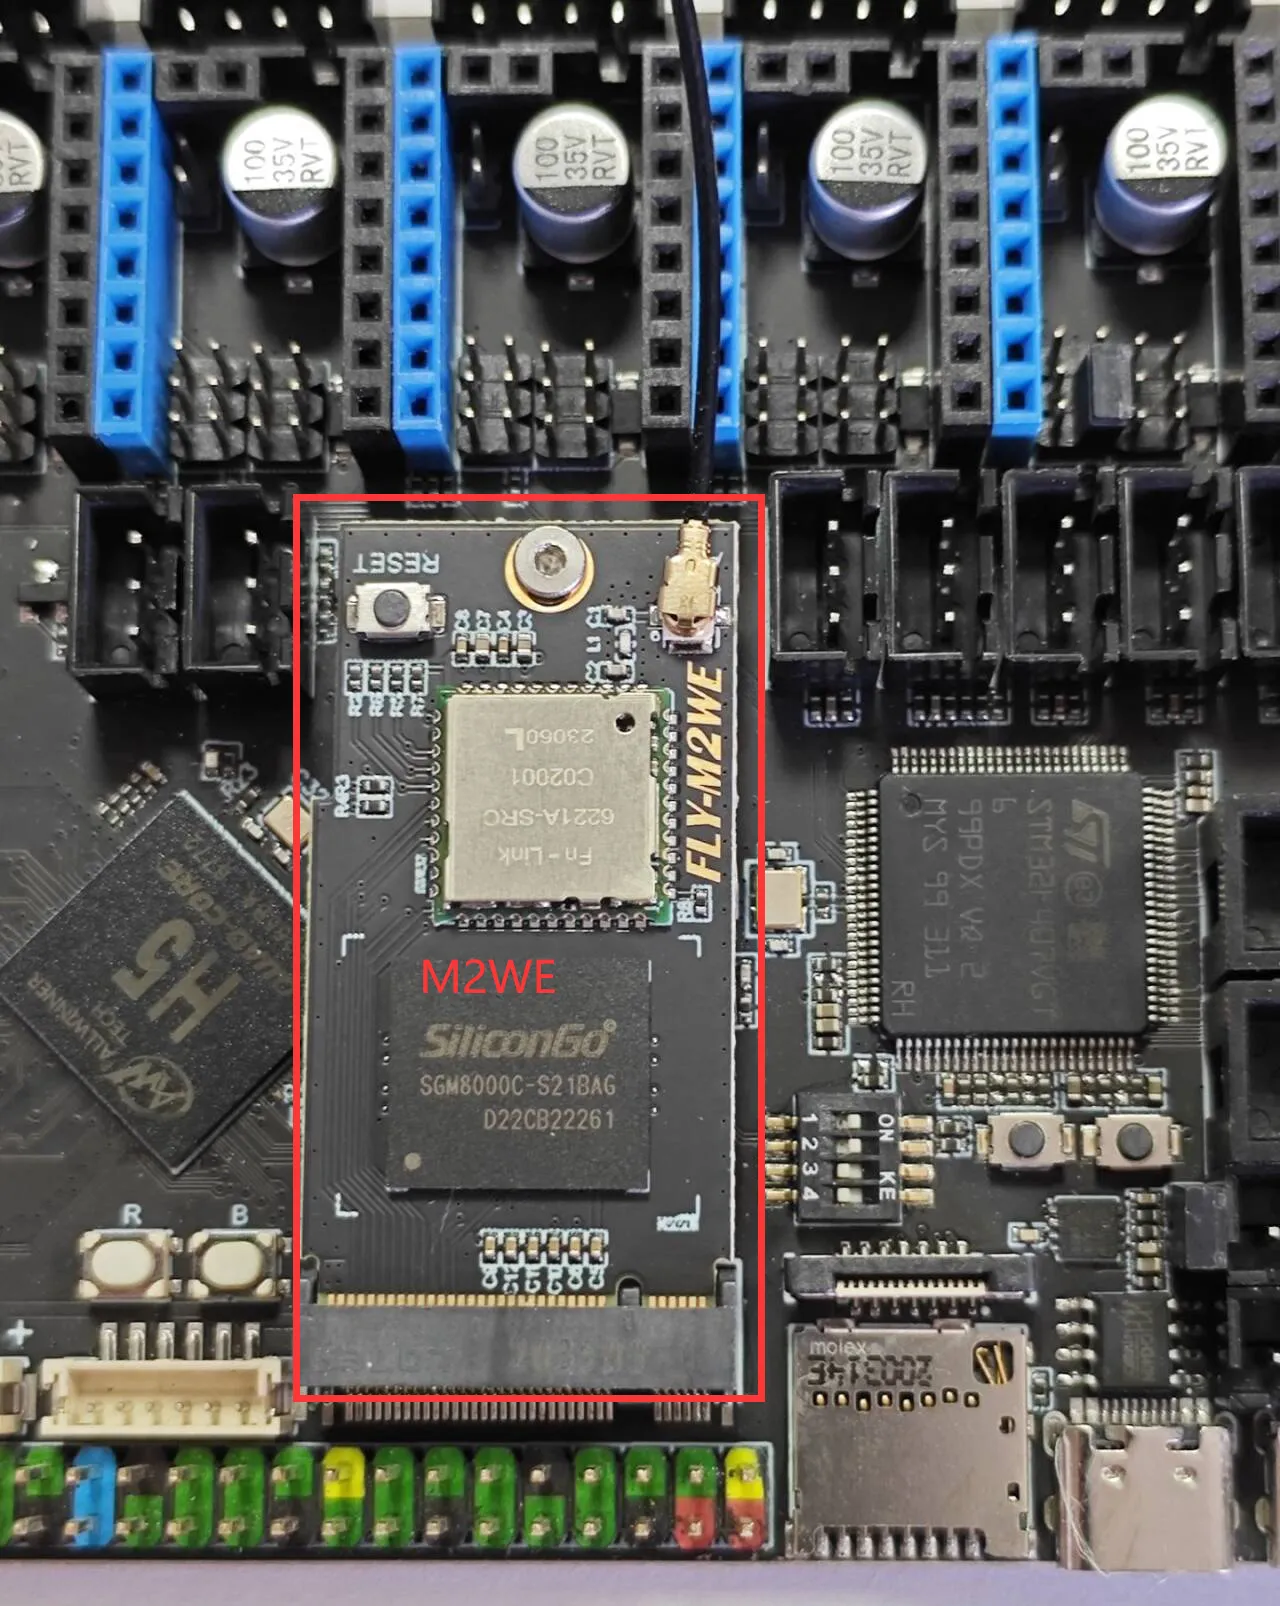
- Install M2WE Card onto C8
- After flashing the system into the TF card, the TF card needs to be connected here on C8, otherwise the system cannot boot
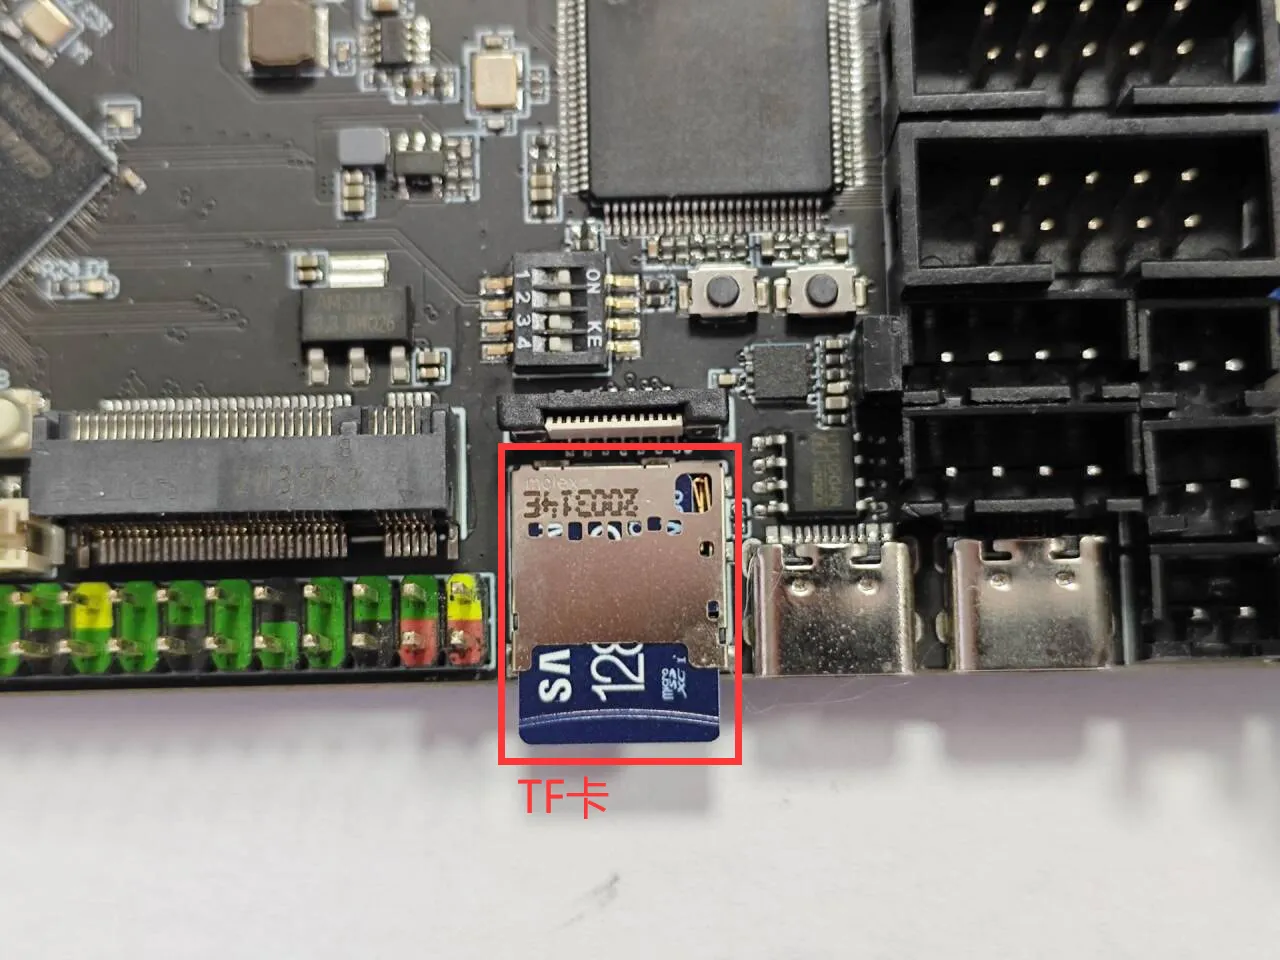
- Please note that if there is a TF card, the system will boot from the TF card by default
- Please note that a 1.27 hex screwdriver is required to secure the screws
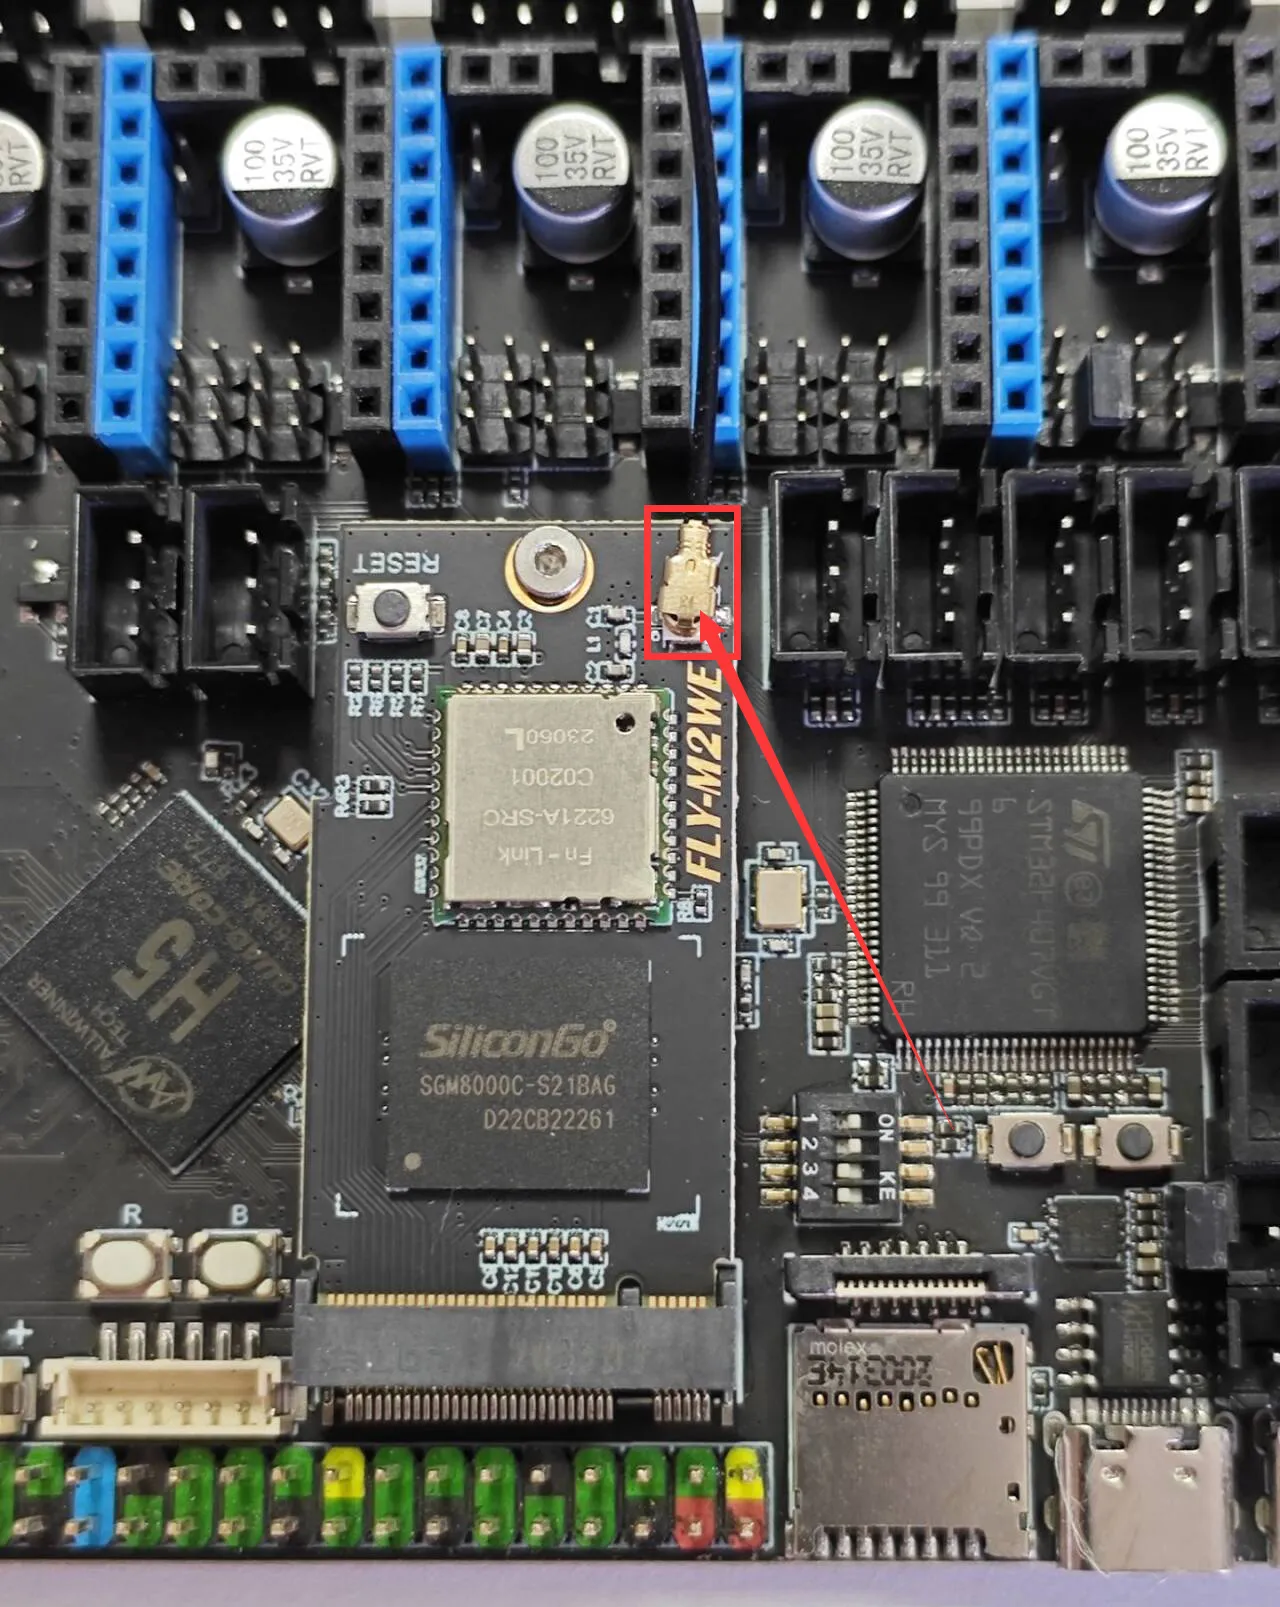
Installing Antenna
- Install the antenna for the
M2WEor2.4G WiFimodule
- FLY host computer requires the
M2WEor2.4G WIFImodule; otherwise, WiFi cannot be used - Note that the host computer does not support WiFis with Chinese names, nor does it support dual-band (2.4G and 5G) combined WiFis
- The red arrow indicates the WiFi antenna interface
- The WiFi antenna port is
ipex1 - Please install the antenna onto the M2WE, otherwise poor signal may prevent connecting to the router
- Once the system card is installed, proceed to the next step: connect to the host computer via SSH
- Power the host computer.
At this point, your host computer is ready to boot up!!!
Please proceed to the next step: SSH Connect to Host Computer
Modifying Other System Configuration Options
To modify other system configuration options, please refer to: Modifying System Configuration