System Flashing
System Introduction
FlyOS-Fast is a lightweight Linux system customized specifically for 3D printing, supporting the entire series of Fly host platforms. Its features include:
- Fast boot with kernel optimization to ensure Klipper real-time performance
- Optimized file system to reduce the risk of failure to boot due to power loss
- 30-second quick startup of KlipperScreen
- Pre-installed services including Klipper, RRF, Mainsail, Fluidd, Moonraker, and KlipperScreen
- Support for switching between Klipper and RRF systems
- Support for online one-click switching between Mainsail and Fluidd
- Support for USB drive printing, power-off resume printing, and serial screen
- Support for automatic firmware flashing (fly-c8, fly-geminiv3) on startup
- Allows presetting default language and printer name for front-end UIs like Fluidd
For more OEM customization features (such as setting up custom logos, preset configuration files, or hiding Mainsail tabs), please contact us.
Host Machine Beginner Guide
Host Machine Beginner GuideSystem Flashing Preparation
- Card reader
- One TF card with a capacity of 16GB-128GB and a transfer speed of Class10 or higher
- Download H618 system image
Default username: root
Default password: mellow
Note
This system is a lightweight customized system; the built-in klipper components and services are not official original versions and do not support user modifications or upgrades.
System Image Download Process
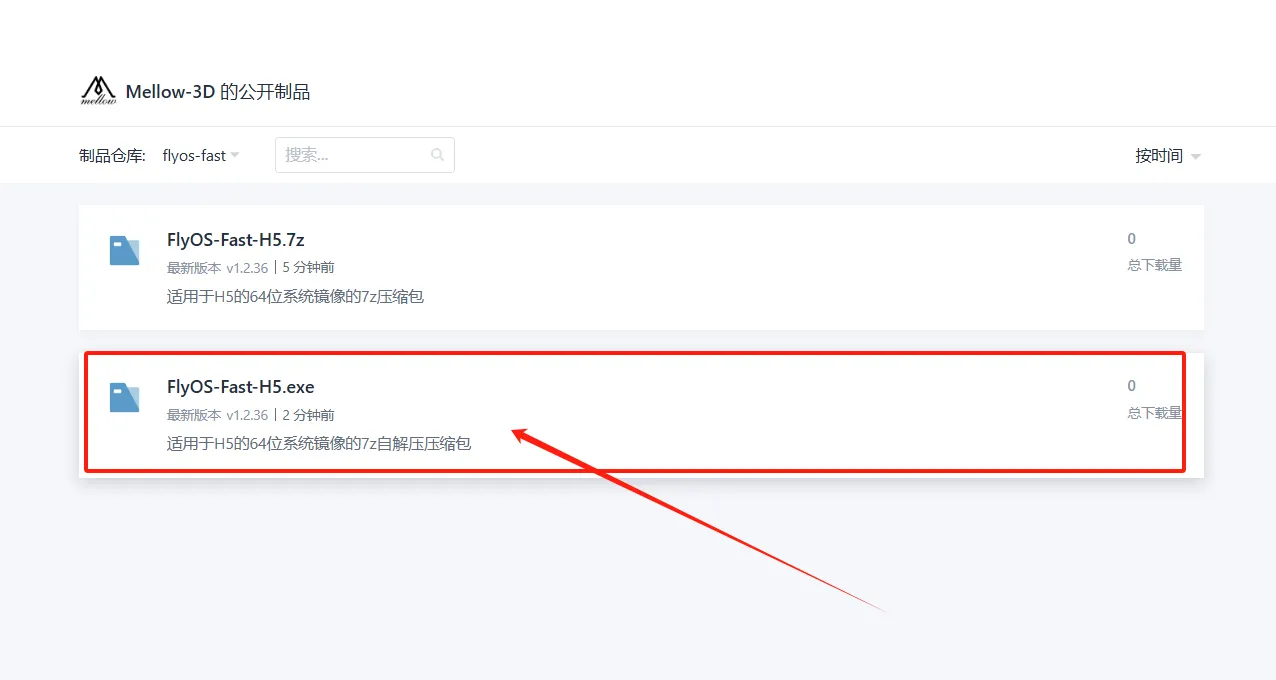
- Access the FlyOS-Fast repository
- Select the compression format and enter the file page
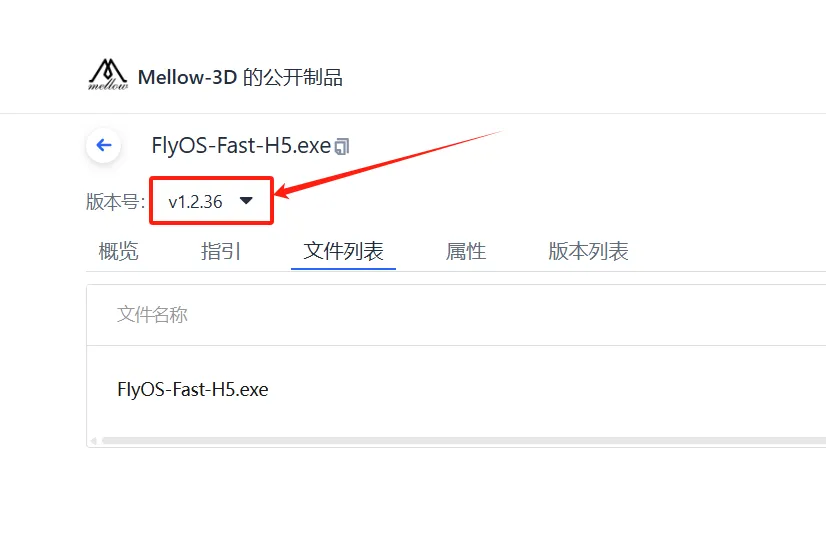
- Choose the version (default latest)
- If there is no download button, hover over the file list, hold down
Shift, and scroll the mouse wheel left and right - Or drag the scroll bar to the right by holding down the left mouse button and moving it, showing the download button
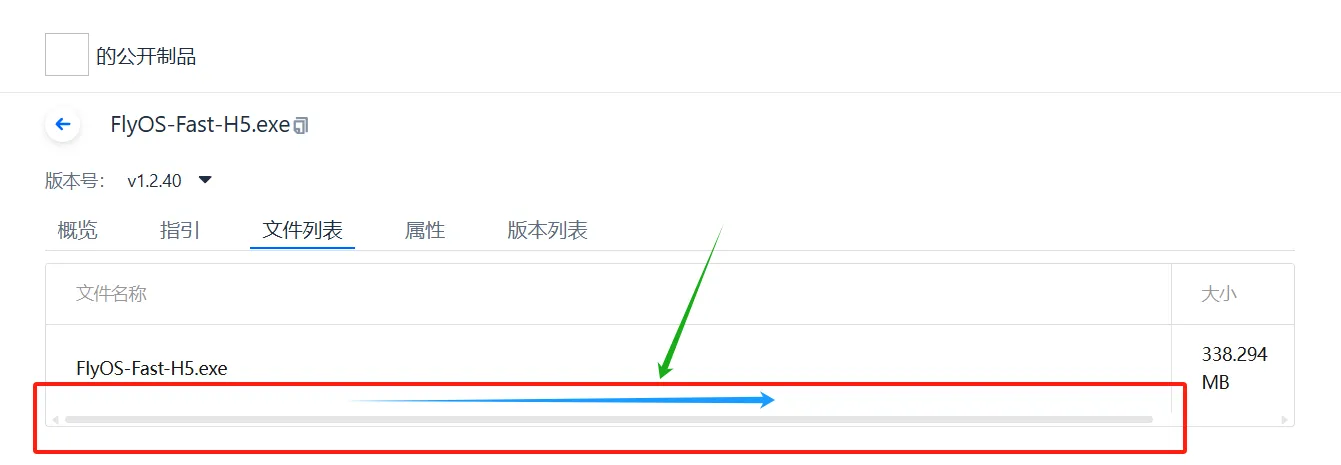
- Click the download button to obtain the system file
System Image Flashing
Preparation
- Complete System Download
- Download the flashing tool (Rufus as an example, Etcher or Win32 Disk Imager can also be used)
- Rufus Chinese / English (Windows)
- Etcher (Windows/MacOS/Linux)
- Win32 Disk Imager (Windows)
- Download the system image file (e.g.,
FlyOS-Fast-H5.exe) - Extract the image file to get the
.img- Double-click or right-click open
FlyOS-Fast-H5.exe, select the extraction directory, and clickExtract - After extraction, a
FlyOS-Fast-H5-vx.x.x.imgfile will be generated
- Double-click or right-click open
- Prepare the flashing card (it is recommended to use a SanDisk 32GB C10 or higher TF card), insert the card into the reader and connect it to the computer
Flashing the System
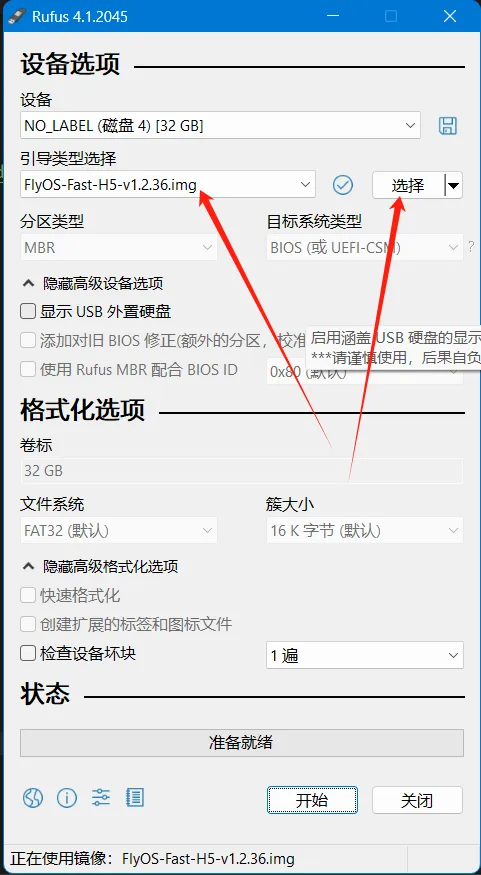
- Open Rufus, select the device (capacity should match the flashing card)
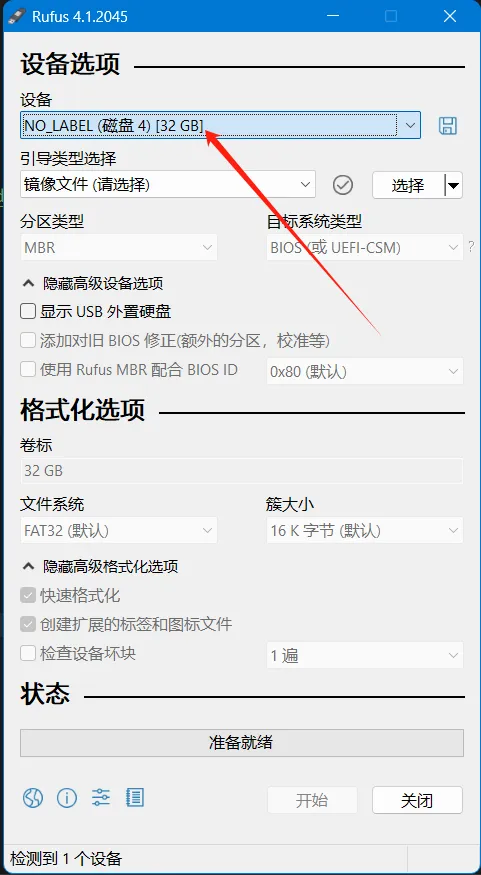
- Set the boot type to "image file"
- Click the "Select" button and select the extracted
.imgfile - After selection, the boot type displays the image file name
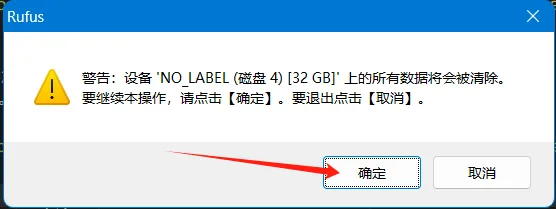
- Click "Start". If prompted to clear disk data, click "OK"
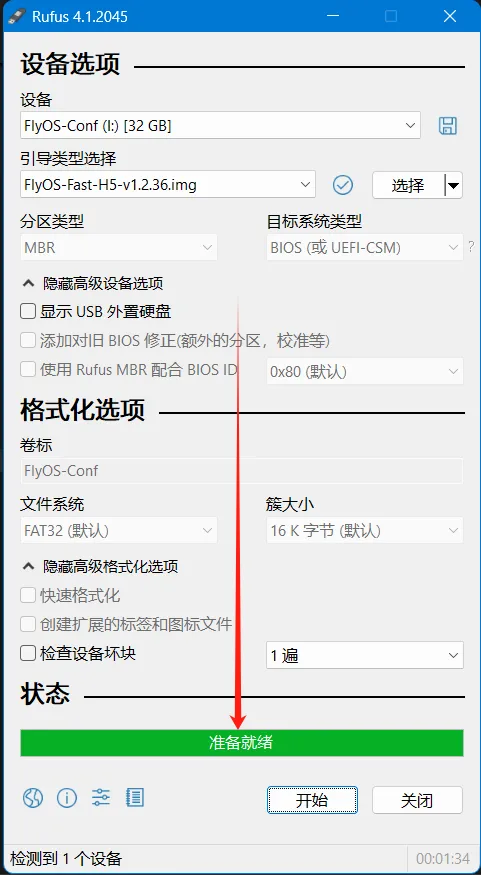
- After flashing is complete, the computer emits a prompt sound, and the progress bar shows "Ready"
- Do not remove the flashing card after completion
- Open File Explorer, check if there is a USB drive or removable disk named
FlyOS-Conf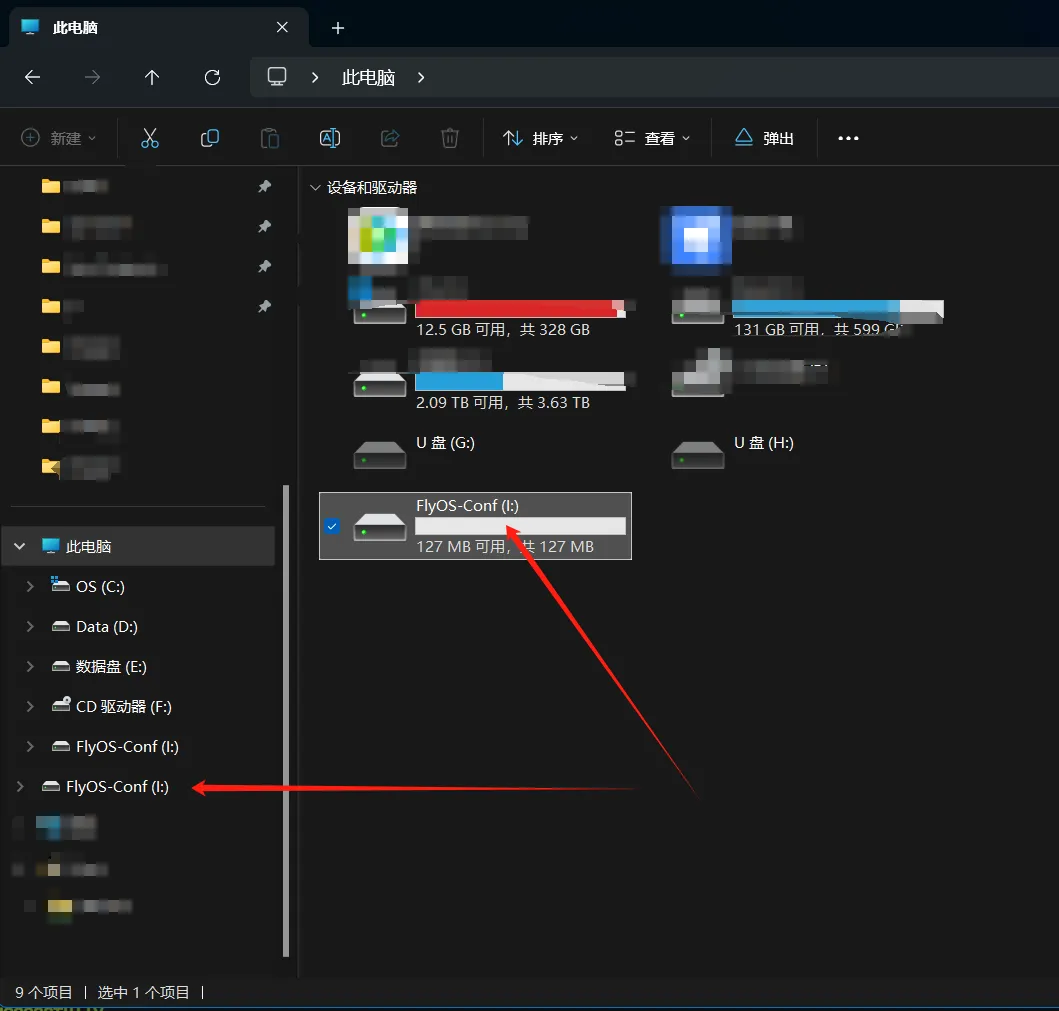
- Open
FlyOS-Conf. If the following two files are present, the flashing is successful
- The
config.txtfile is the system configuration file. Please refer to the next page for modification details