Mainboard ID Reading and Viewing
tip
Do not modify the configuration when opening the web page for translation
Notes
Do not modify the configuration when opening the web page for translation
Notice
Do not modify the configuration when opening the web page for translation
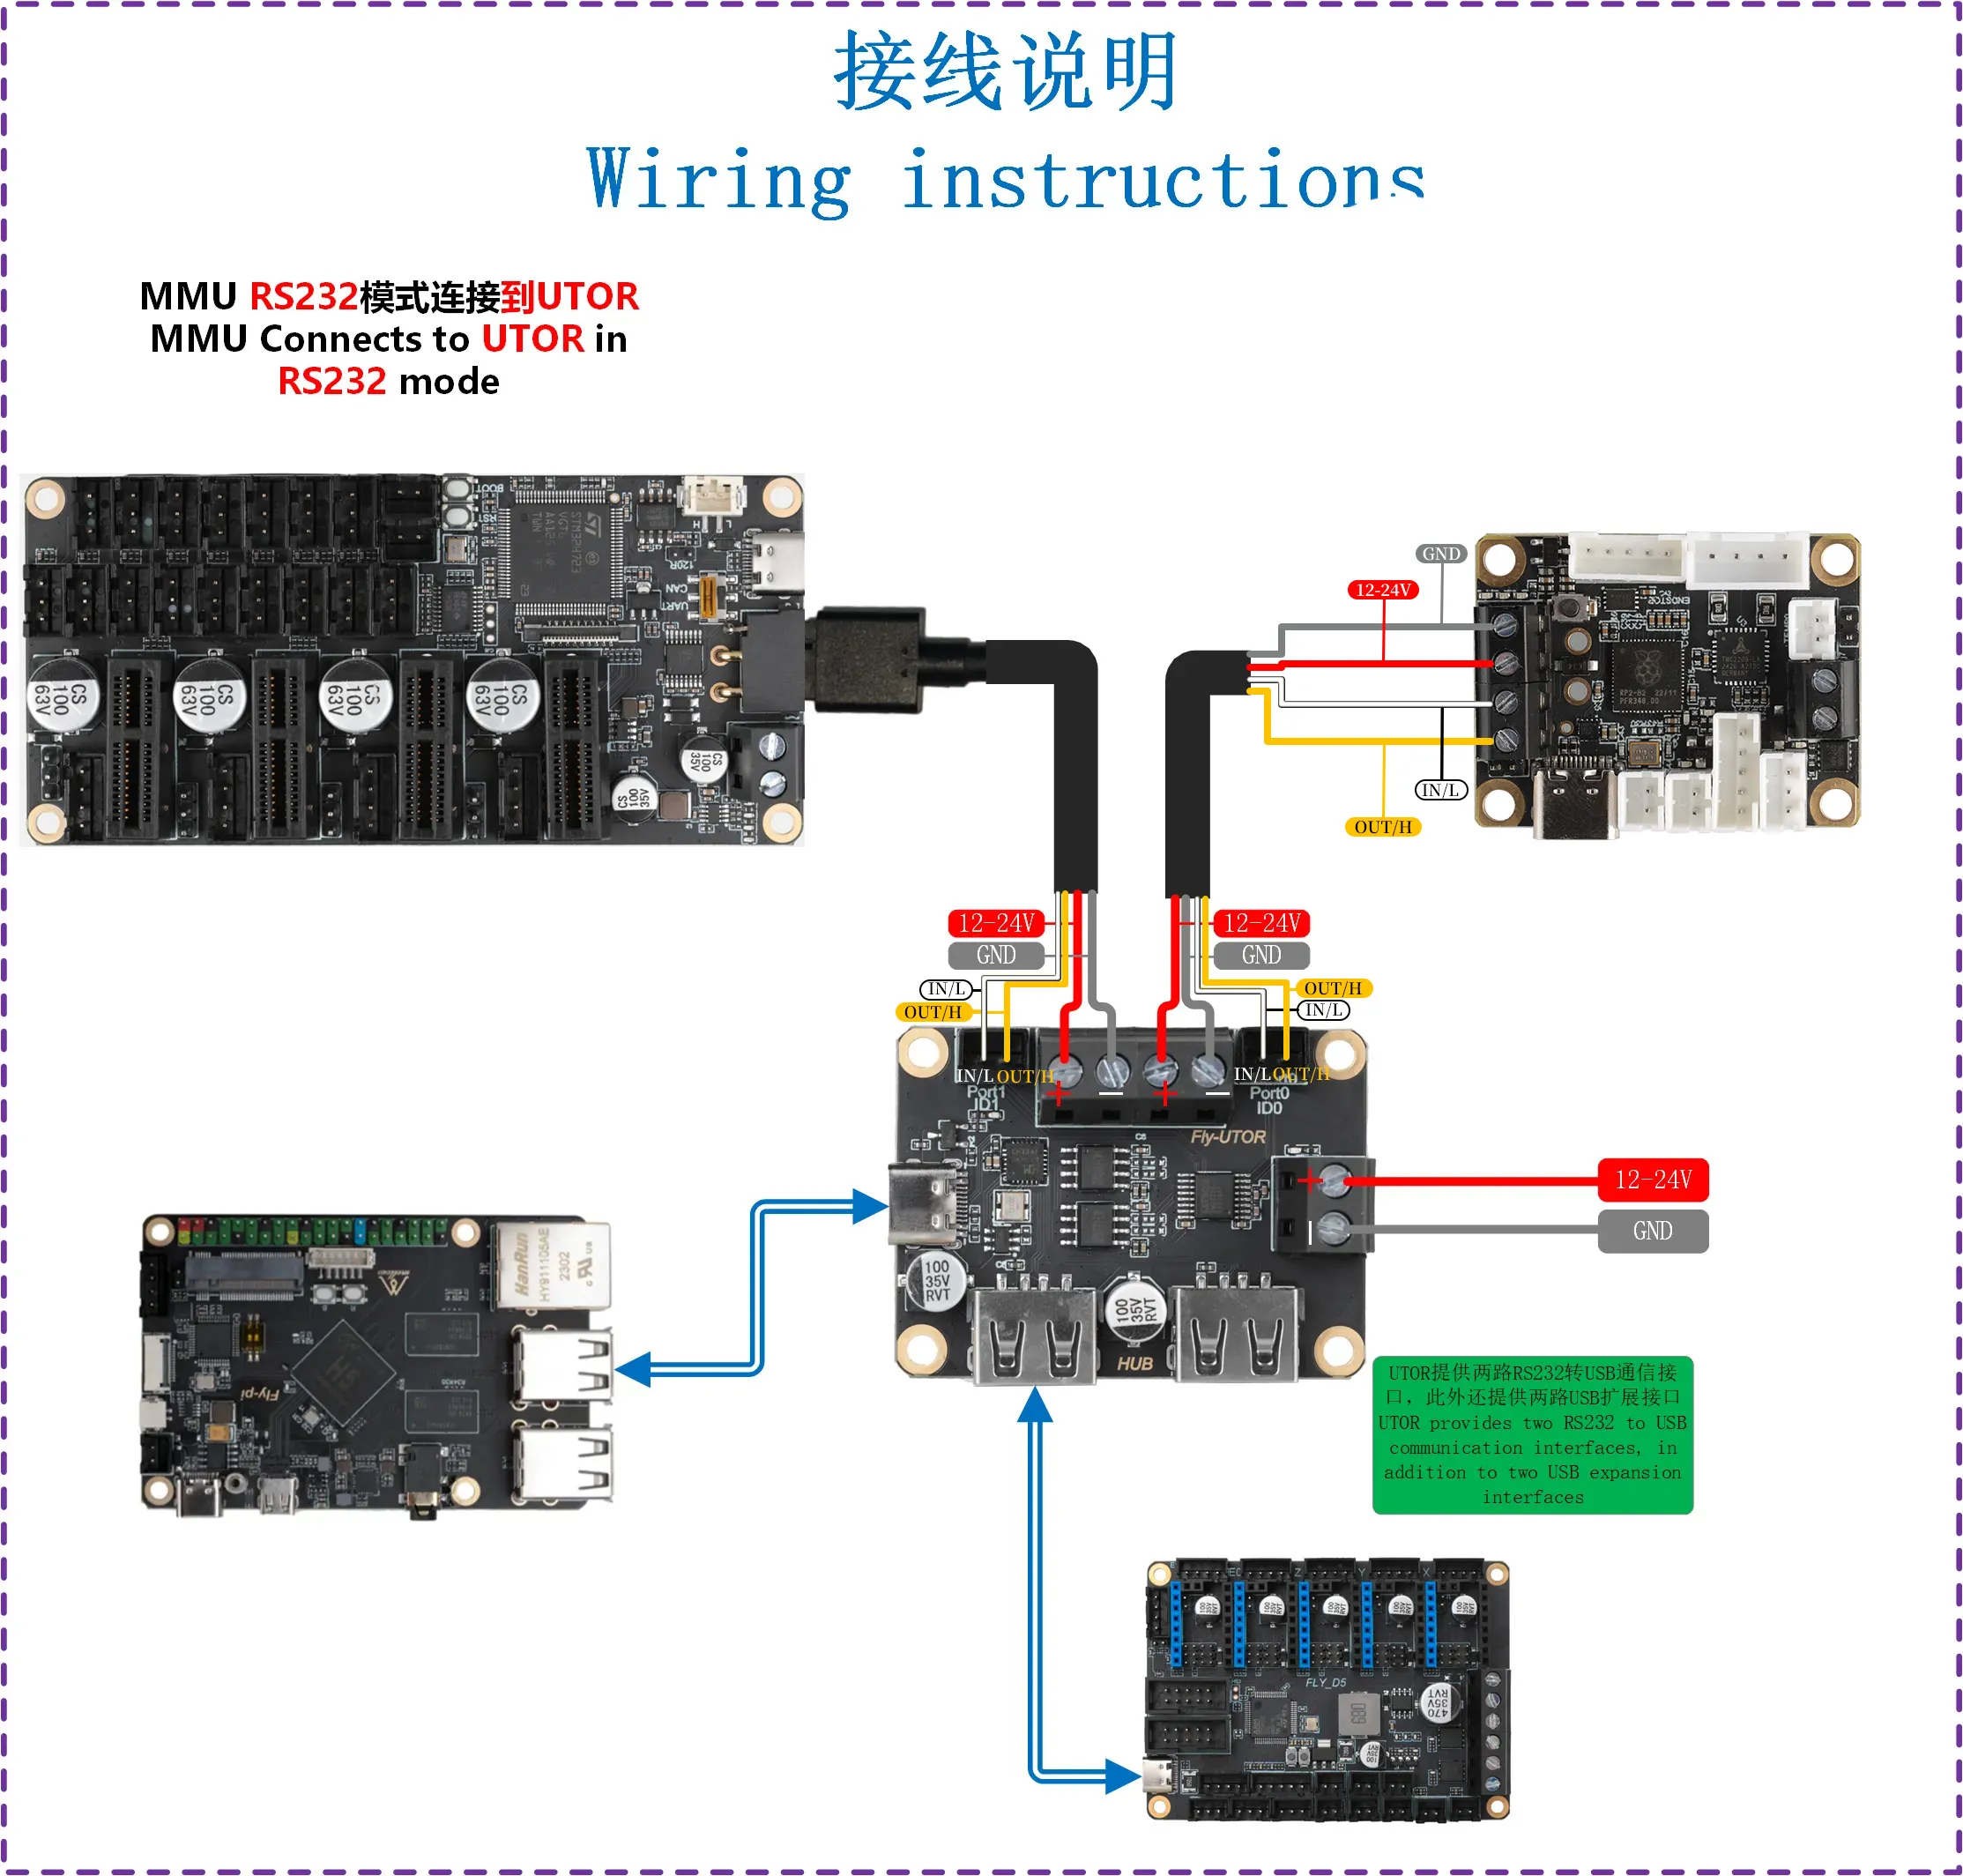
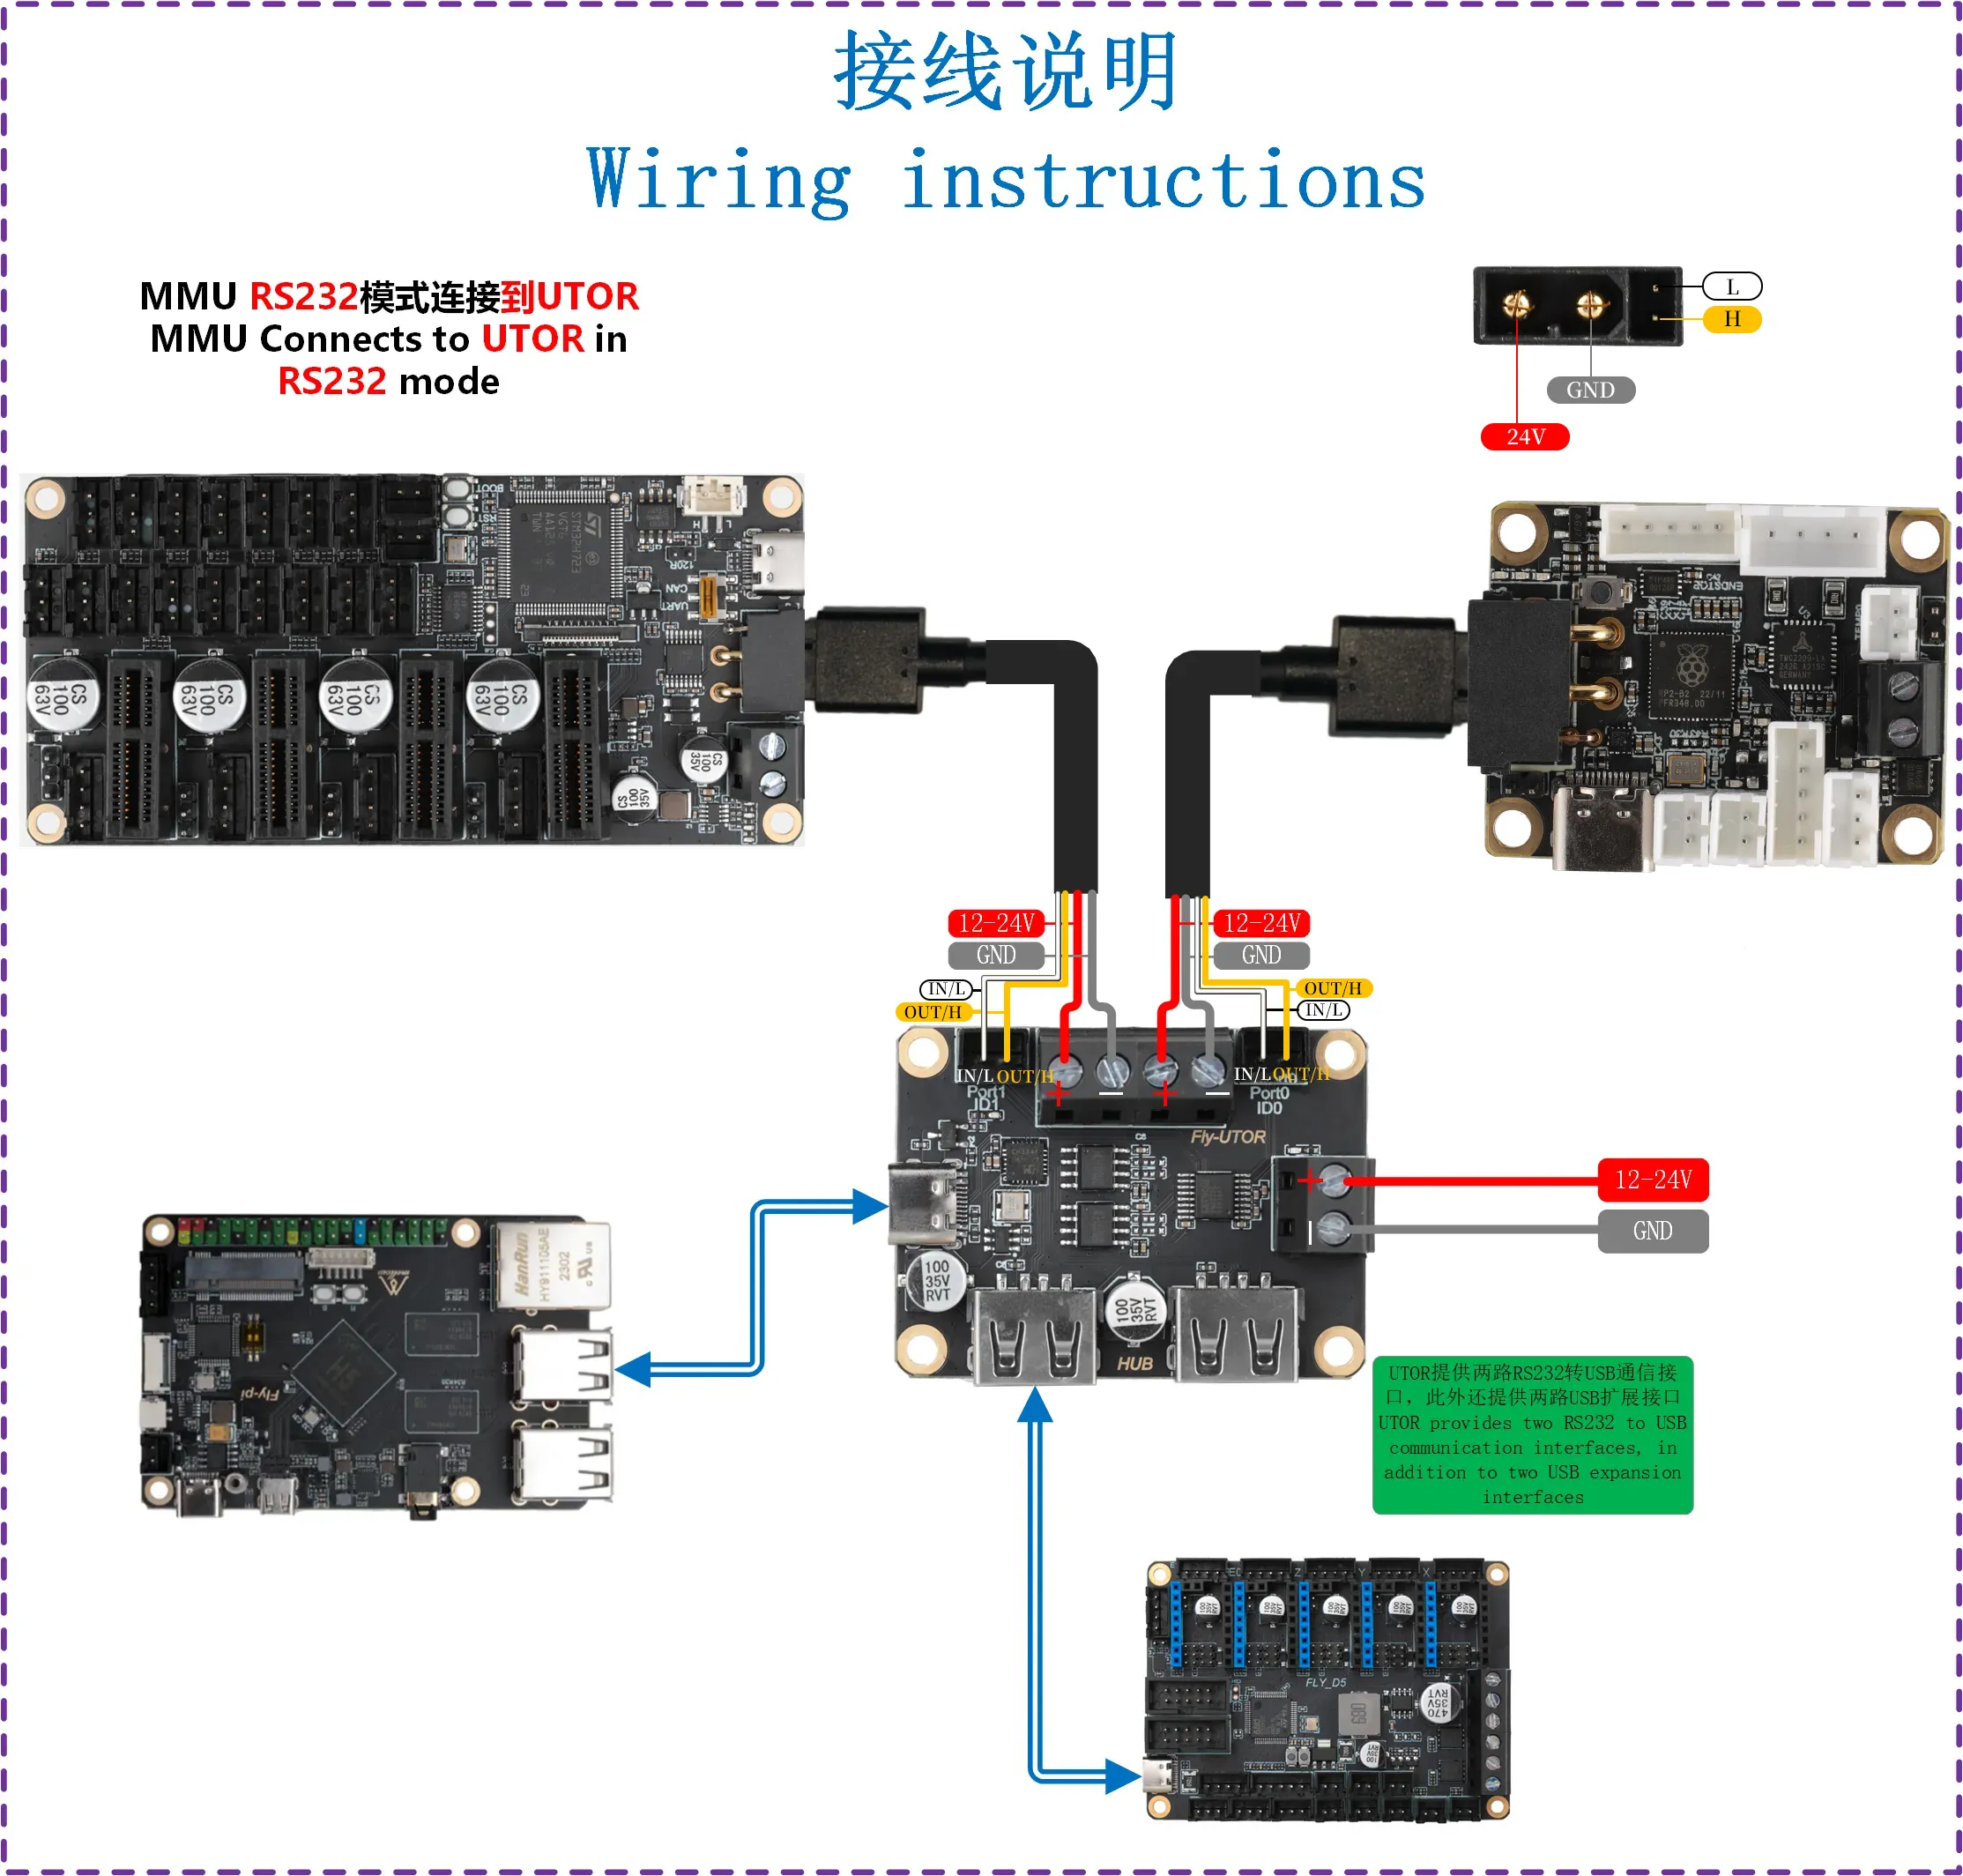
232 Wiring Diagram
- Use the XT30 data cable to connect the tool board to UTOR before searching for the ID. The following is a reference wiring diagram
KF Wiring Diagram
XT30 Wiring Diagram
Search for RS232 ID
Notes Before Searching for Devices
- Before searching for the RS232 ID, please ensure the following conditions are met:
- Please ensure the tool board has already been flashed with RS232 firmware.
- Please ensure the tool board is connected to UTOR or G2T (if the main board has built-in RS232, please ignore this line).
- Please ensure the tool board and host computer share a common ground!!! This step is very important.
Search for RS232 ID
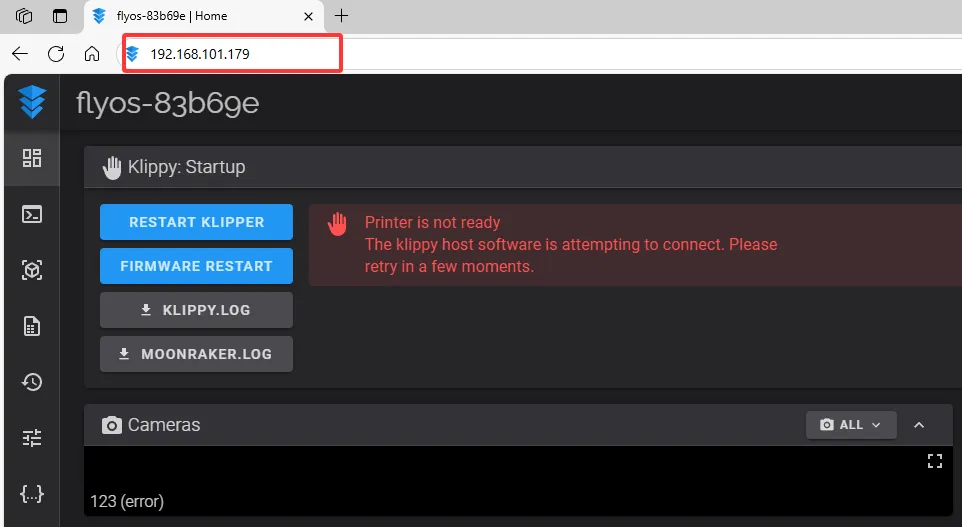
- Open your browser and enter the IP address of the host computer in the address bar. For example, if my host IP is
192.168.101.179, directly enter it and press Enter.
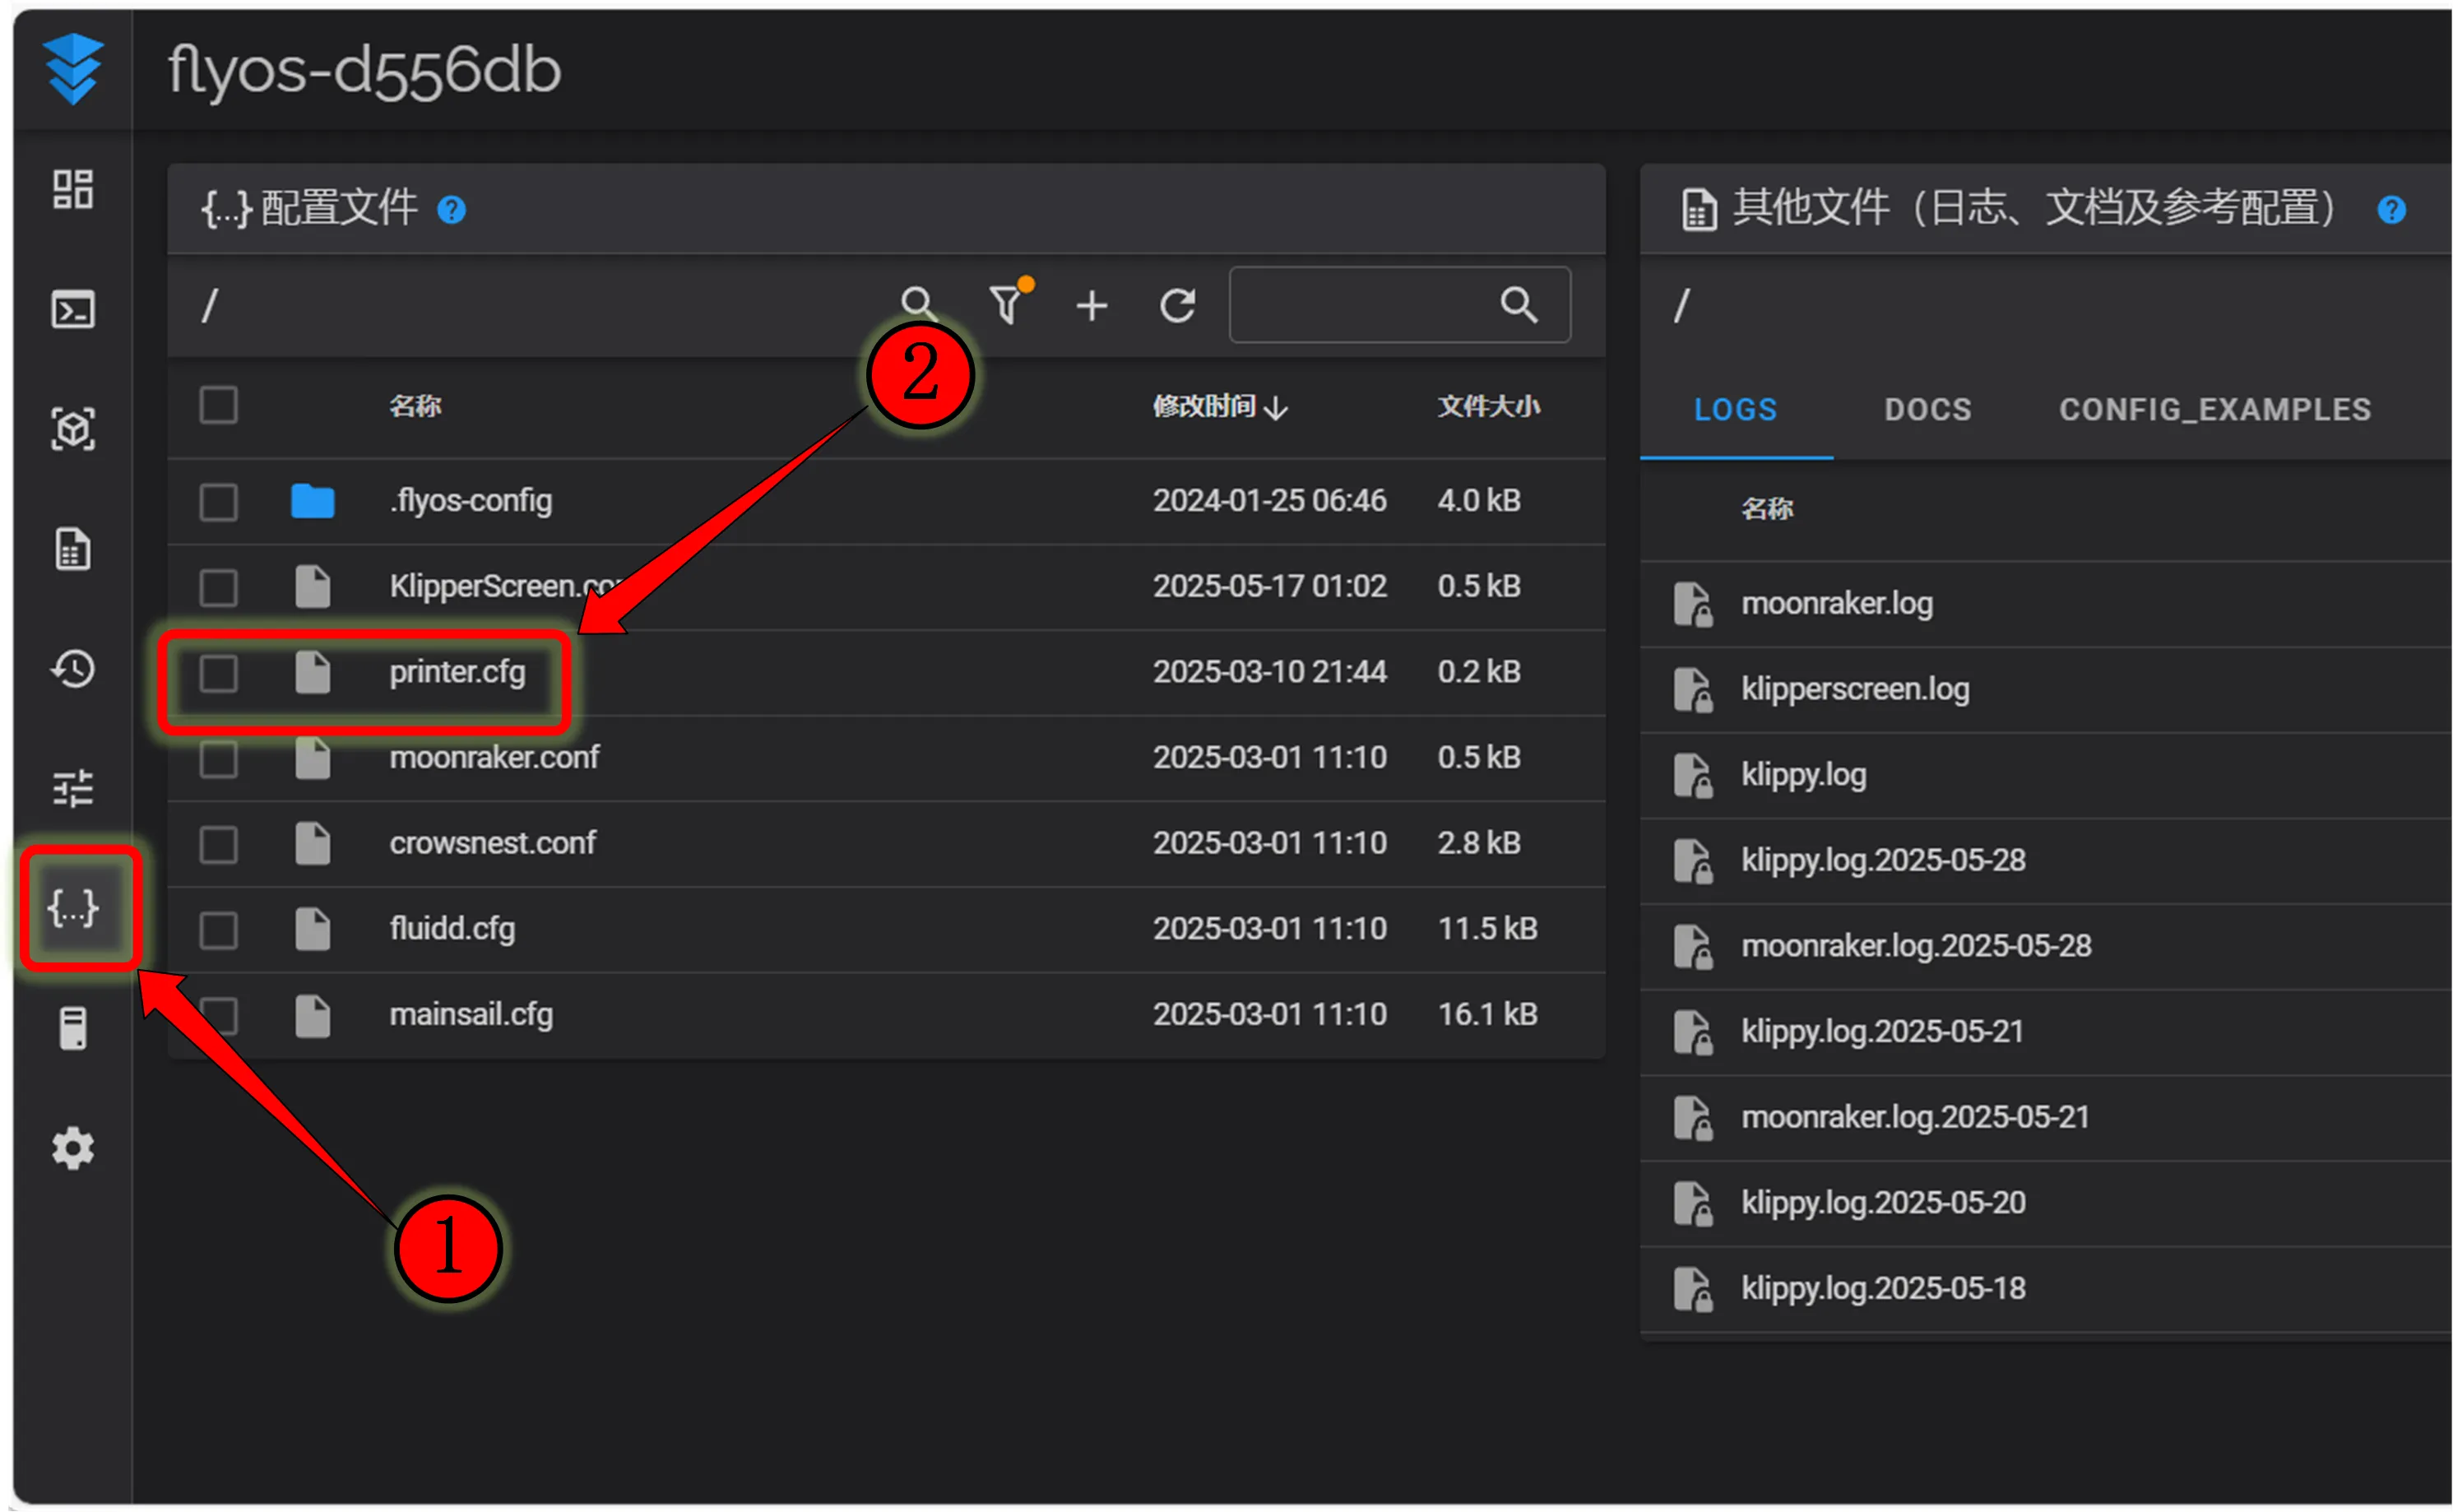
- Open the WEB interface of the host computer, and in the configuration section of the left sidebar, find:
 |
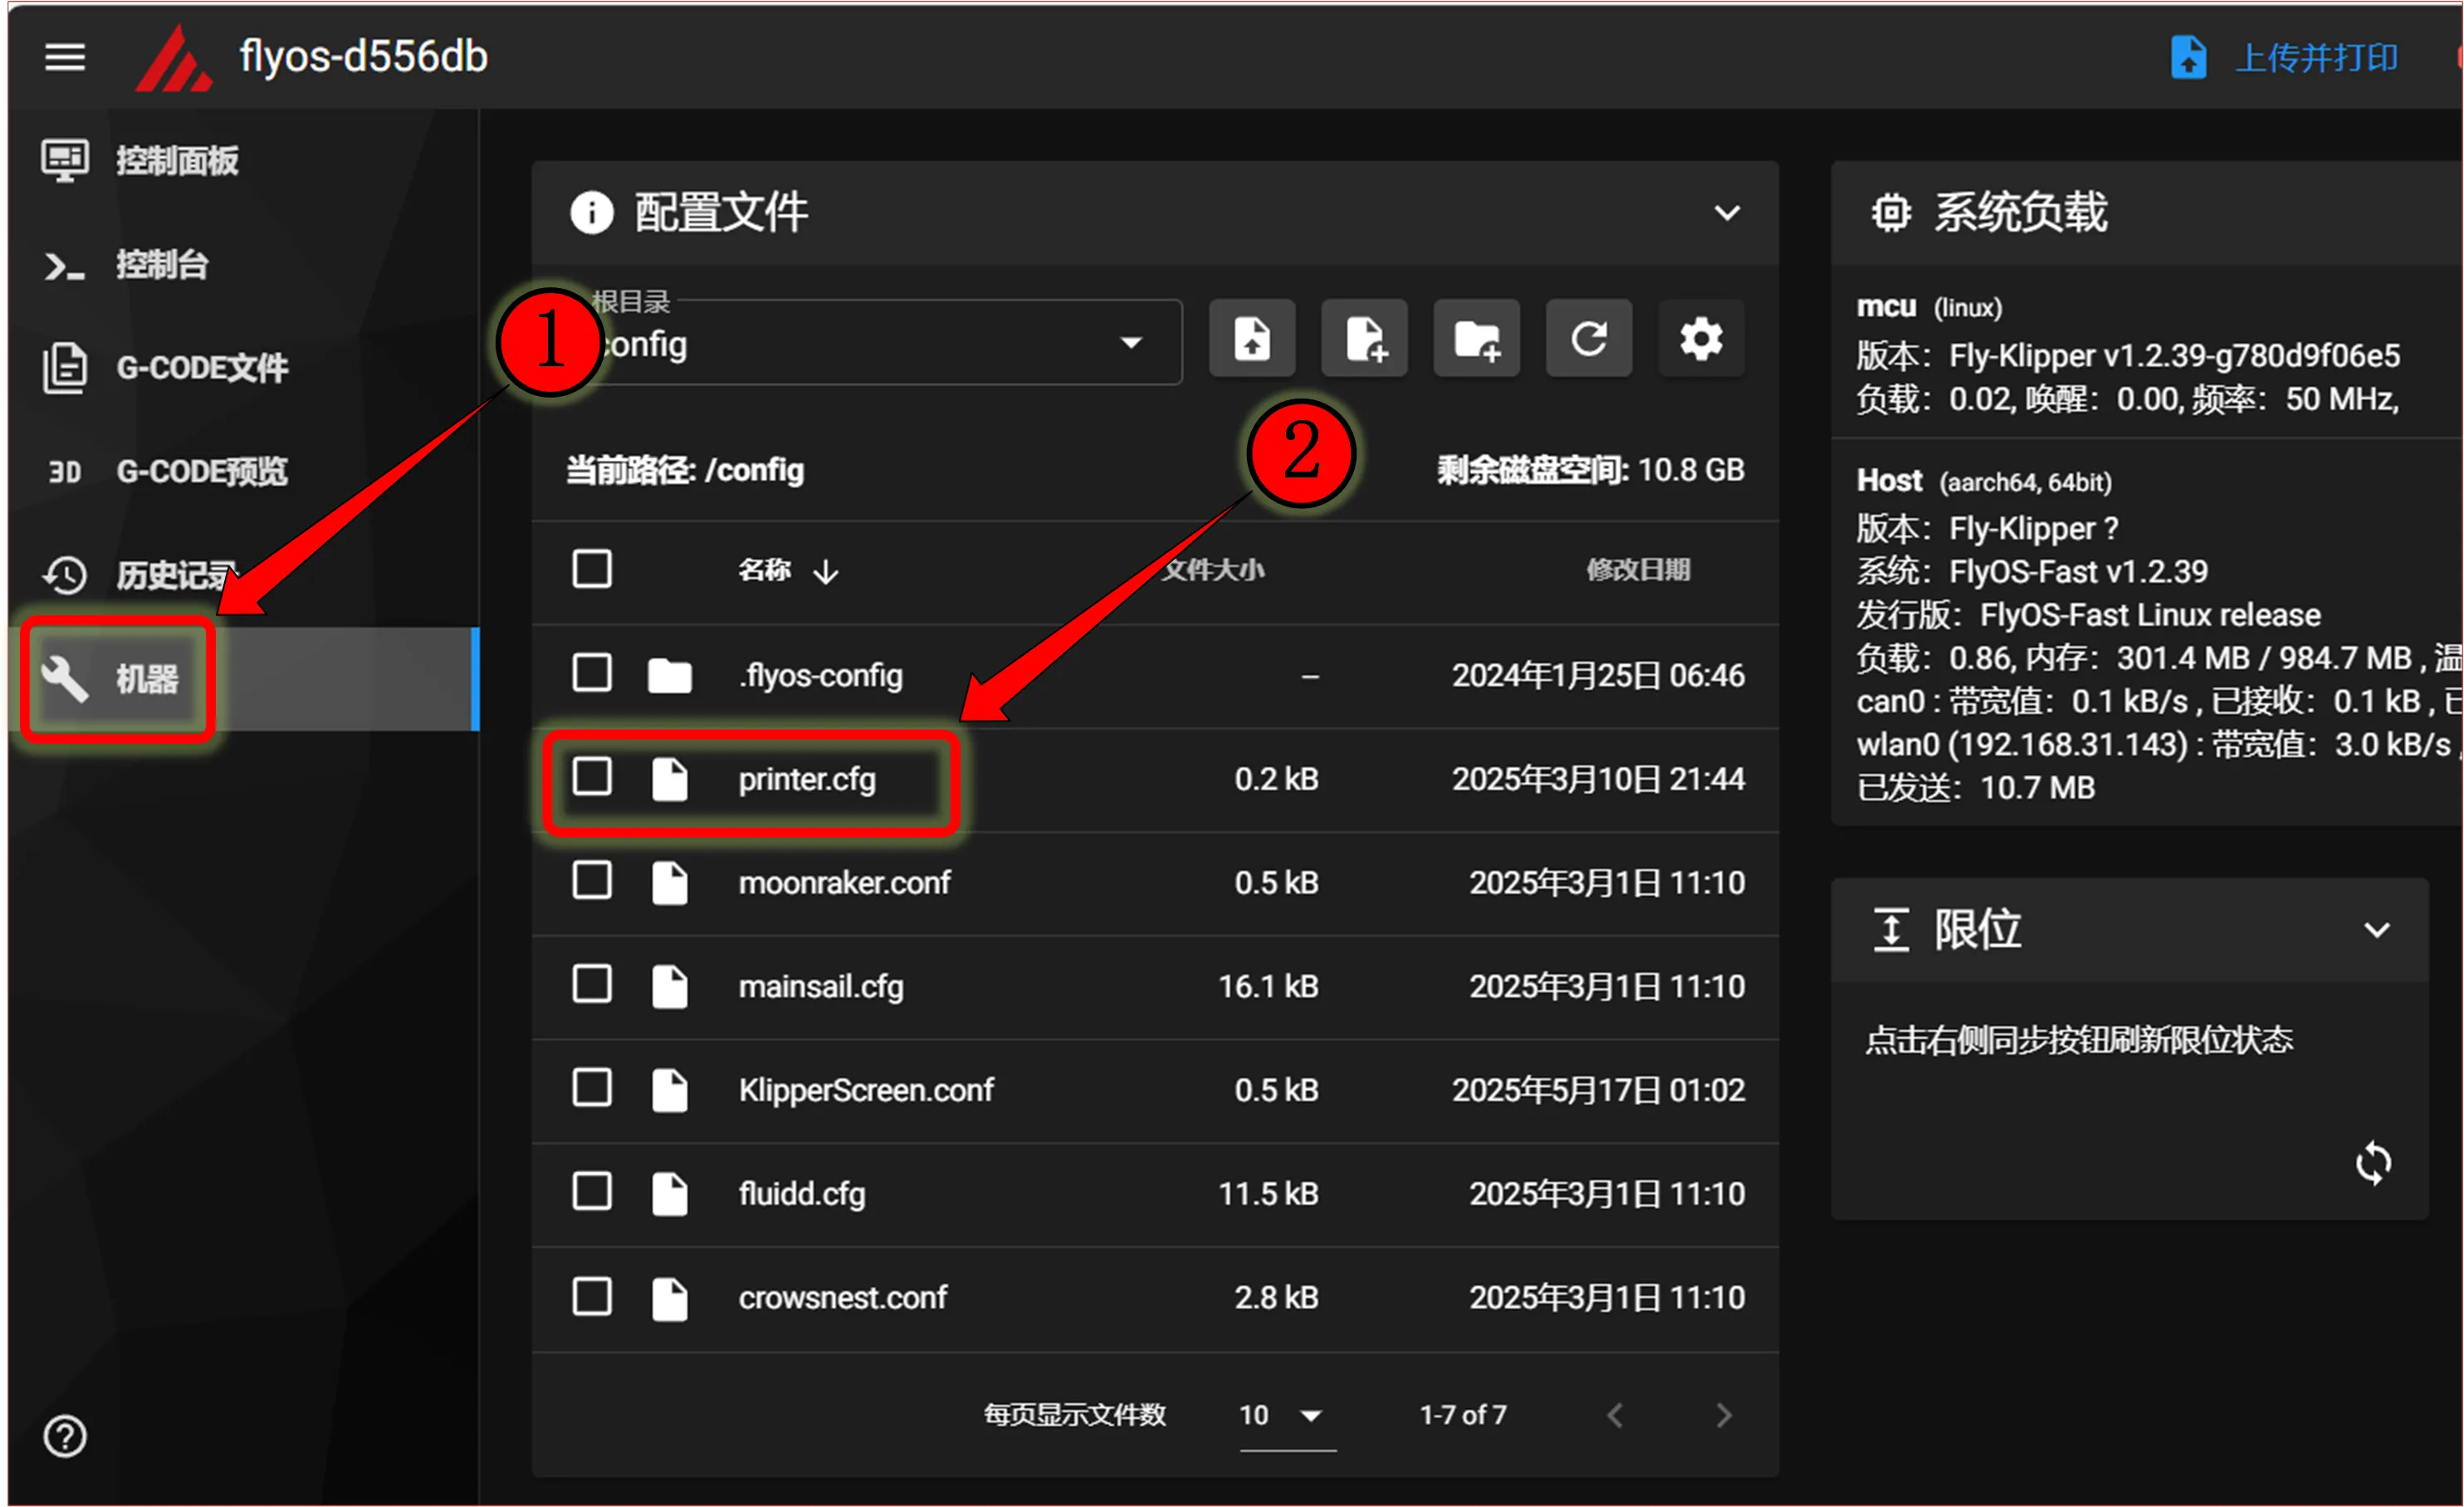 |
-
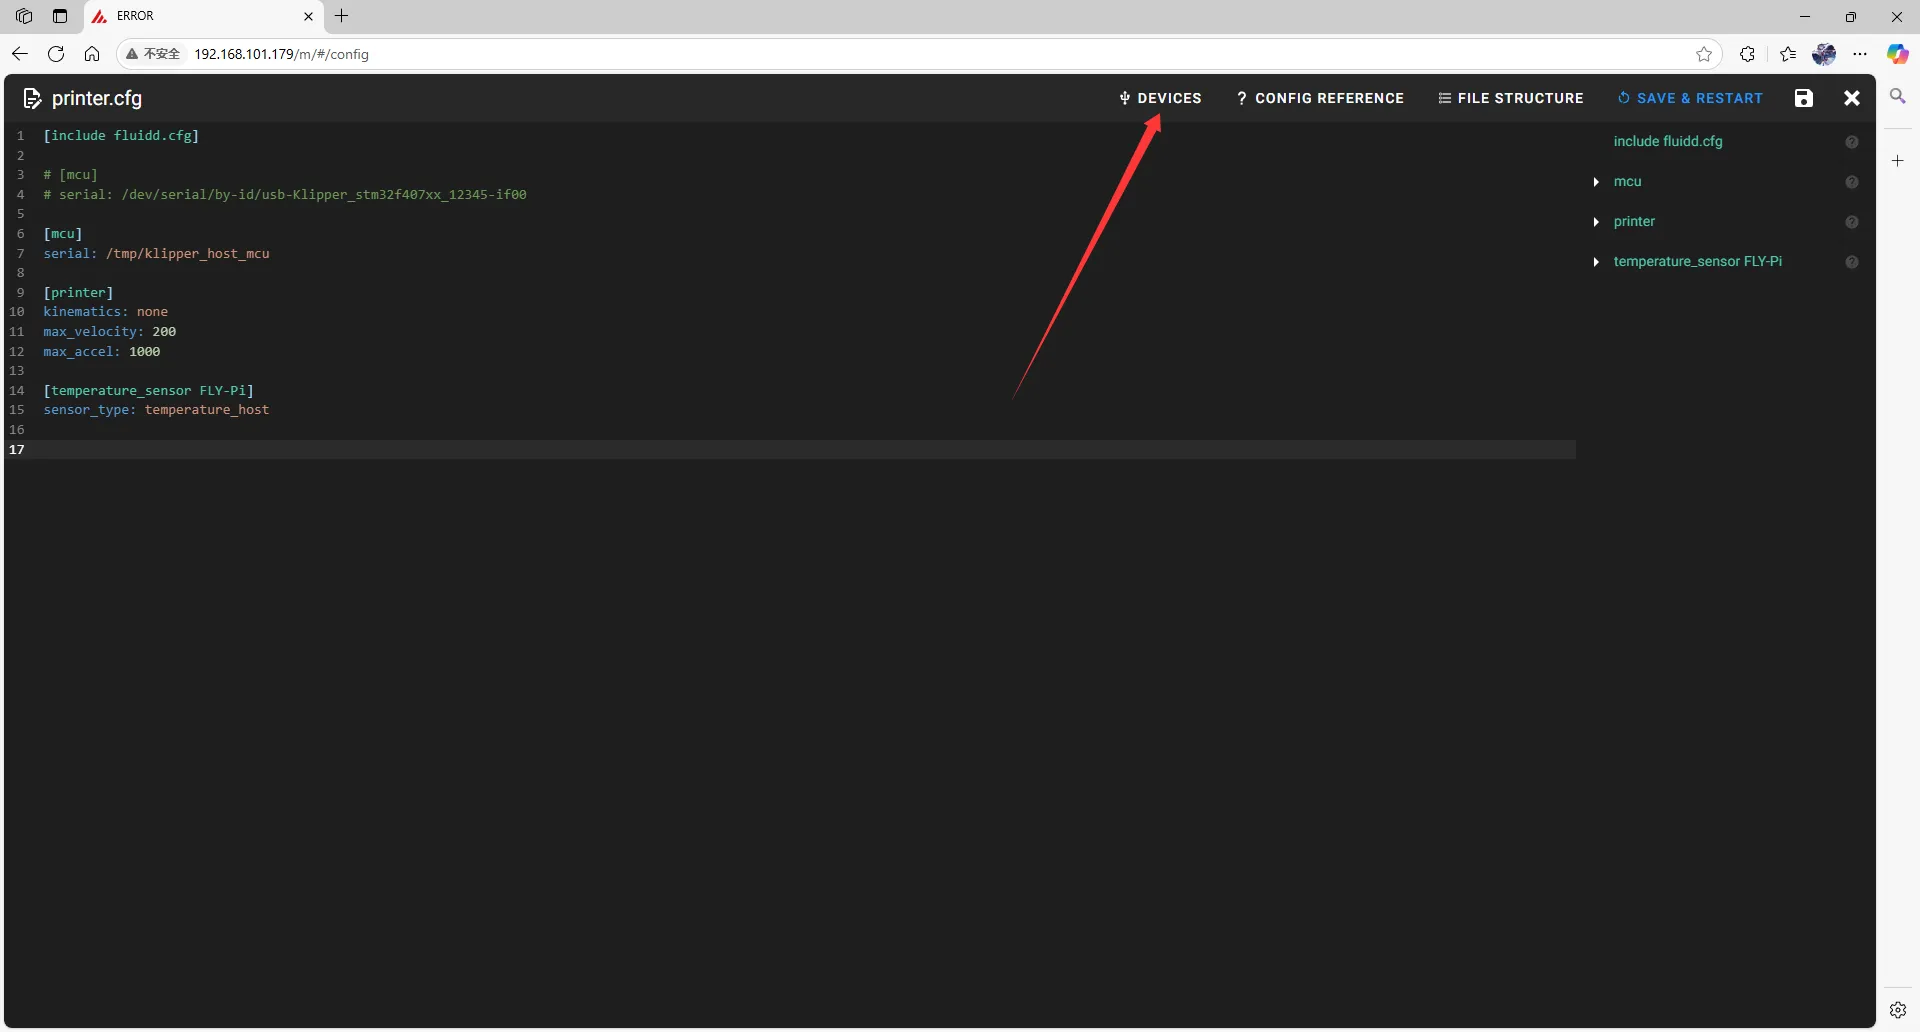
After entering
printer.cfg, click onDEVICESat the top right corner.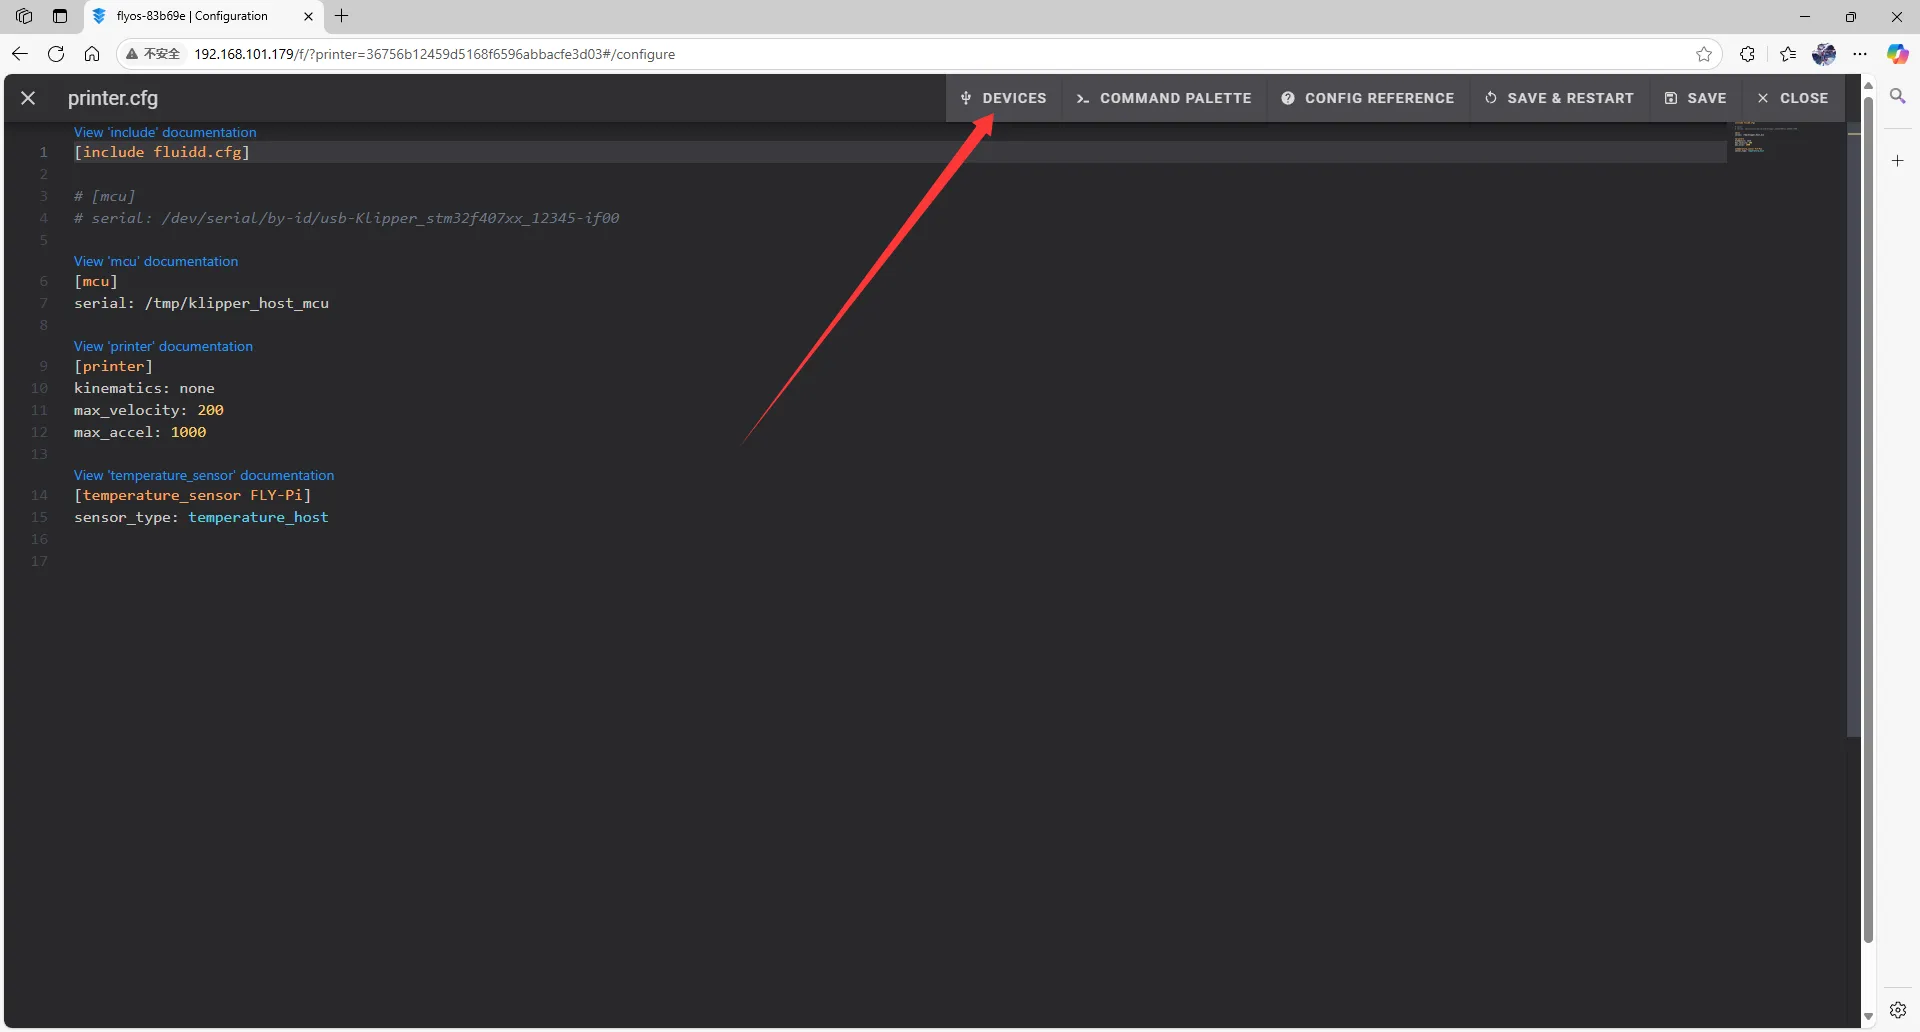
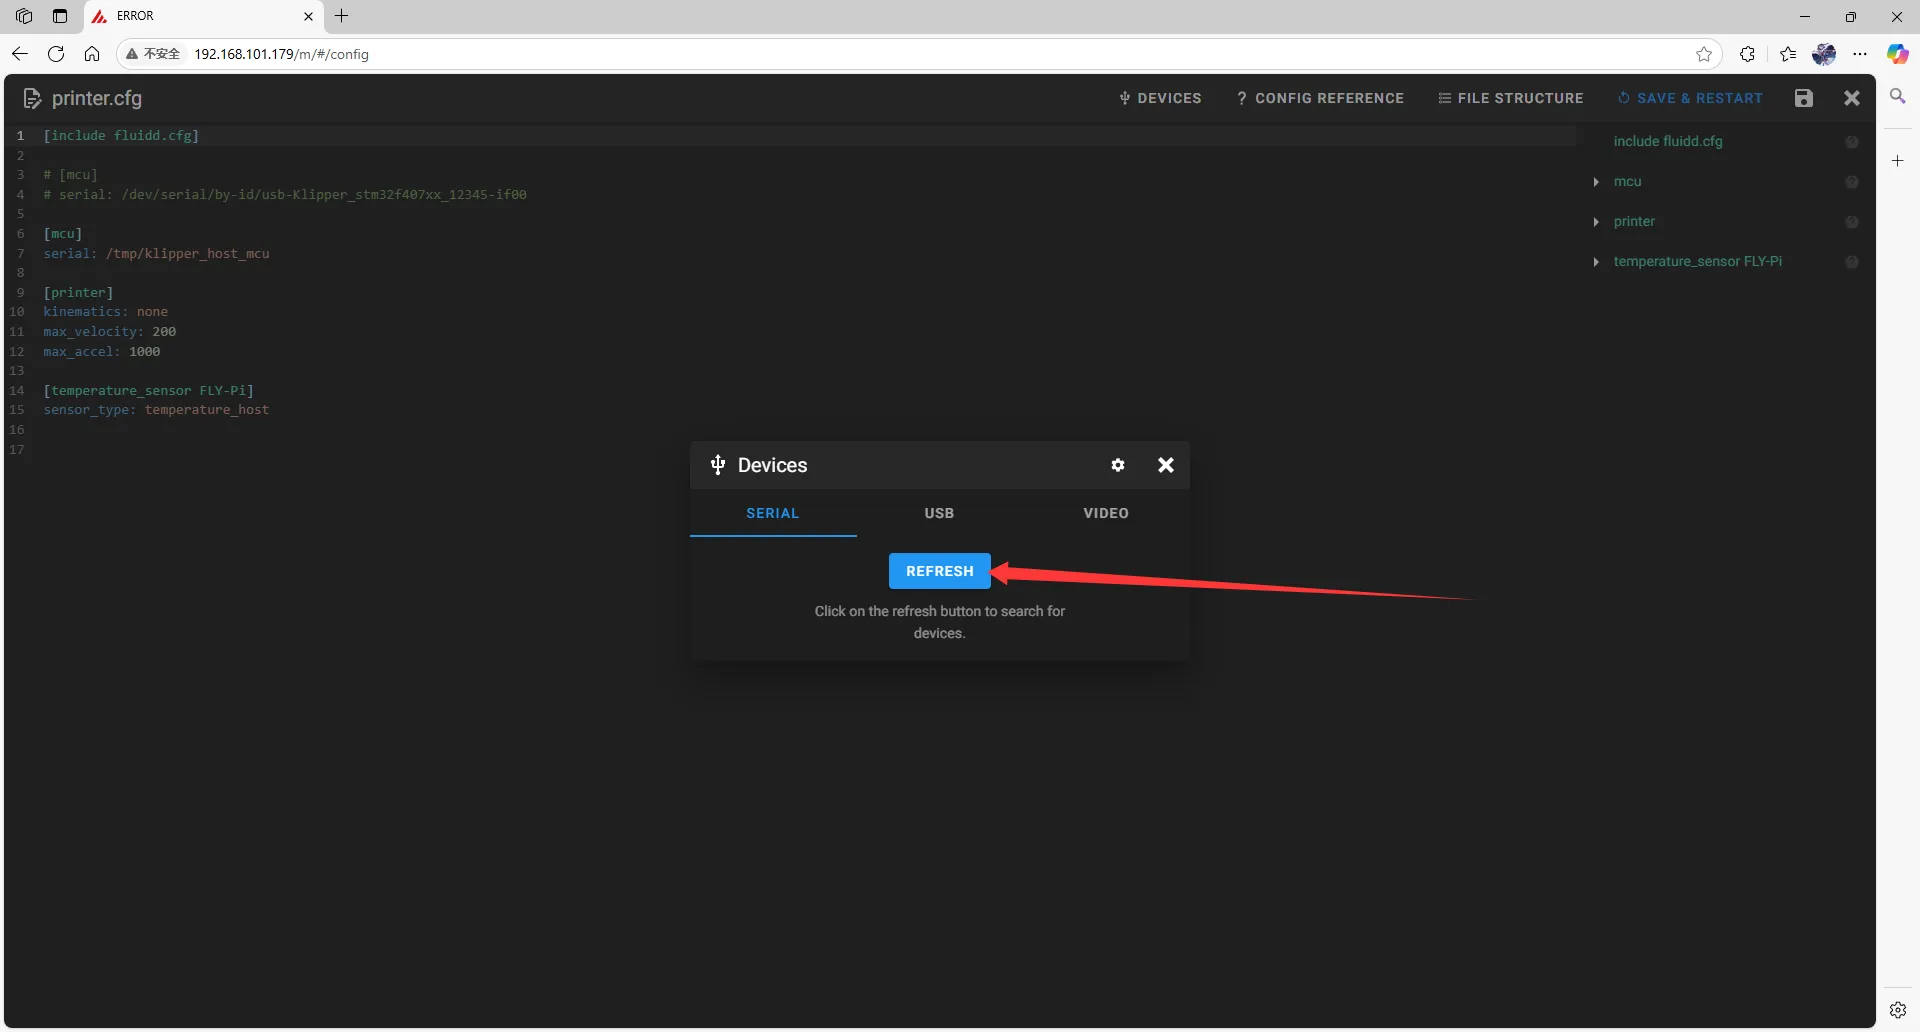
-
Click on
SERIAL, then refresh.- Refresh in fluidd
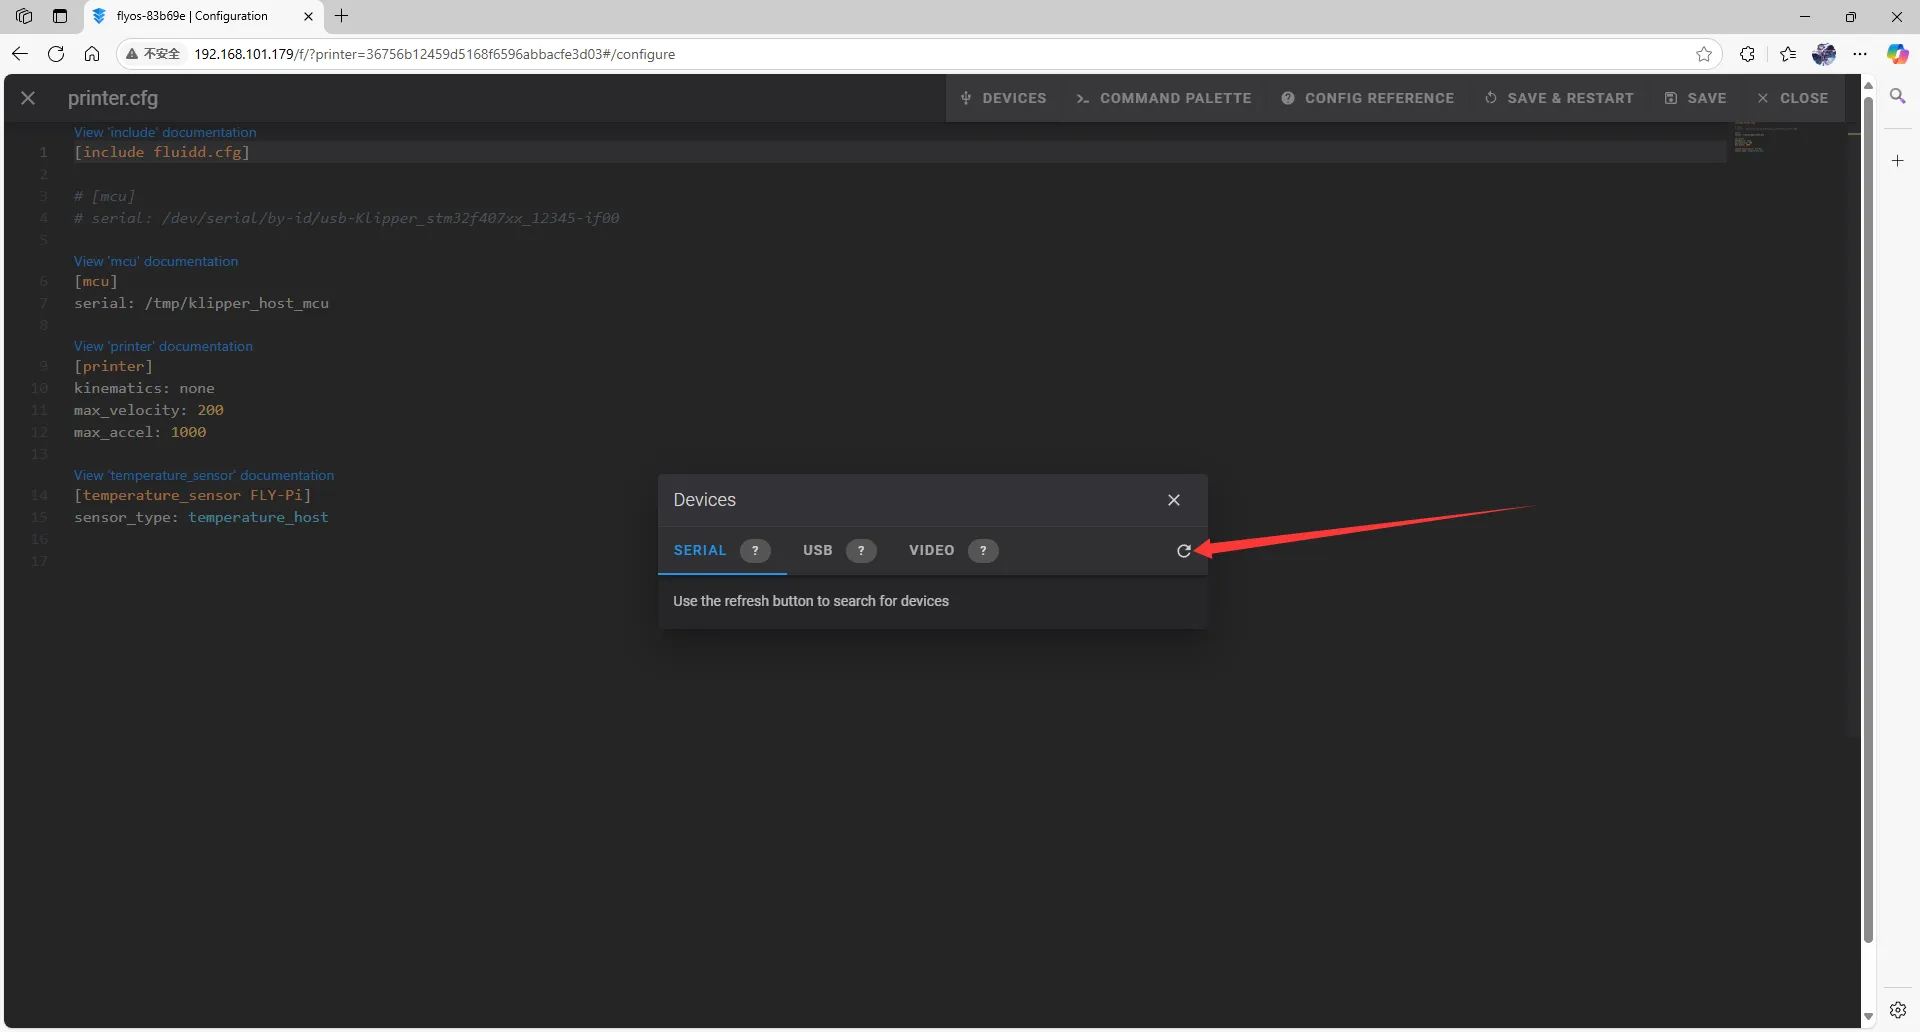
- Refresh in mainsail
-
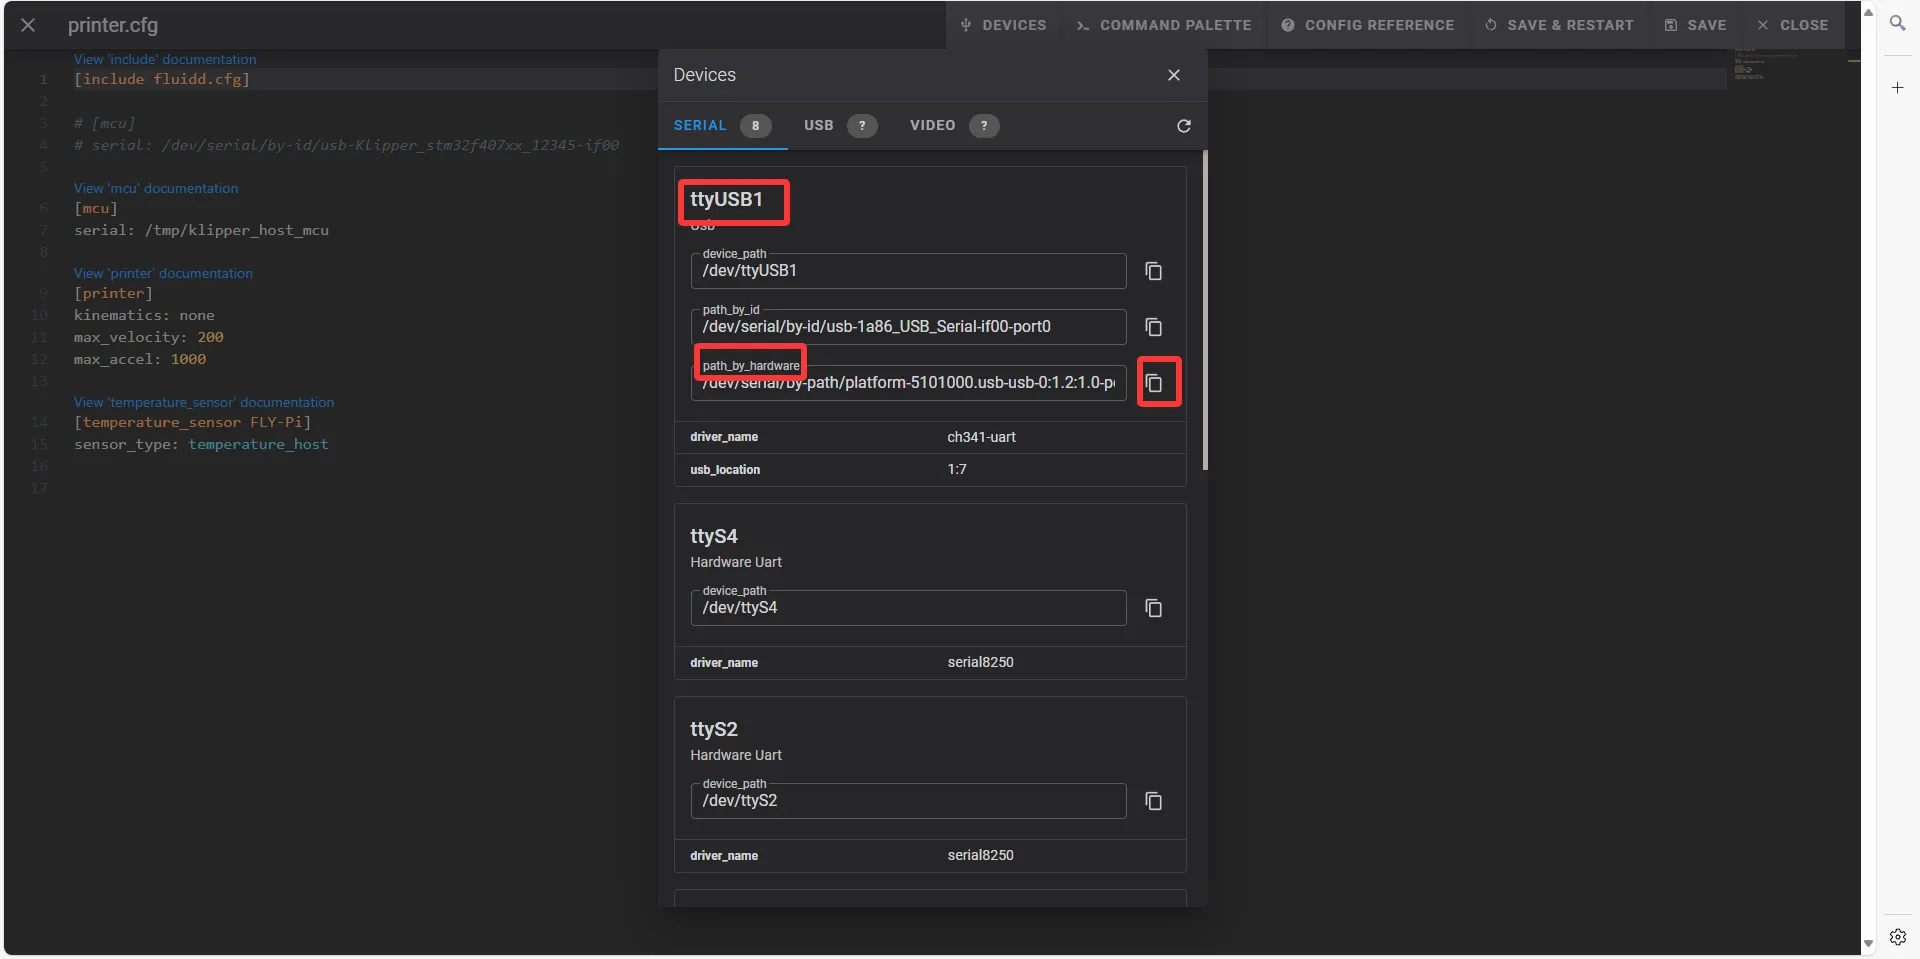
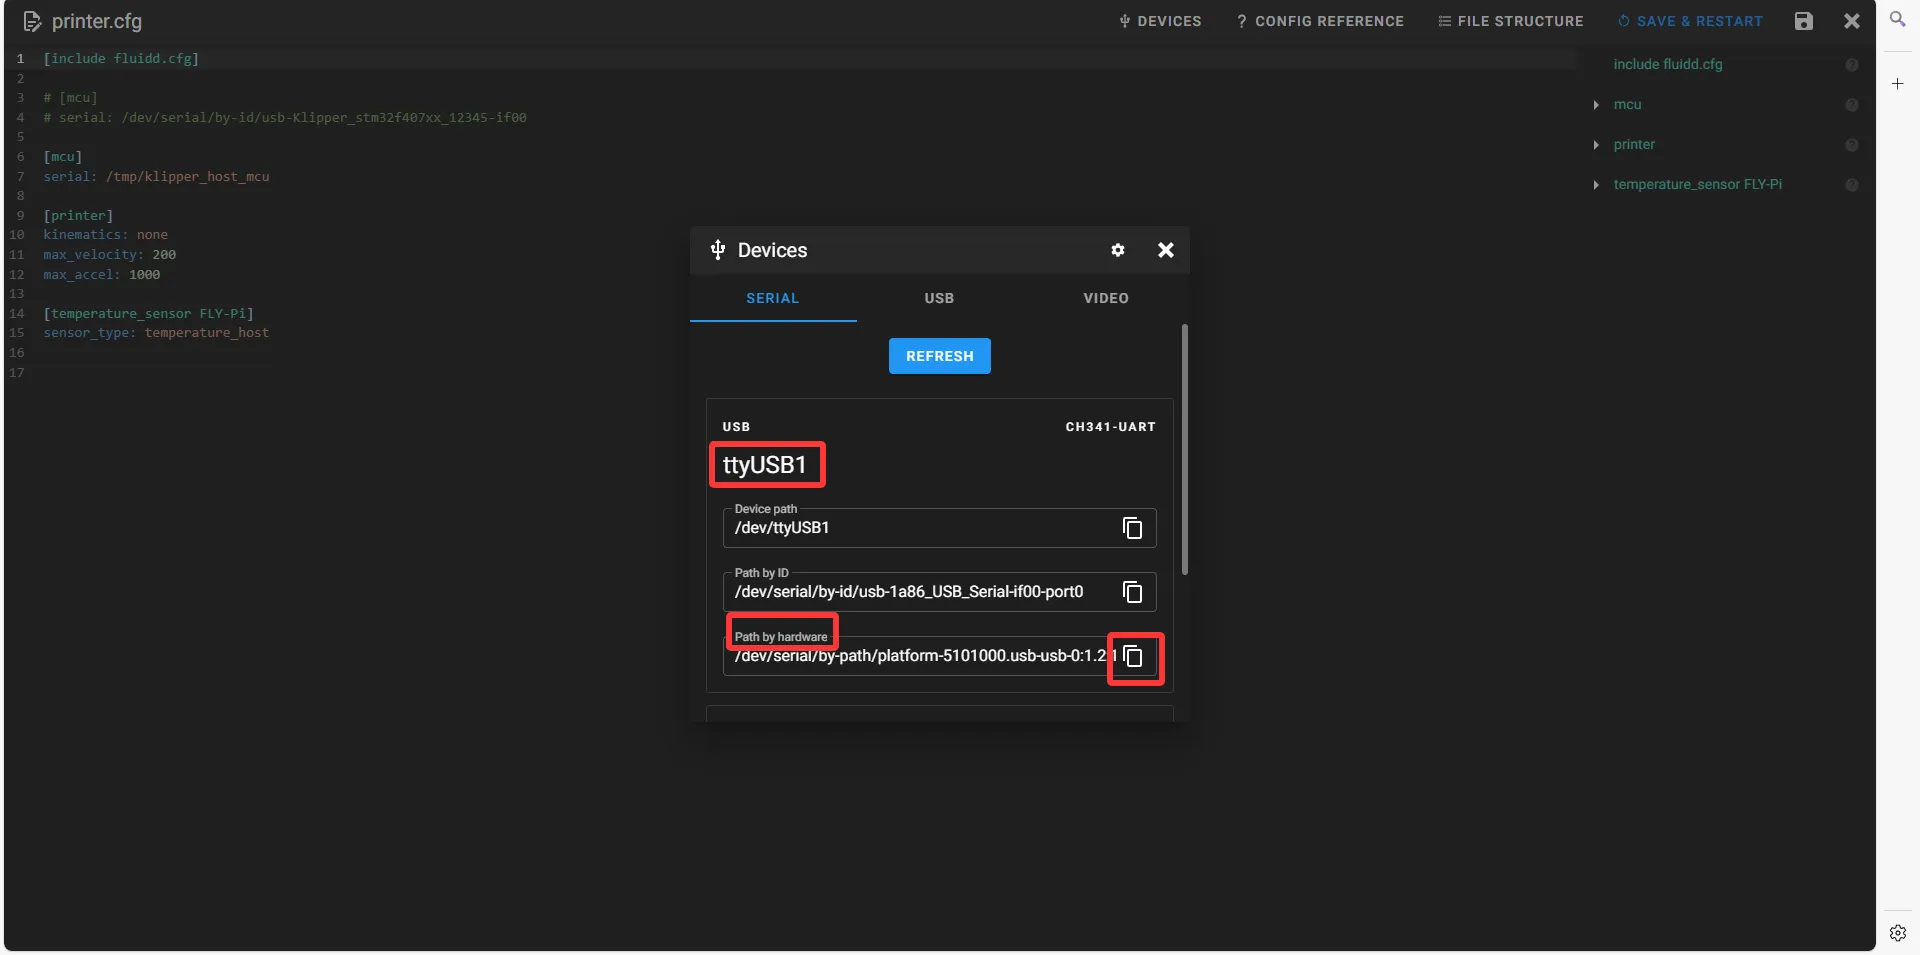
Copy the ID; click on the arrow to copy.
- In fluidd, check if
ttyUSBexists, and ensurePath_by_hardwareexists; this is the RS232_ID.
- In mainsail, check if
ttyUSBexists, and ensurePath_by_hardwareexists; this is the RS232_ID.
- In fluidd, check if
Fill in the RS232 ID
- Close
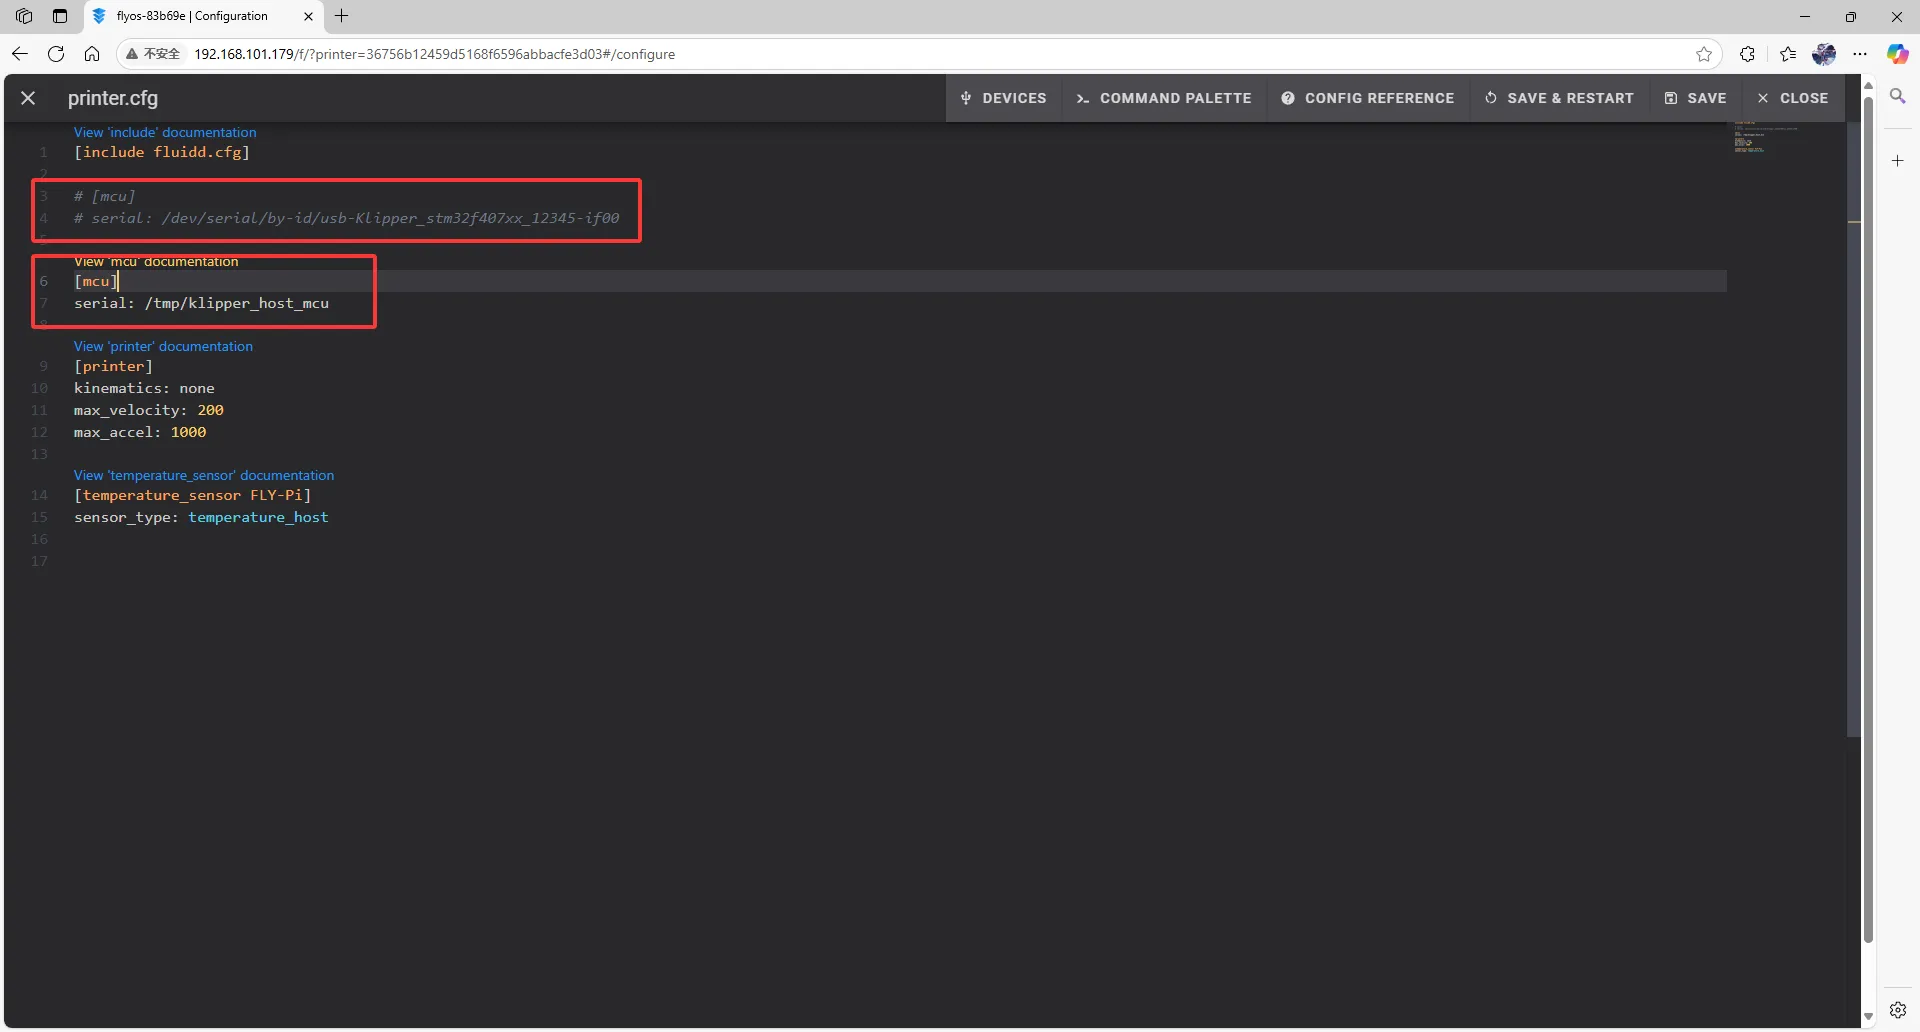
DEVICESand fill in the ID.
Note
[mcu <Tool Board Name>]
serial: <Replace this with the ID you just looked up>
baud: 250000
restart_method:command
 |
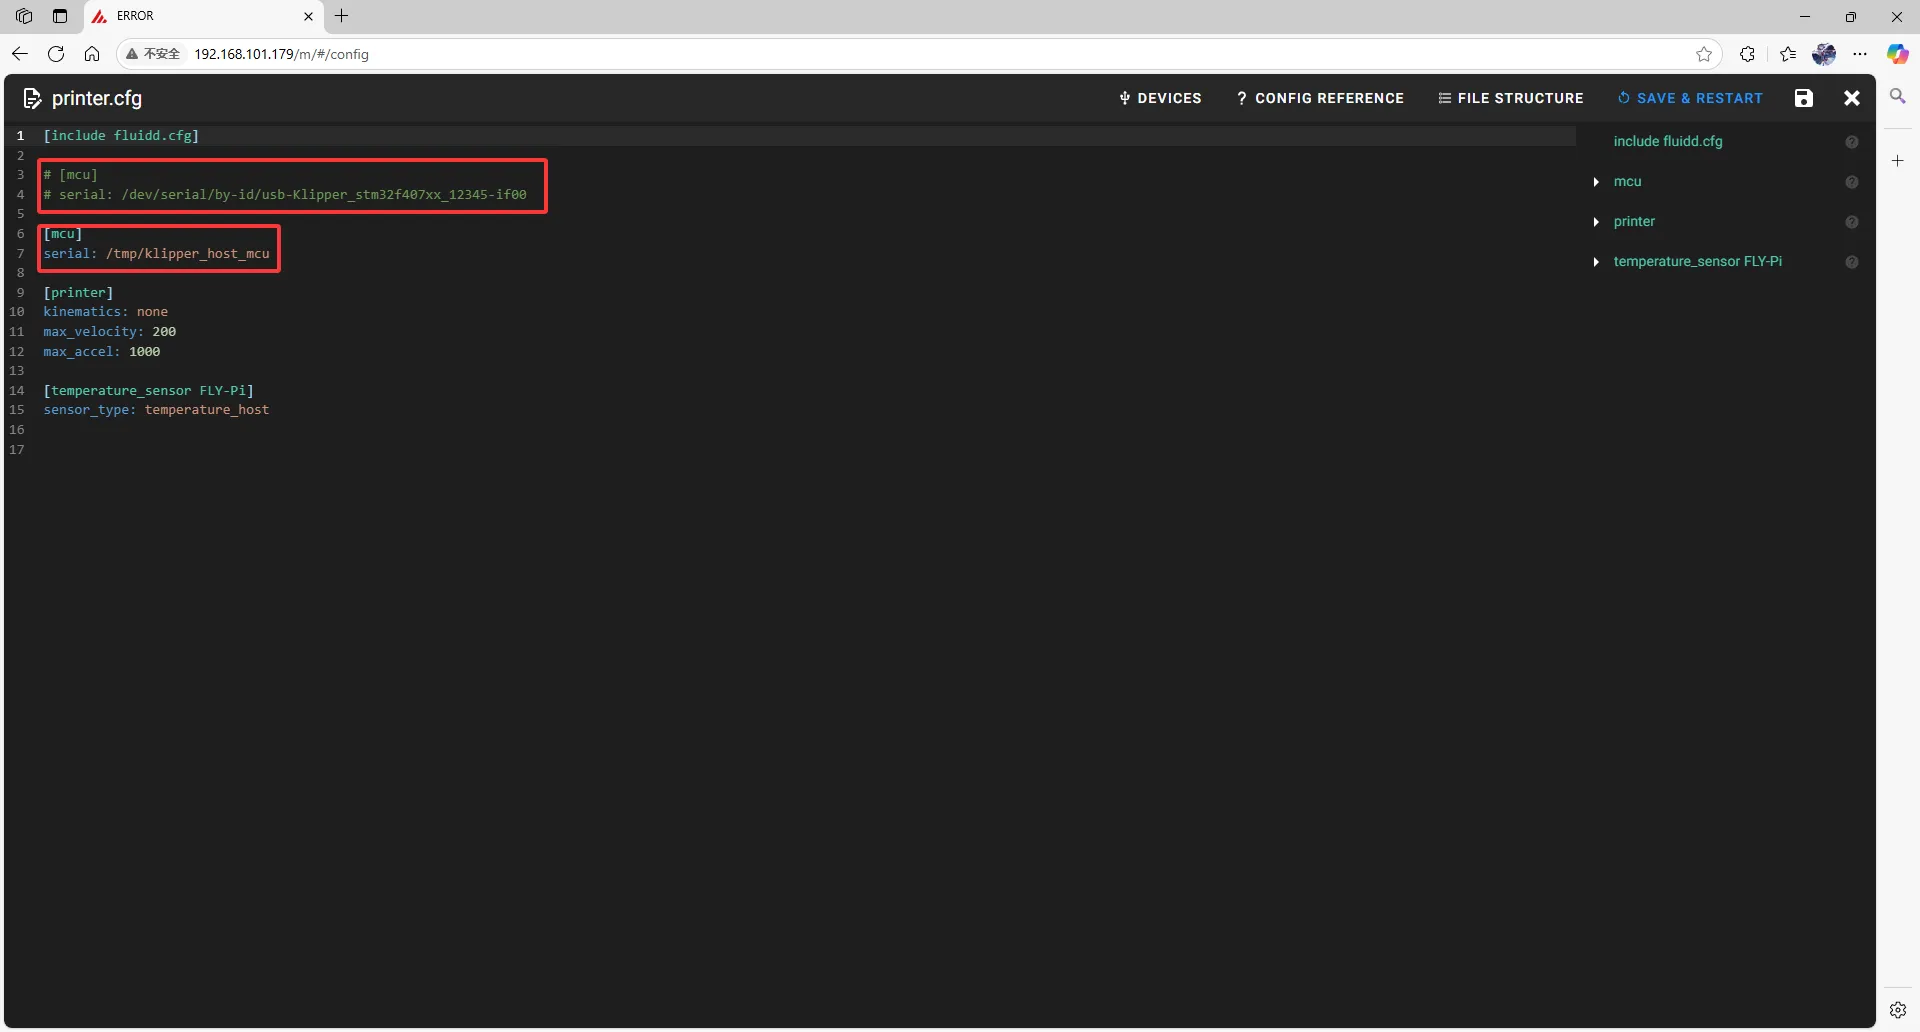 |
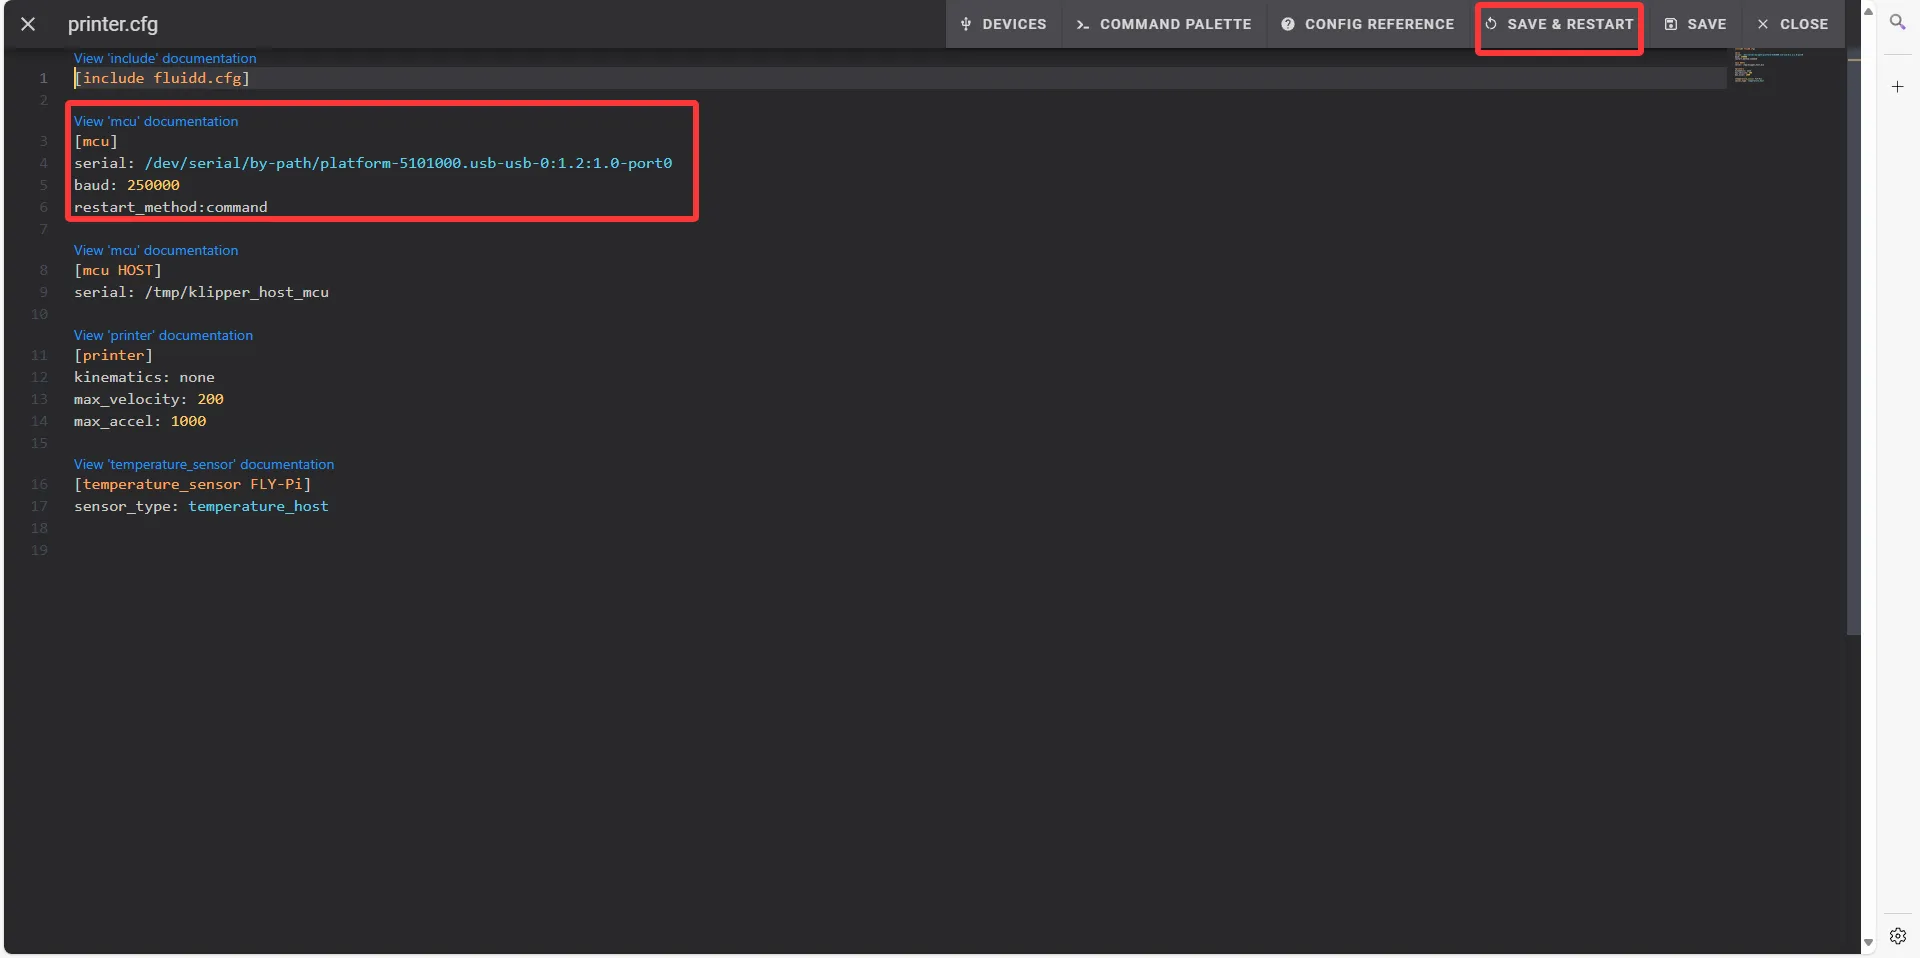
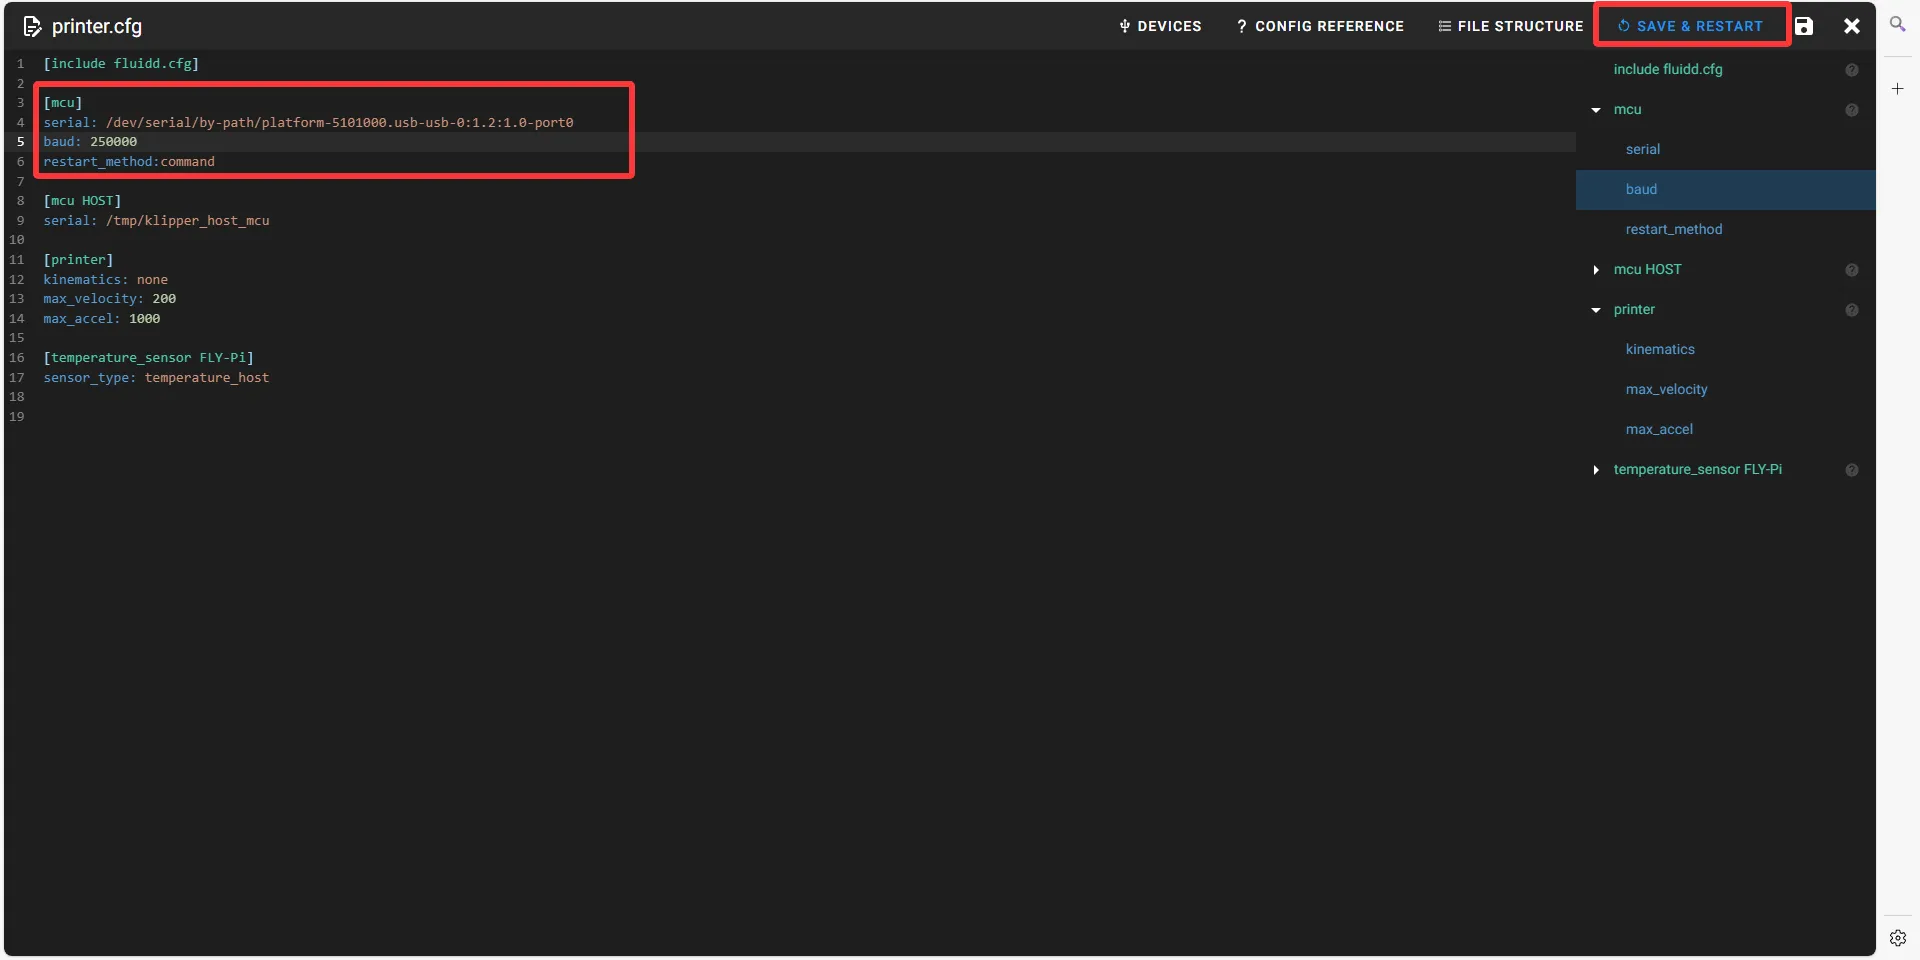
- Fill the ID into the configuration.
tip
- After filling in the ID, click
SAVE & RESTARTat the top right corner.
 |  |
- If Klipper prompts
ADC out of range, this is normal. Connect the heating bed and thermistor to the main board, configure the thermistor pins for the extruder and heating bed, then save and restart.
dangerous
Note: All IDs shown in this document are examples. Each main board has a different ID, so please fill in the actual ID you obtained.
dangerous
Please note that the ID below cannot be used!!!!
serial: /dev/serial/by-id/usb-1a86_USB_Serial-if00-port0
Loading...