Firmware Compilation
Start Compiling
- A host machine with the installed
klipperservice is required Connect via SSH over the network - Make sure the device is connected to the host machine
- Note: Please use a regular host machine, such as a Raspberry Pi FLY board, etc. If it's a modified host machine (e.g., WiFi stick, Redmi, etc.), due to too many issues, we cannot provide technical support for these machines
- To switch from the
ROOTuser to a regular user, you can enter the command below - Do not use the
ROOTuser - For the fly user, you can directly enter:
su fly. For non-fly users, please replace<your host machine username>with your host machine's username!
su <your host machine username>
::: tip
- Please ensure that the host machine can connect to the network normally.
- Before compiling the firmware, use SSH to log in to the host machine via the network.
- Do not use a serial port tool to log in to the host machine.
:::
Klipper Firmware Compilation and Configuration Page Operation Instructions
::: tip
Please make sure that the keyboard input method is in half-width mode, i.e., English mode.
:::
- The key
↑(up arrow) and↓(down arrow) on the keyboard are used to move the cursor up and down to select menu items. - The confirm key
Enteror spacebarSpaceis used to check the menu or enter a sub-menu. - The exit key
ESCis used to return to the previous menu. - The
Qkey is used to exit the Klipper firmware configuration page. - When exiting the Klipper firmware configuration page and there is a prompt, press the
Ykey to save the configuration file.
::: warning
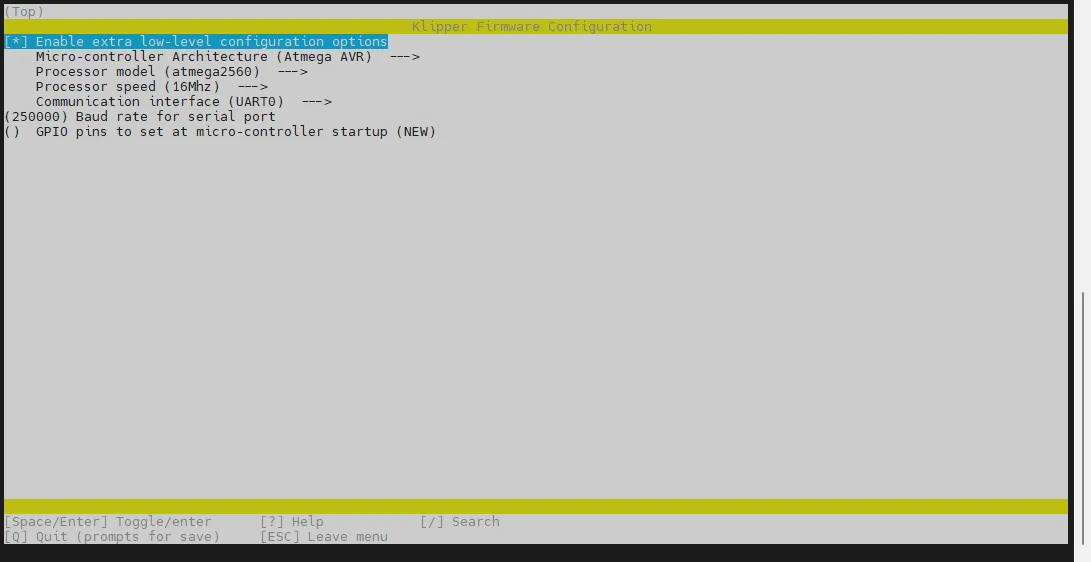
If there are fewer options in the configuration page, please first check [ ] Enable extra low-level configuration options to display some hidden options.
:::
Below is the introduction on how to compile the firmware:
-
After connecting to SSH, input the following command and press Enter:
cd ~/klipper && rm -rf ~/klipper/.config && rm -rf ~/klipper/out && make menuconfig -
Among them,
rm -rf ~/klipper/.config && rm -rf ~/klipper/outis to delete previous compilation data and firmware, andmake menuconfigis to compile the firmware. After execution, the following interface should appear: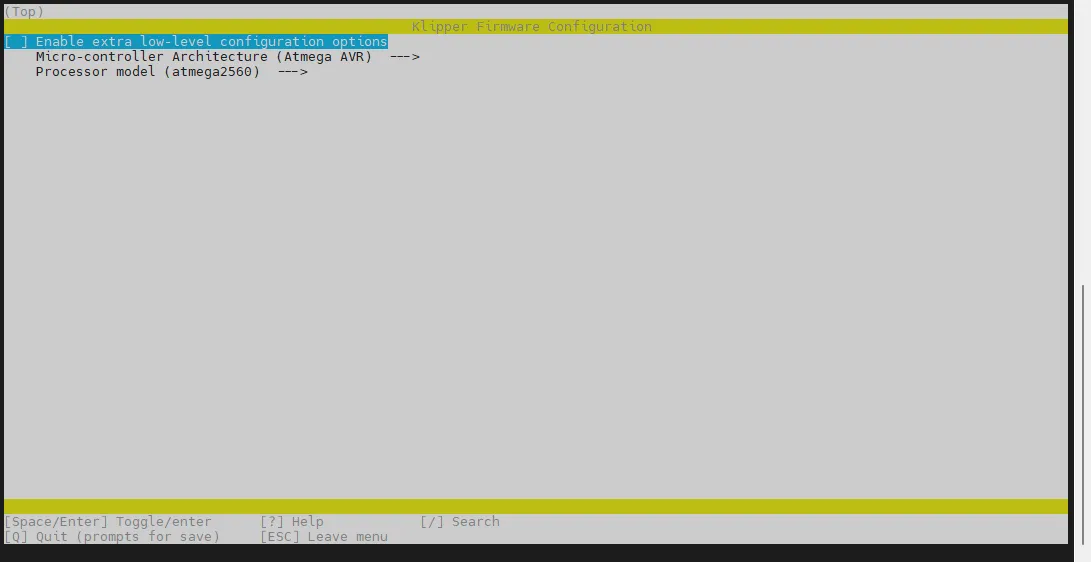
-
Select Enable extra low-level configuration options and press Enter
-
Enter the menu Micro-controller Architecture then select Raspberry Pi RP2040/RP235x and press Enter
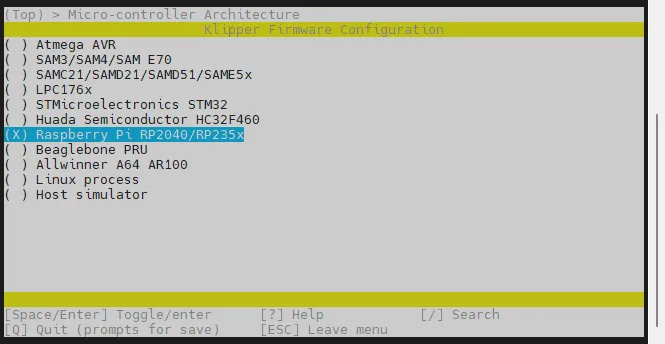
-
Select Bootloader offset, choose: NO bootloader

-
Communication interface, choose: USBSERIAL
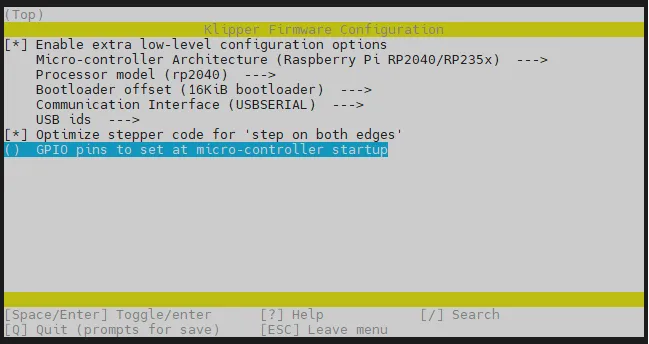
- Press the
Qkey, and Save configuration appears, then pressYkey
- Now the configuration should be saved and you should return to the command line interface
- Enter the following command to start compiling, it will take some time
make -j4
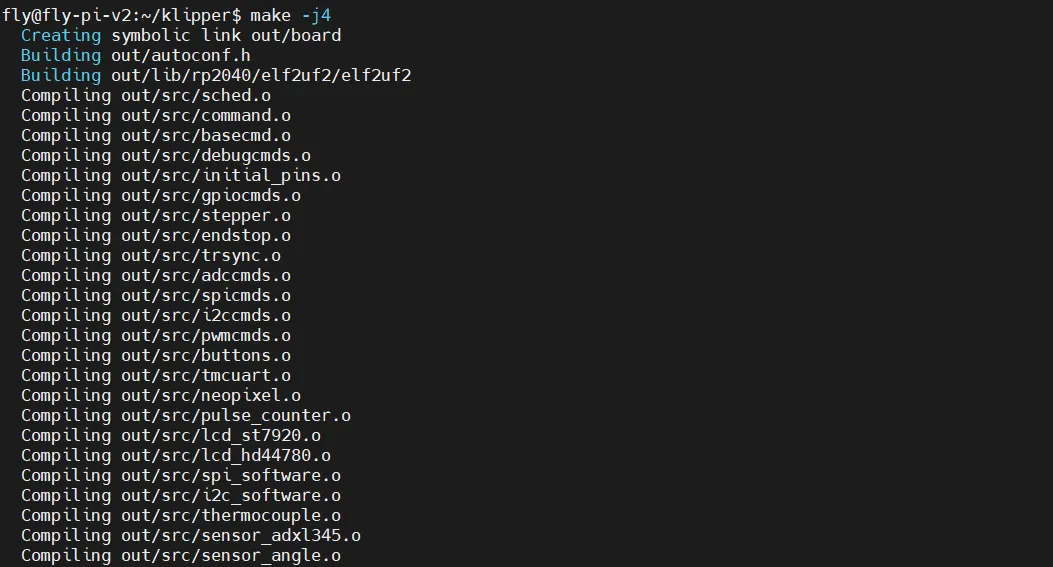
-
If the following content is output, the compilation is successful
Linking out/klipper.elf
Creating uf2 file out/klipper.uf2
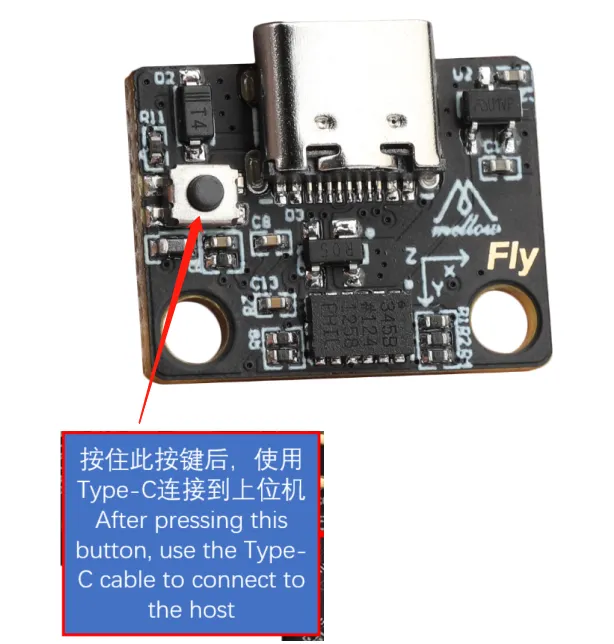
Enter Flashing Mode
The circled area is the BOOT button
- To enter flashing mode, the mainboard must be completely powered off. Press the BOOT button and connect one end of the data cable with data transfer capability to the mainboard and the other end to the host computer
Confirm Whether Entering Flashing Mode
- Please ensure that the host machine can connect to the network normally, and ensure that the data cable connecting the peripheral machine to the host machine has data transmission function.
- After SSH connecting to the host machine, enter
lsusband press Enter. If the information circled in the following image is displayed, you can proceed to the next step.- If there is no feedback information, this indicates a system issue with the host machine, and we are unable to help. You need to replace it with a confirmed normal system or replace the host machine.
- If the prompt says there is no
lsusbcommand, you can execute the following command to install it:sudo apt-get install usbutils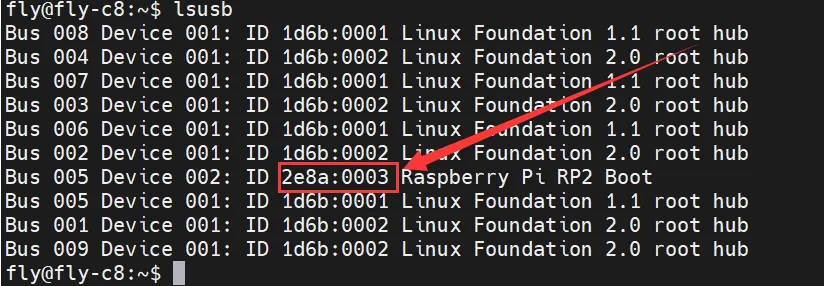
2e8a:0003belongs to the device you will be using this time. The suffixRaspberry Pi RP2 Boothas some reference value but is not used as a basis for judgment.- Some host machines may display incompletely or not at all due to system issues.
- If entering the
lsusbcommand displays the device but does not show2e8a:0003, please try replacing the data cable and attempt to connect the motherboard to another USB port on the host machine.
You can only proceed to the next step when there is 2e8a:0003.
Flashing the Firmware
- Please note that the current toolboard is in firmware burning mode and can only burn firmware with a .uf2 suffix.
- Use the following command to burn the firmware to the toolboard.
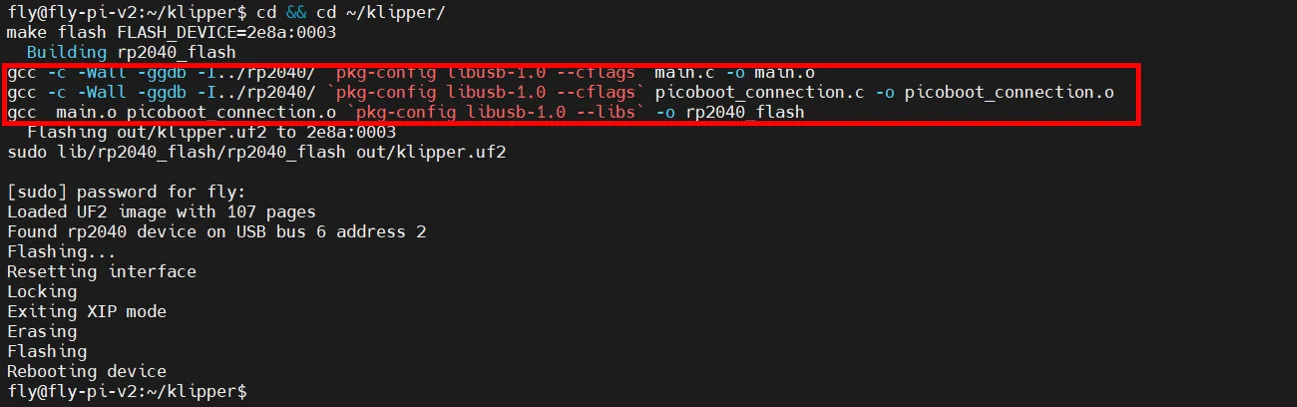
cd && cd ~/klipper/
make flash FLASH_DEVICE=2e8a:0003
If this is the first burn after writing the system with the host machine, you may see a prompt similar to the one circled in red below — partial red prompts are normal and not an error.