Mainboard ID reading and viewing
Do not modify the configuration when opening the web page for translation
Do not modify the configuration when opening the web page for translation
Do not modify the configuration when opening the web page for translation
- CANBus UUID acquisition
- RS232 ID acquisition
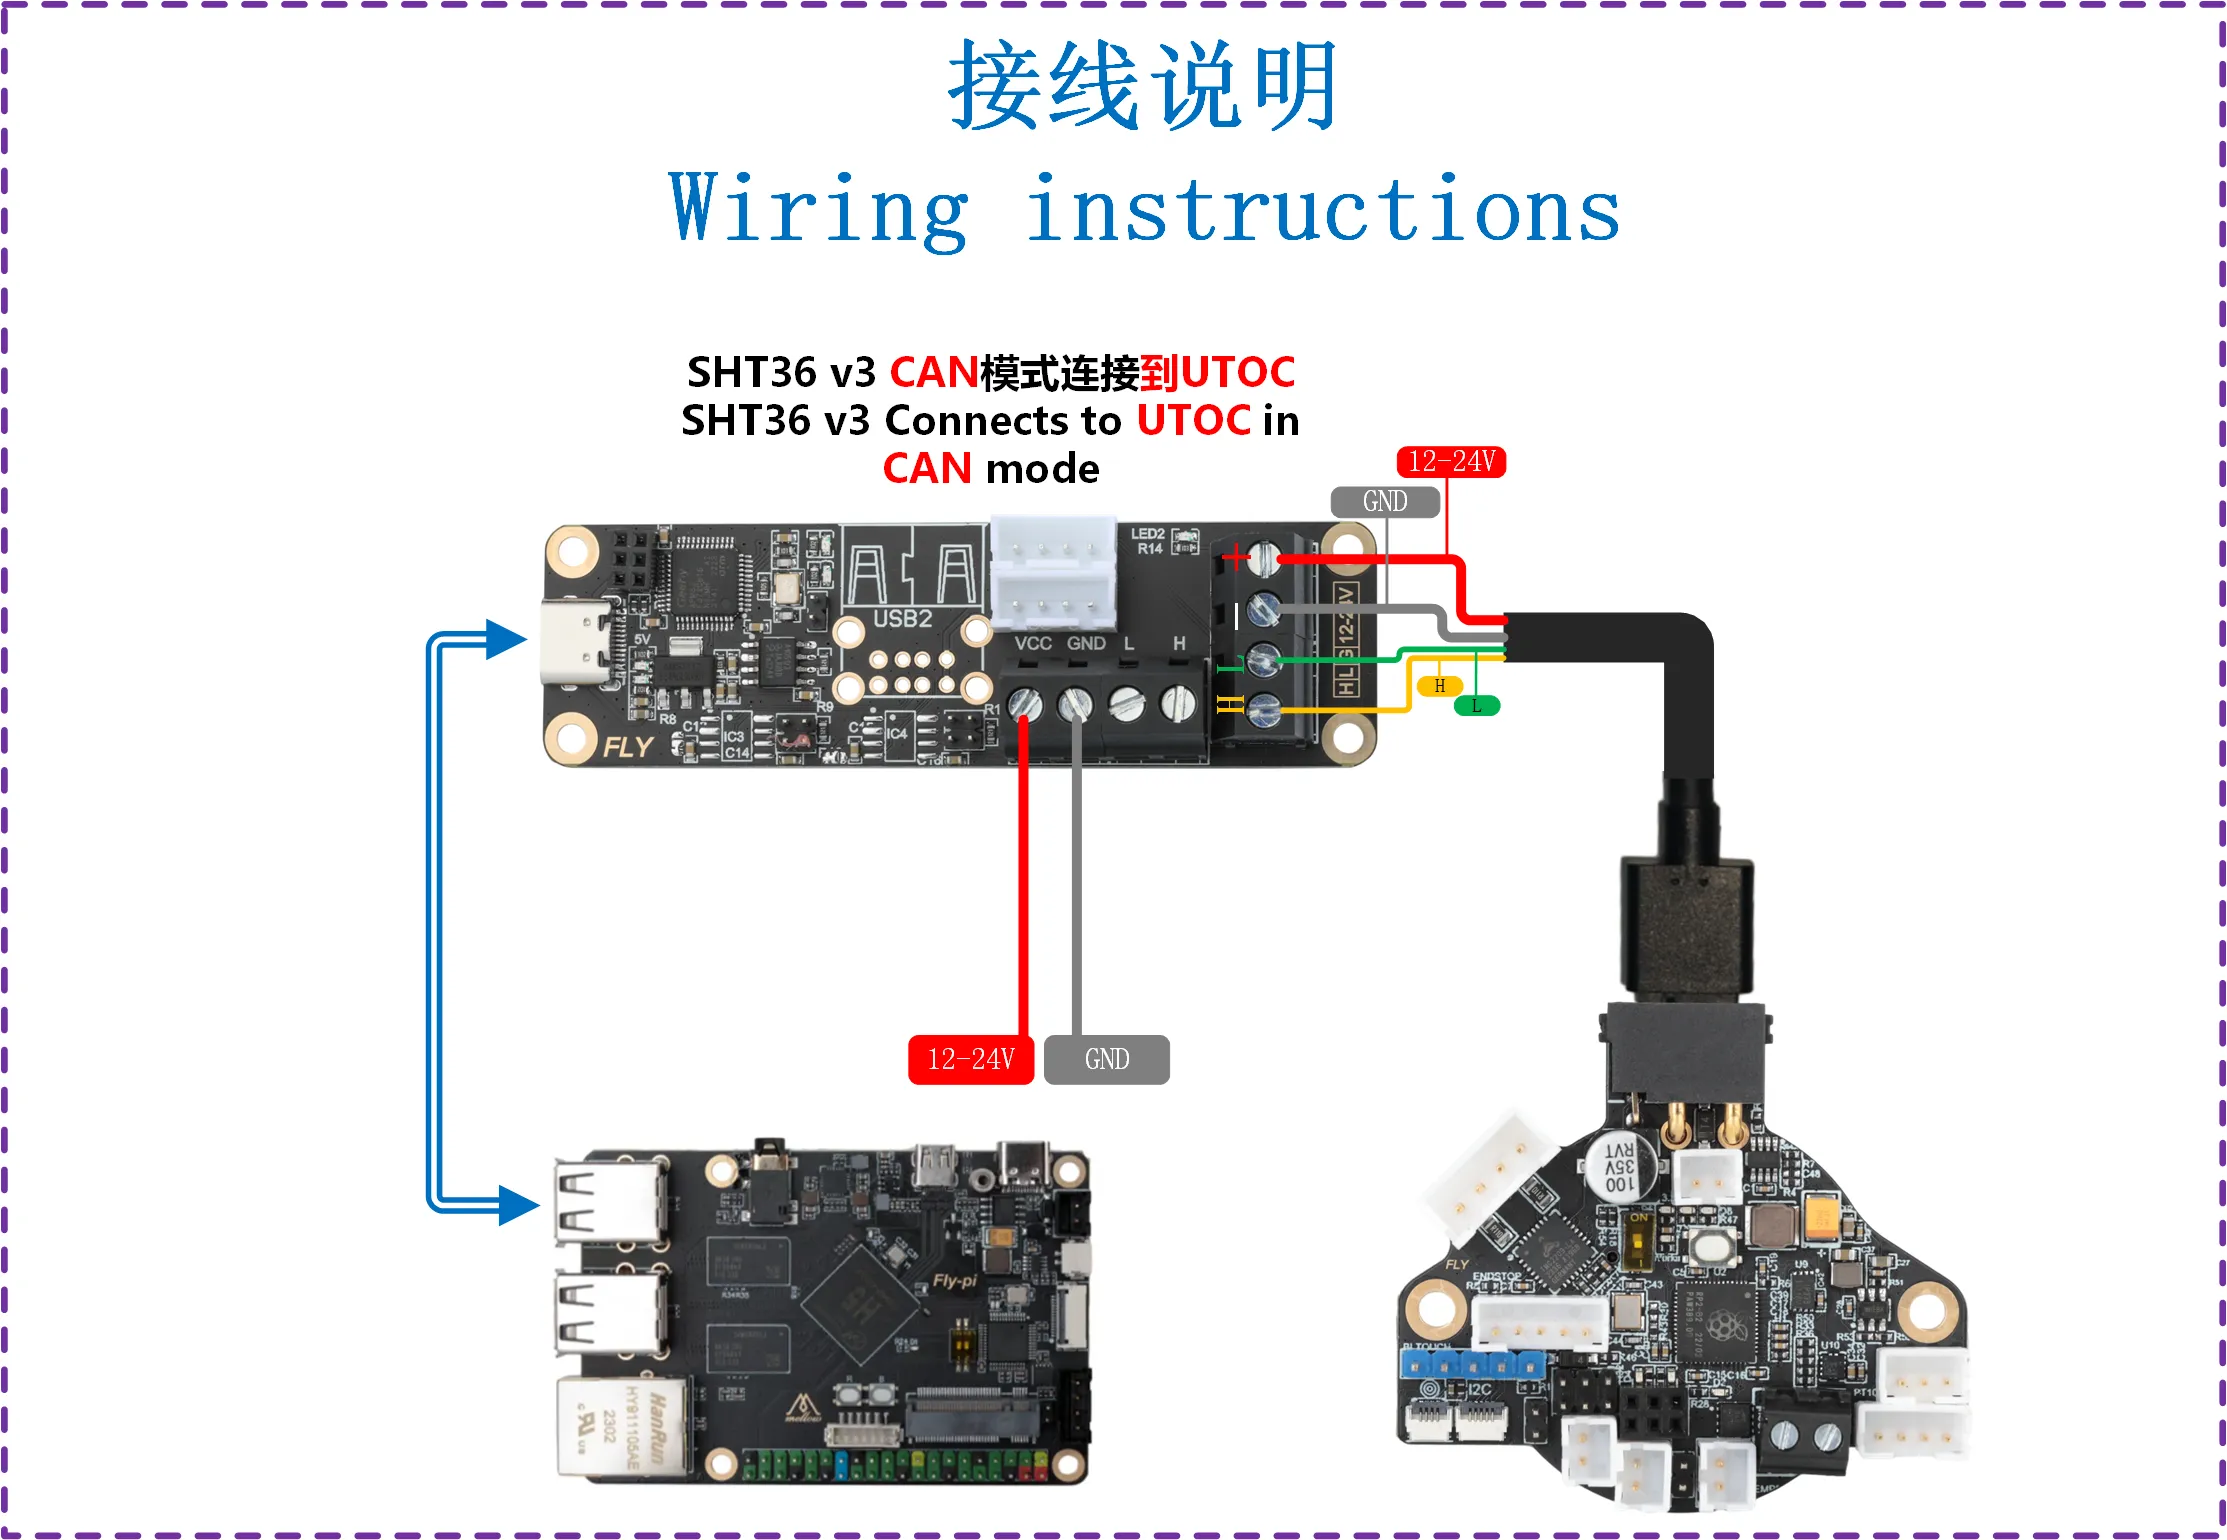
- Connect the tool board to UTOC or a mainboard with bridge firmware using an XT30 data cable before searching for the ID. The following is a reference wiring diagram.
- Please check if the dip switch is set to the correct position
- Make sure that the resistance of CAN H and CAN L is around
60Ωwhen powered off. If it is120Ω, you need to turn on the120Ωdip switch. If it is around40Ω, you need to turn off the dip switch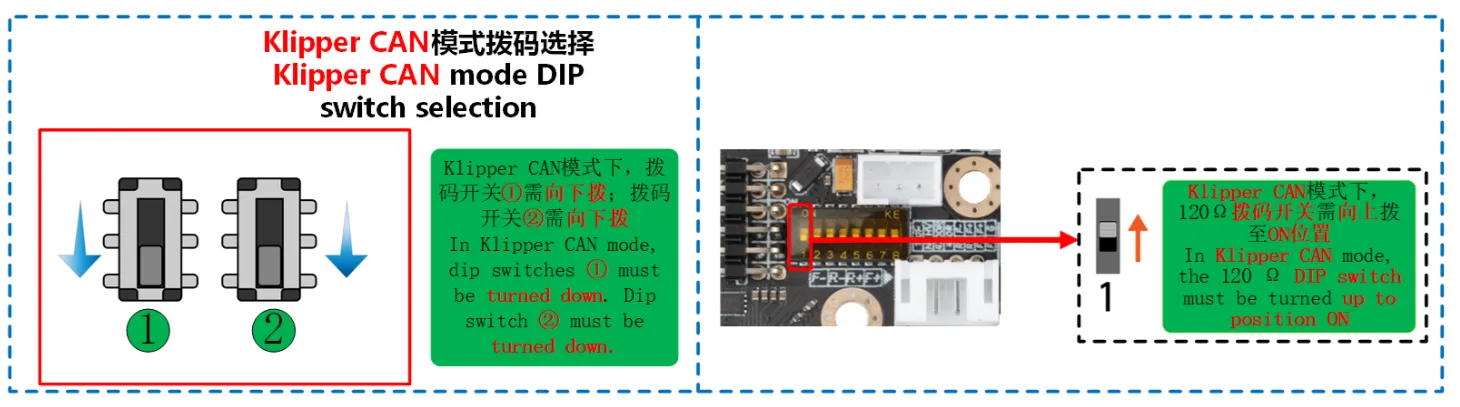
CAN Configuration and ID Search
- If you need to use CAN, make sure your host computer has performed CAN configuration
NotesMake sure the mainboard is connected to the host computer before proceeding with the following operations
warningEnsure that the CAN network of the host computer, the CAN speed of the bridge mainboard, and the CAN tool board's speed are completely consistent
Precautions Before Searching for Devices
- Before searching for CAN ID, please connect to SSH
- Please note that you need to log in to SSH via the network, not via the serial port
- Make sure you have connected the UTOC or flashed the CAN bridge firmware on the mainboard, and ensure that the data cable connected to the host computer has data transmission functionality
Search for Devices
- Now that you have successfully logged in to the host computer, you can enter
lsusbto search for devices, which will result in one of the following situations- Entering
lsusbprompts that thelscommand is not found, then you can enter the following command to install the commandsudo apt-get install usbutils - Entering
lsusbresults in no response, this is a system issue, we cannot do anything about it, you need to change the system or use a confirmed normal system - The information in the image below appears, please note that this is just a reference. You only need to confirm that
1d50:606fappears
- Entering
1d50:606fis the device you need to use this time- If there are multiple
1d50:606f, it is recommended to exclude one, otherwise it may affect subsequent burning and firmware connection. For example,FLY MINI PADis recommended to use the built-in UTOC instead of other CAN bridge devices - If not, please check yourself whether the data cable is connected properly and whether the firmware is flashed correctly.
NotesYou can only search for CAN ID when there is
1d50:606fSearch for CAN ID
- Enter the following command to search for ID
~/klippy-env/bin/python ~/klipper/scripts/canbus_query.py can0- FAST system uses the following command
python ~/klipper/scripts/canbus_query.py can0- If an ID appears and the
Application:at the end showsKlipper, it means this ID can be used directly - If an ID appears and the
Application:at the end showsCANBOOTorKatapult, it means the firmware needs to be flashed before it can be used
CAN Problem Collection
Notes- If you cannot find the CAN ID, please see the following document
- CAN Problem Collection
Enter the CAN ID into the configuration
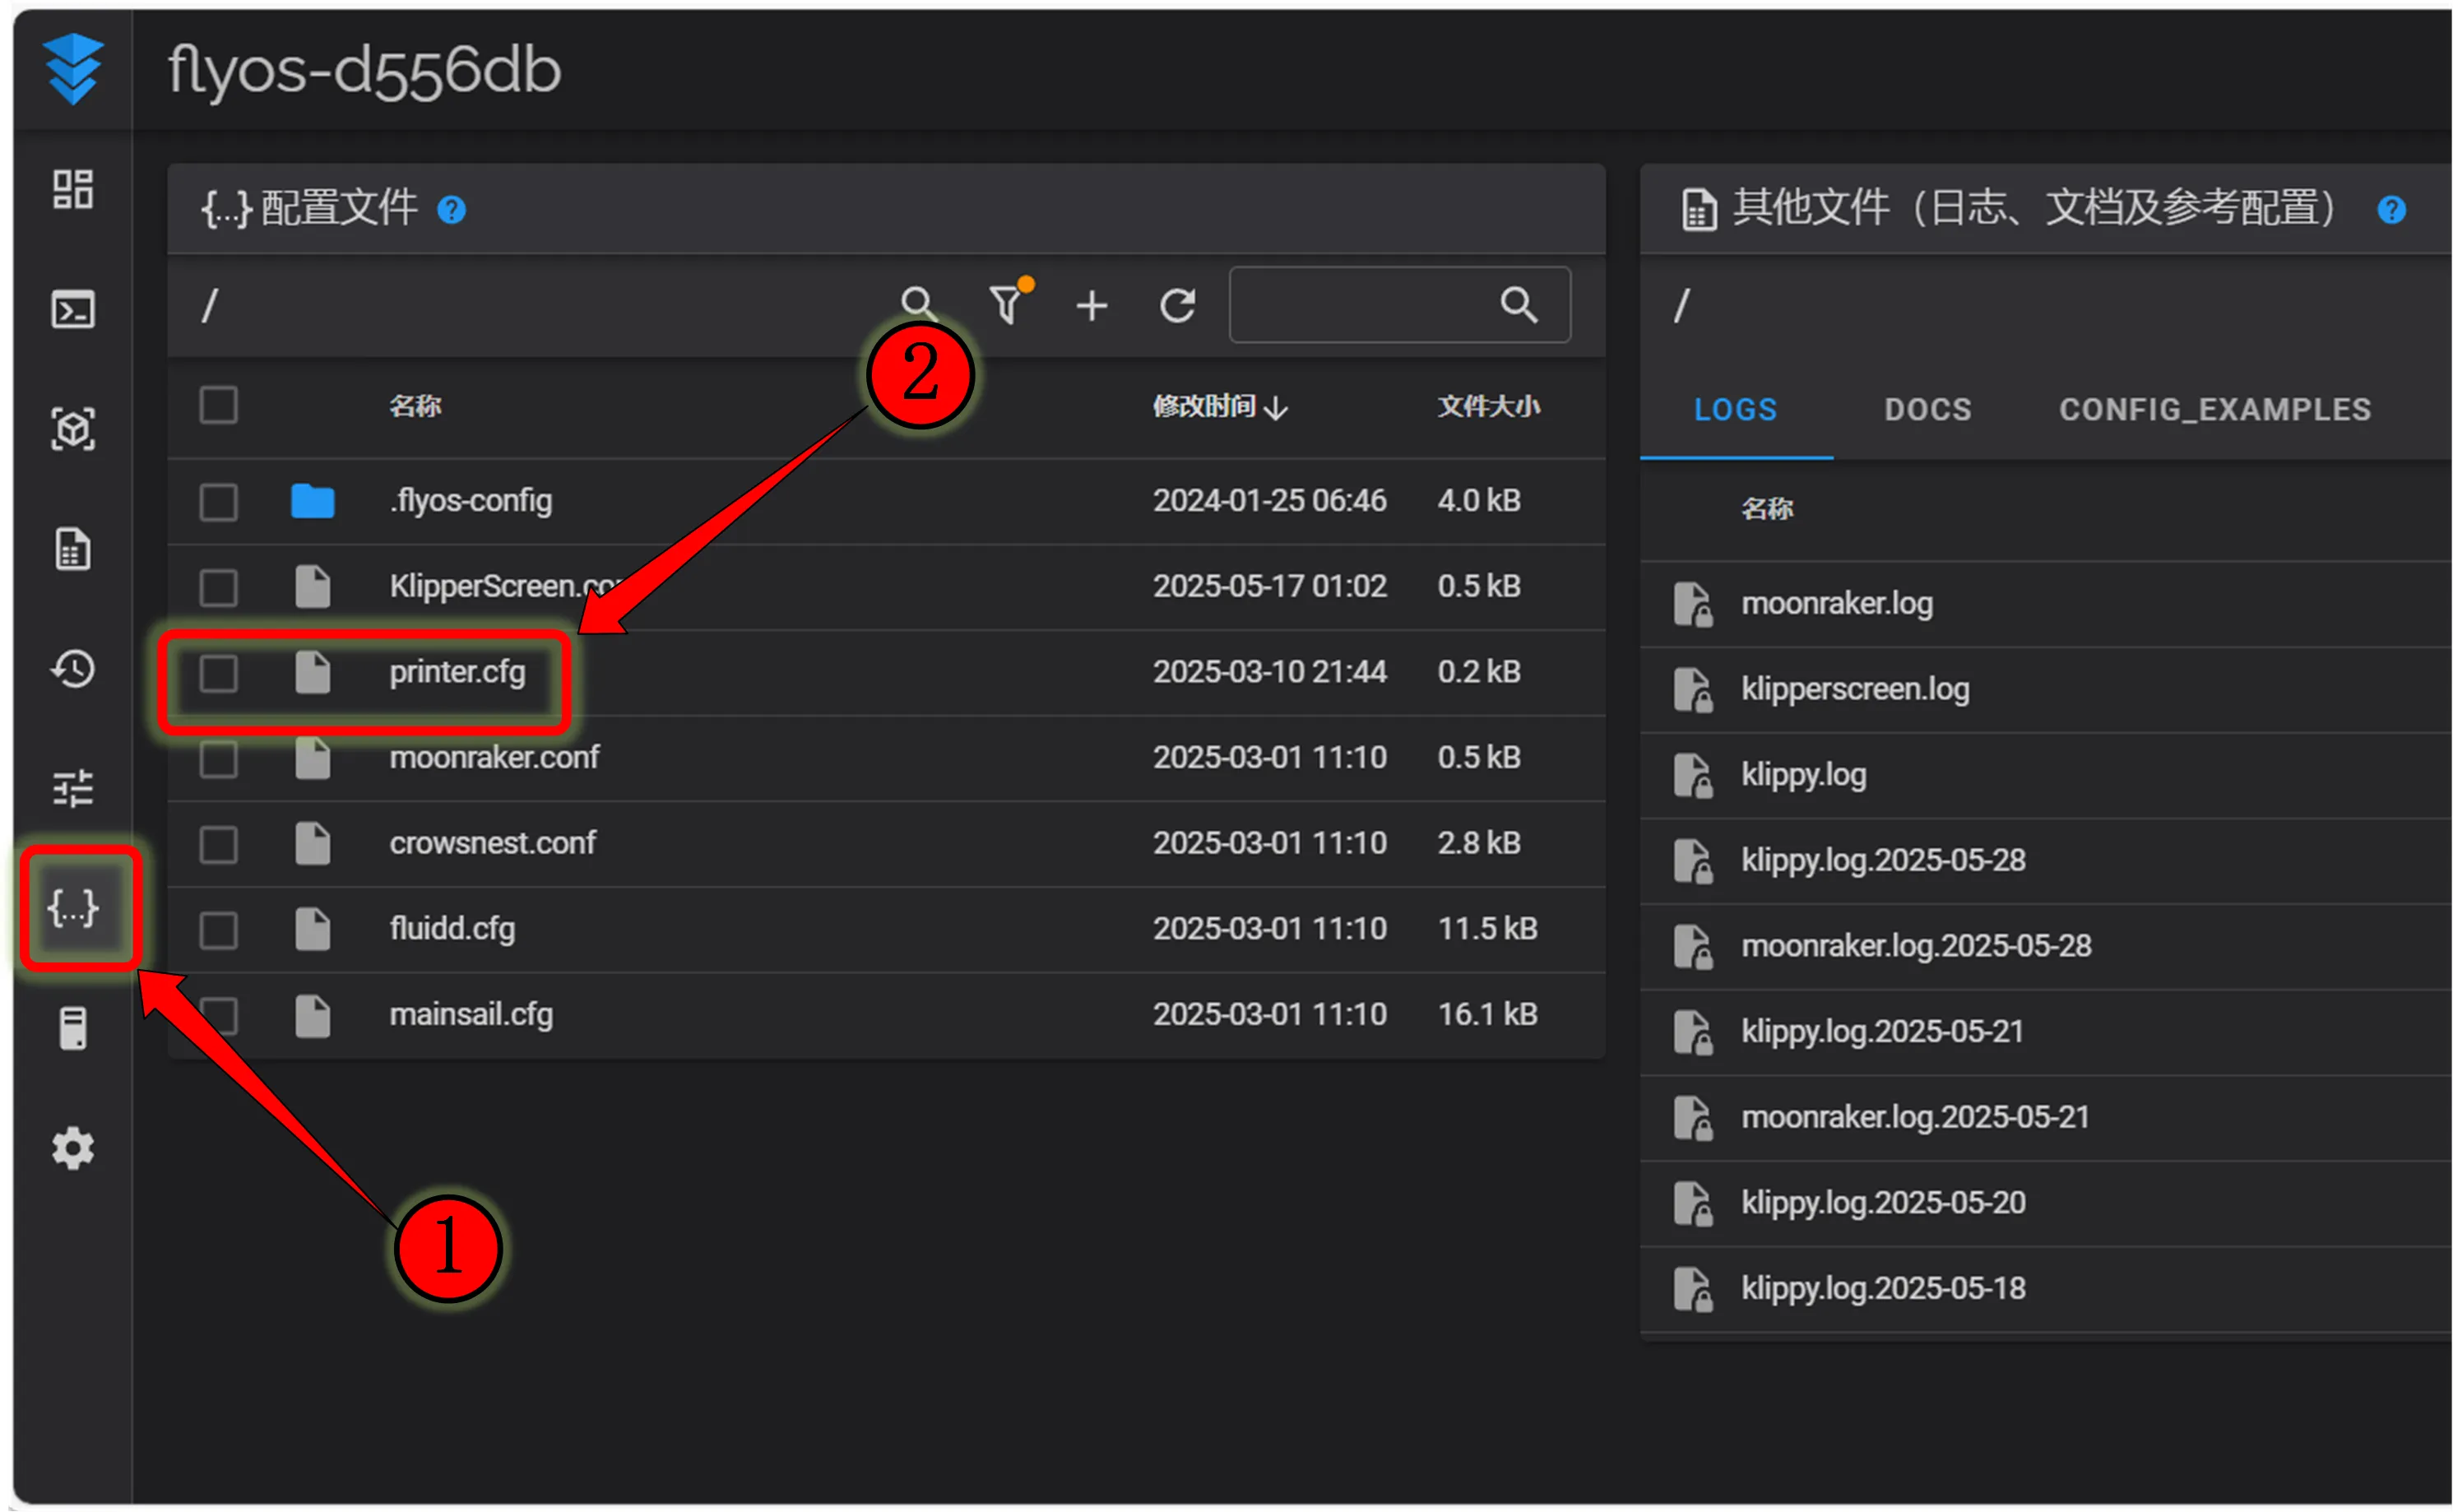
- Fluidd is:
{…}, click to enter, you can findprinter.cfg
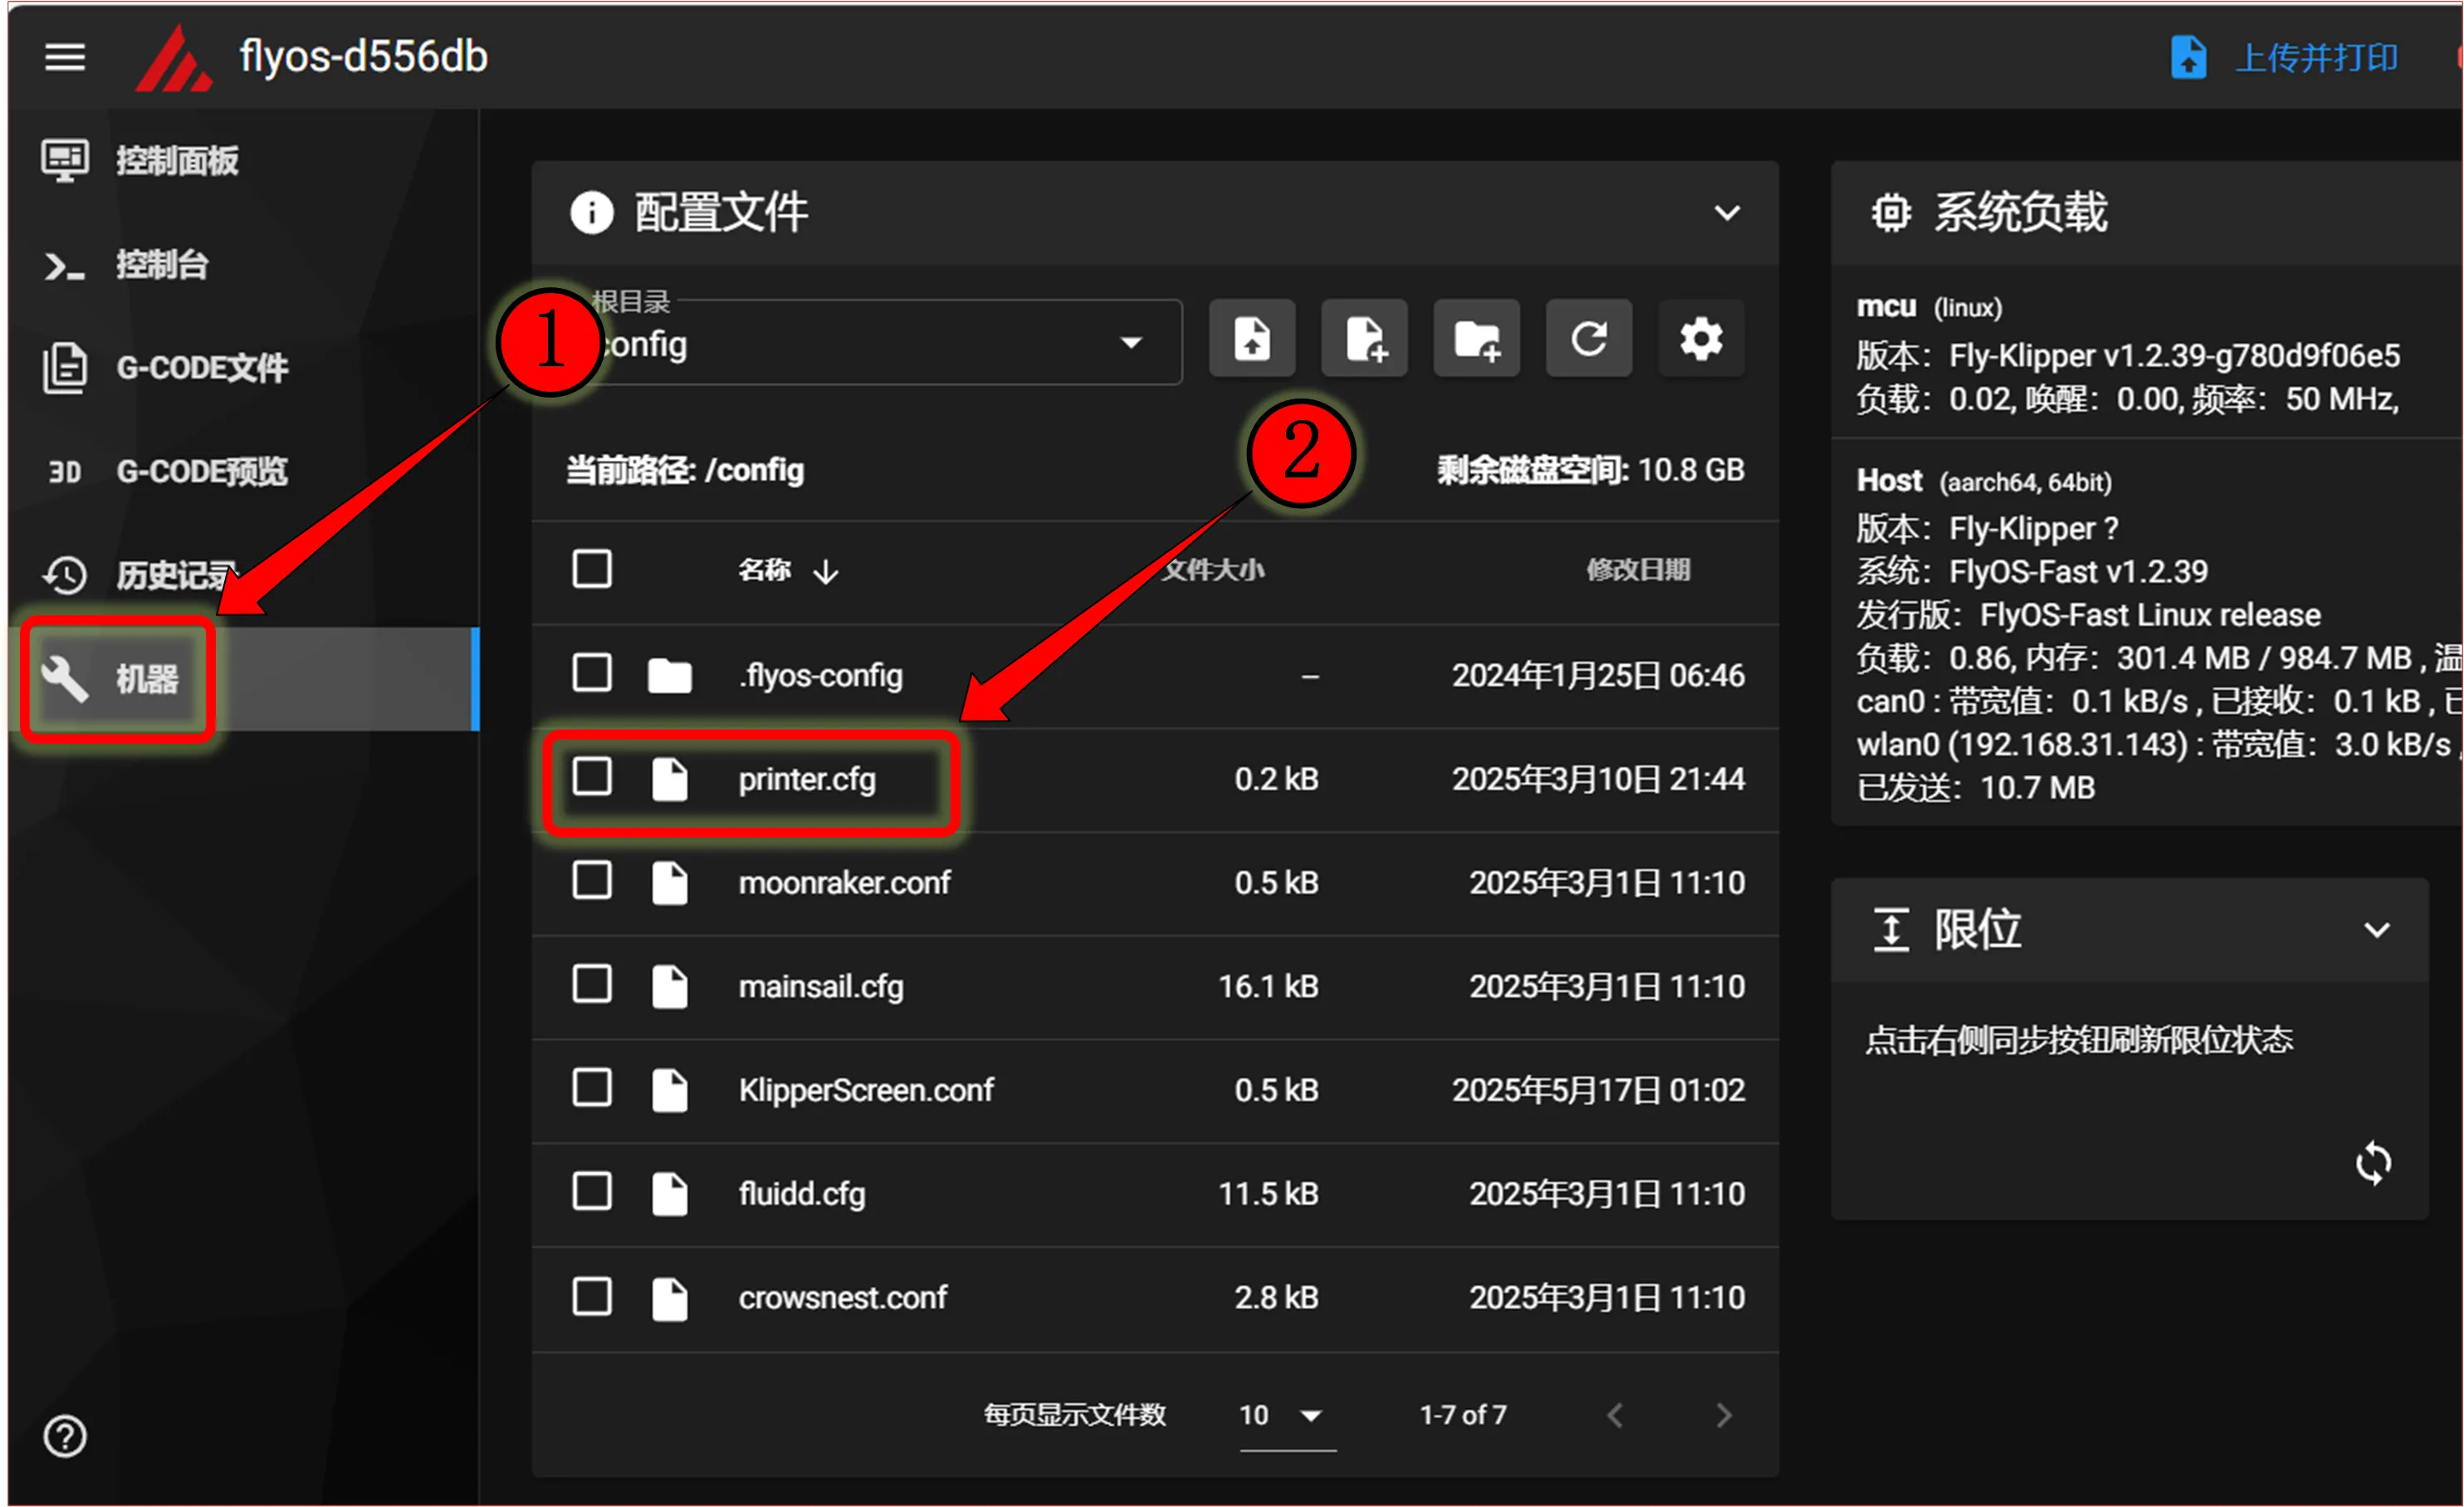
- Mainsail is:
machine, click to enter, you can findprinter.cfg
-
Copy the queried UUID and enter it into the
canbus_uuid:node under the[mcu]section in theprinter.cfgconfiguration. After saving and restarting, the mainboard can be connected. If Klipper indicates that the firmware needs to be updated, ADC error etc., it means Klipper has already connected to the mainboard -
If
Application:shows Canboot, it cannot be configured into the configuration, and you need to flash the Klipper firmware to proceeddangerousNote: All IDs mentioned in the document are examples. The actual ID of each mainboard is different. Please modify and fill in according to the actual obtained ID.
-
The following is a reference configuration
dangerous[mcu]
canbus_uuid: <Replace this with the ID you just queried>- The following is a reference configuration for a mainboard plus a toolboard
- If it is a mainboard ID, it must be
[mcu]pluscanbus_uuid:plus the ID you searched for - If it is a toolboard, it must be
[mcu toolboard name]pluscanbus_uuid:plus the ID you searched for

- Connect the tool board to UTOR or G2T using an XT30 data cable before searching for the ID. The following is a reference wiring diagram.
- Please check if the dip switch is set to the correct position
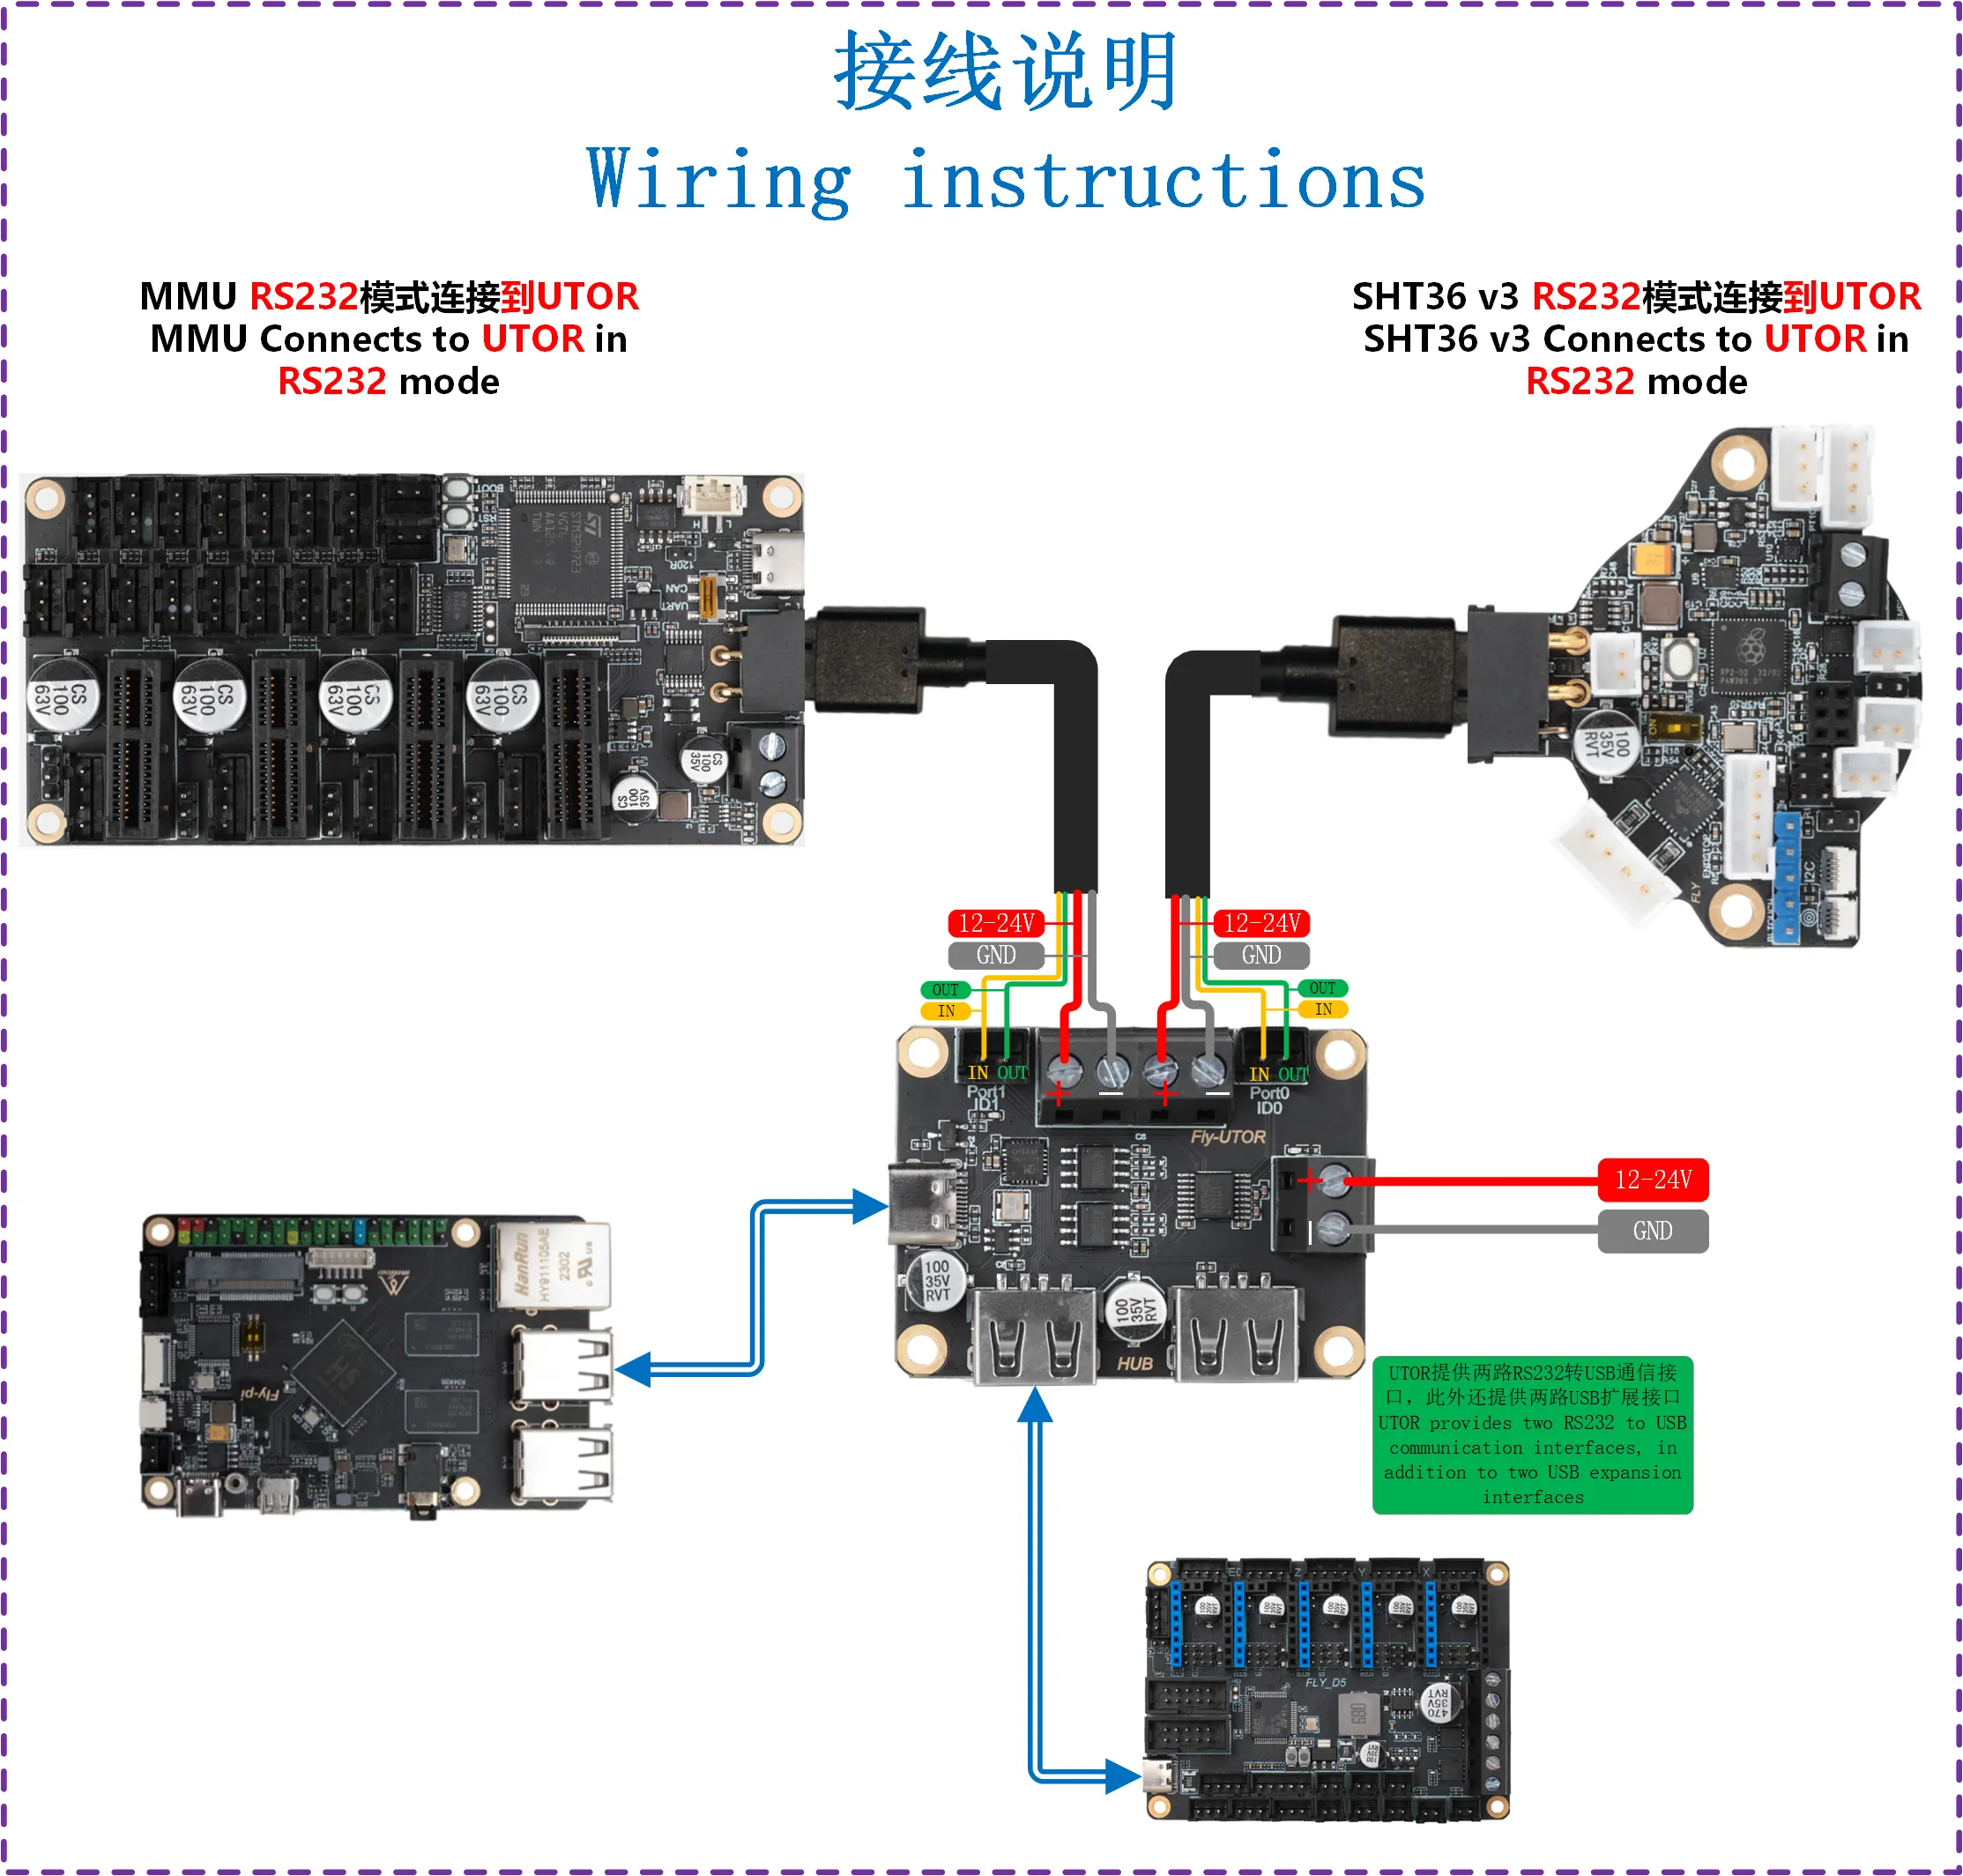
Search RS232 ID
Precautions before searching for devices
- Before searching for RS232 ID, please ensure the following conditions have been completed
- Please make sure the tool board has been burned with RS232 firmware
- Please make sure the tool board is connected to UTOR or G2T (if the mainboard has built-in RS232, please ignore this paragraph)
- Please make sure the tool board and the host are grounded!! This step is very important
Search RS232 ID
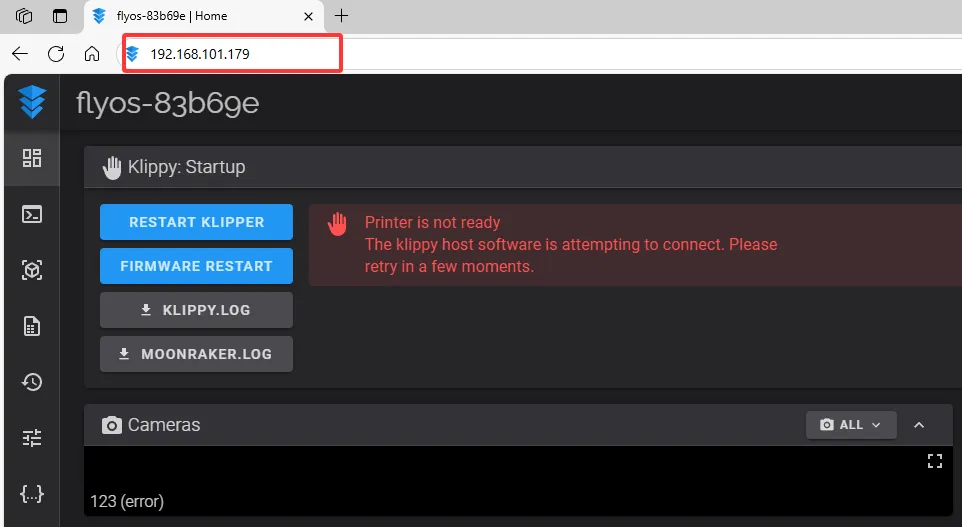
- Open the browser, enter the IP address of the host computer in the address bar, for example, my host computer IP is
192.168.101.179, just enter it and press Enter
- Open the WEB interface of the host computer, find in the configuration option on the left sidebar:
- fluidd is:
{…}, click to enter, you can findprinter.cfg
- mainsail is:
machine, click to enter, you can findprinter.cfg
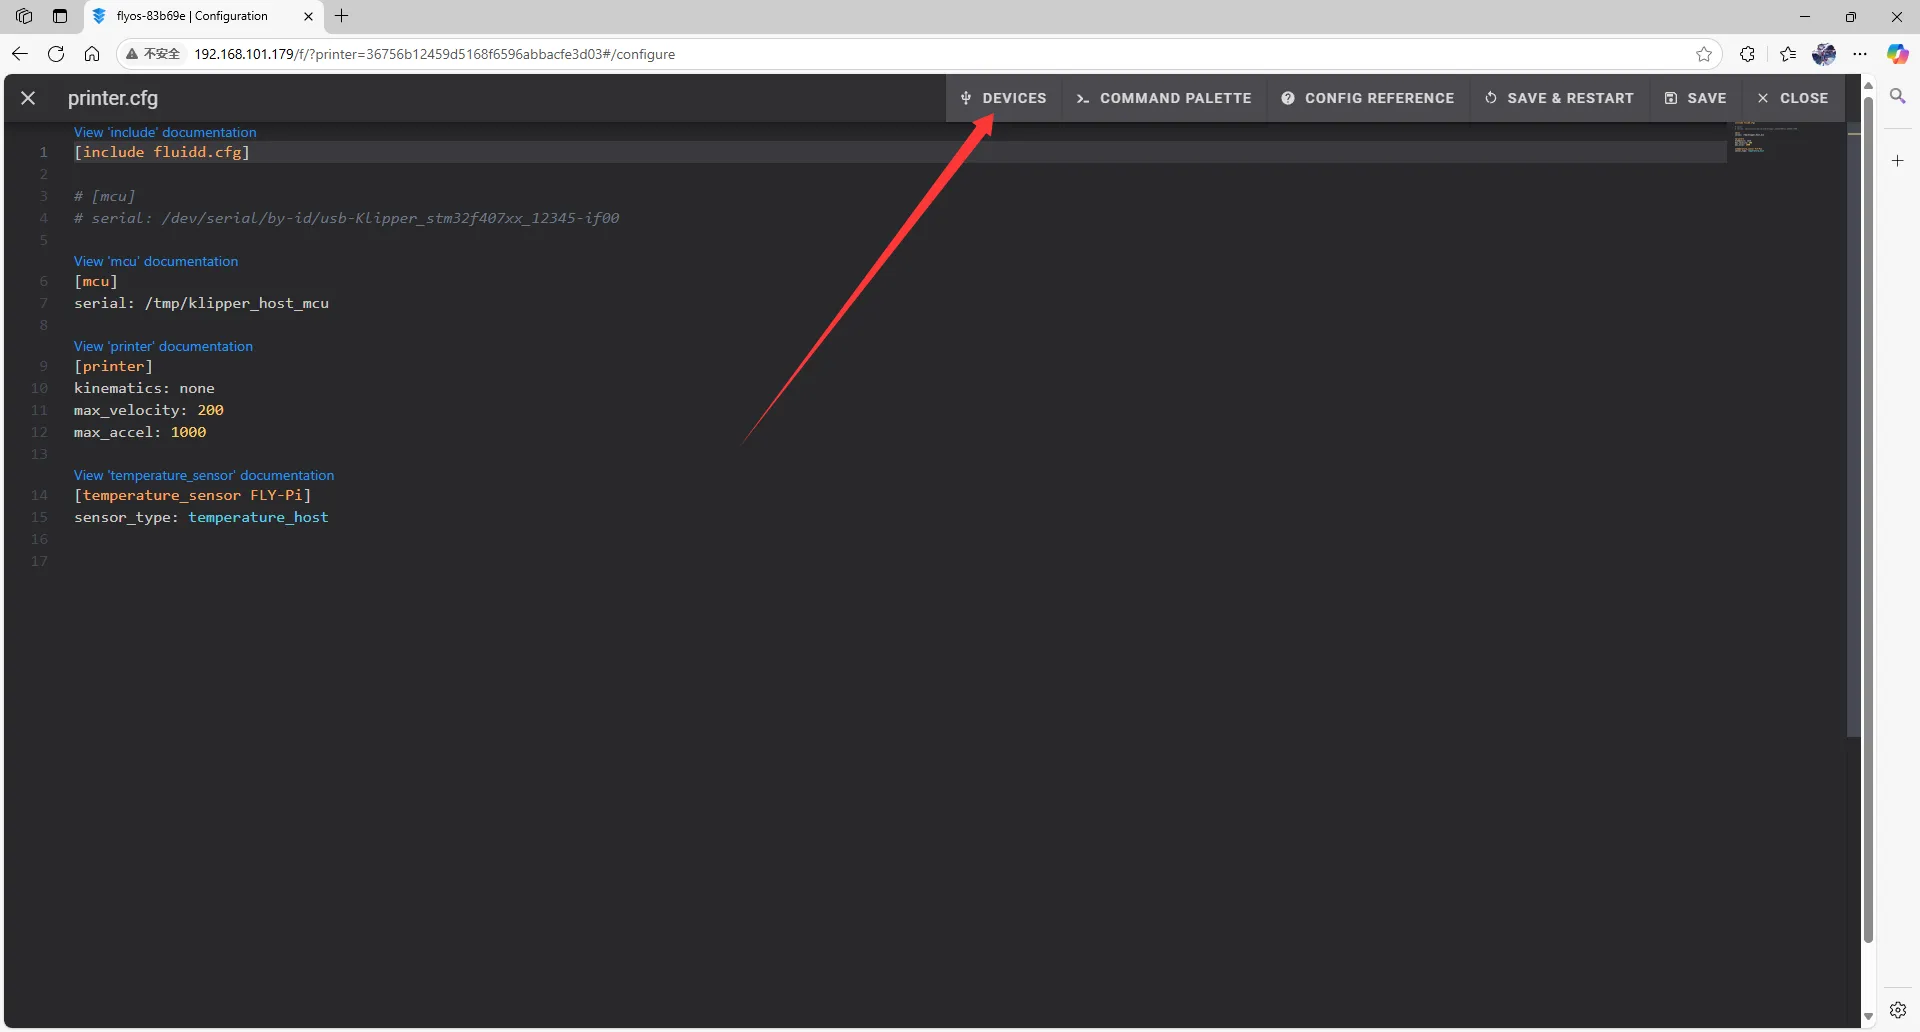
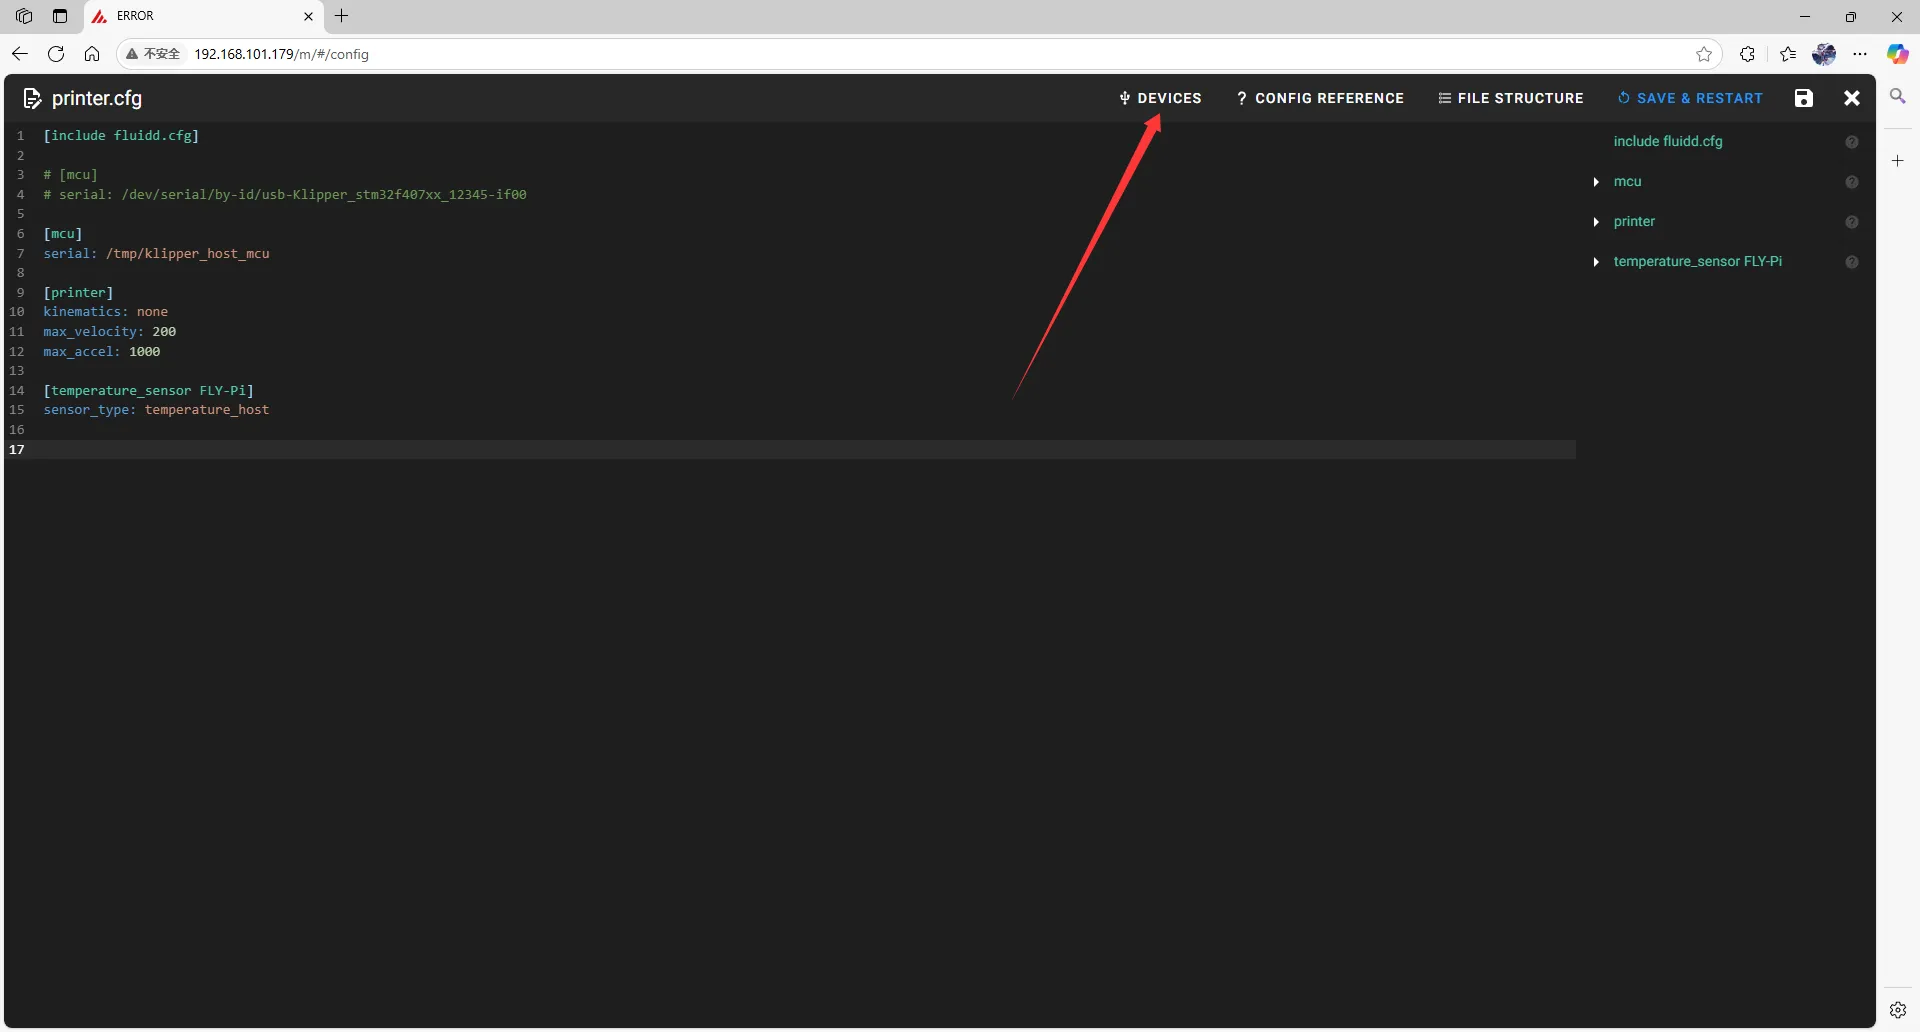
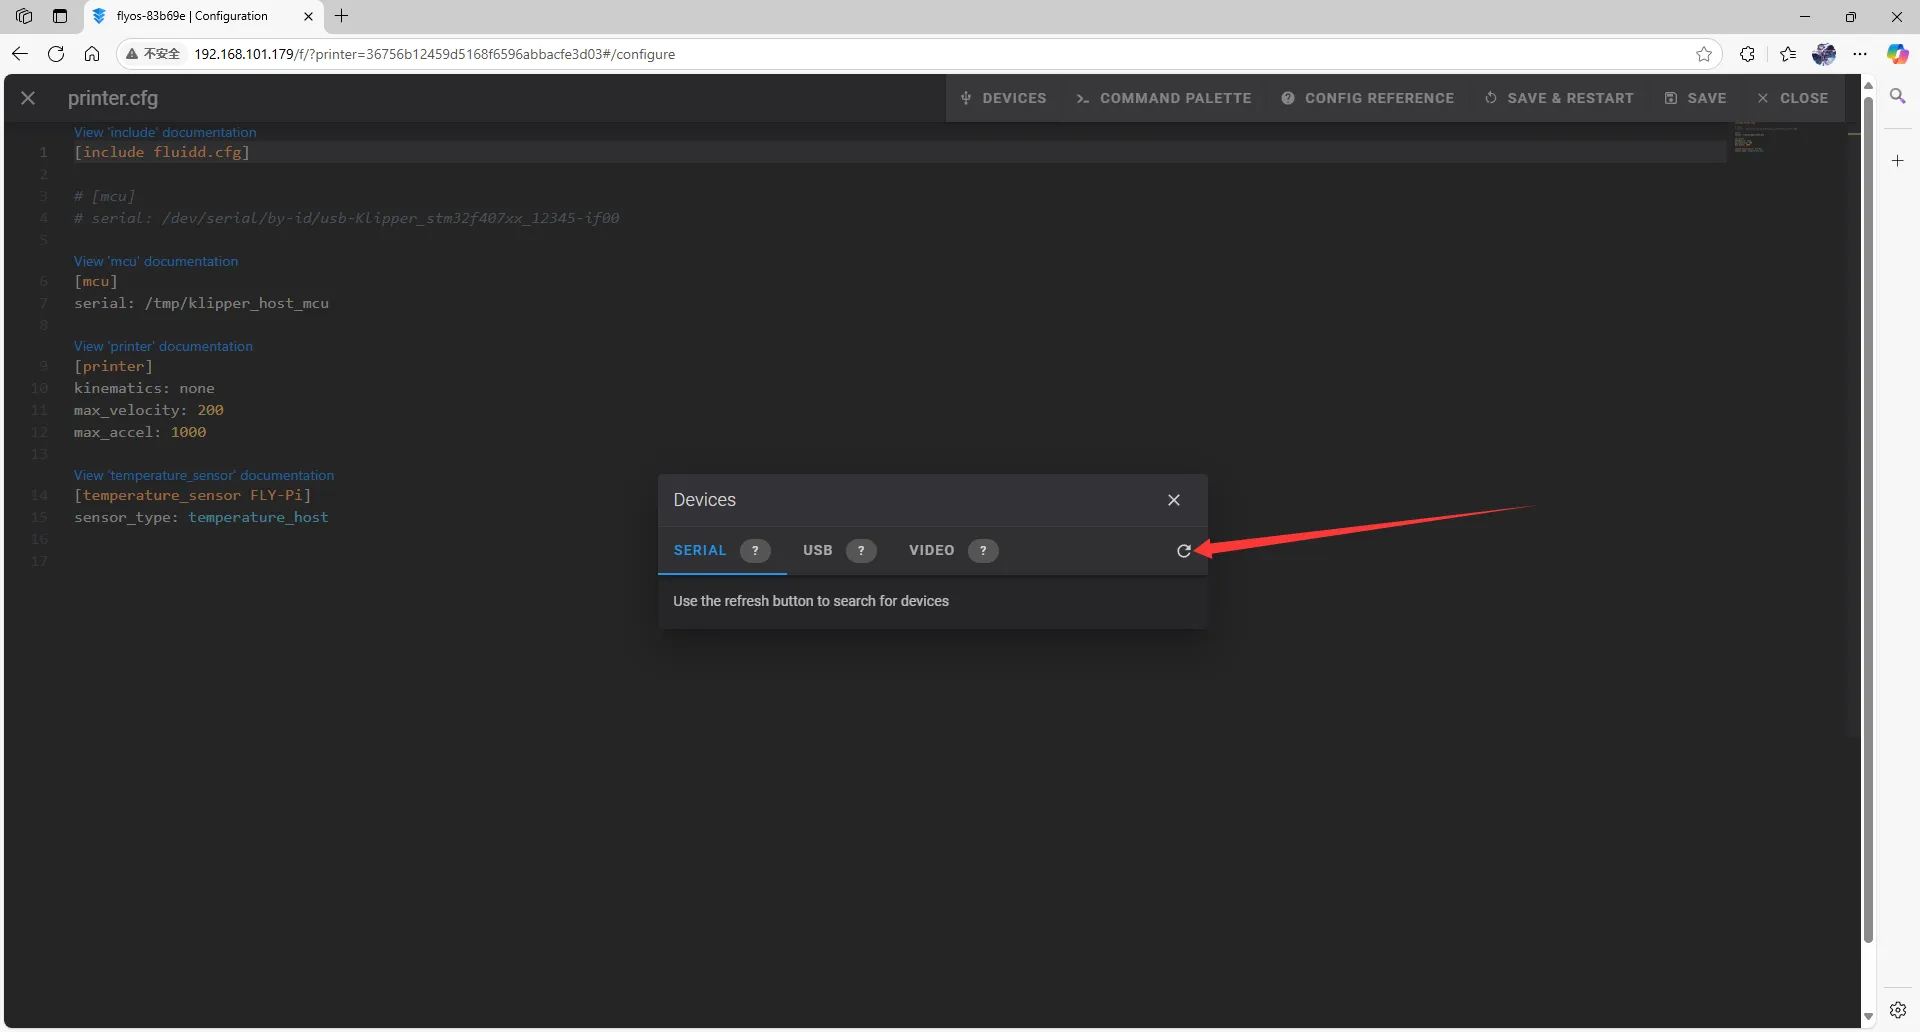
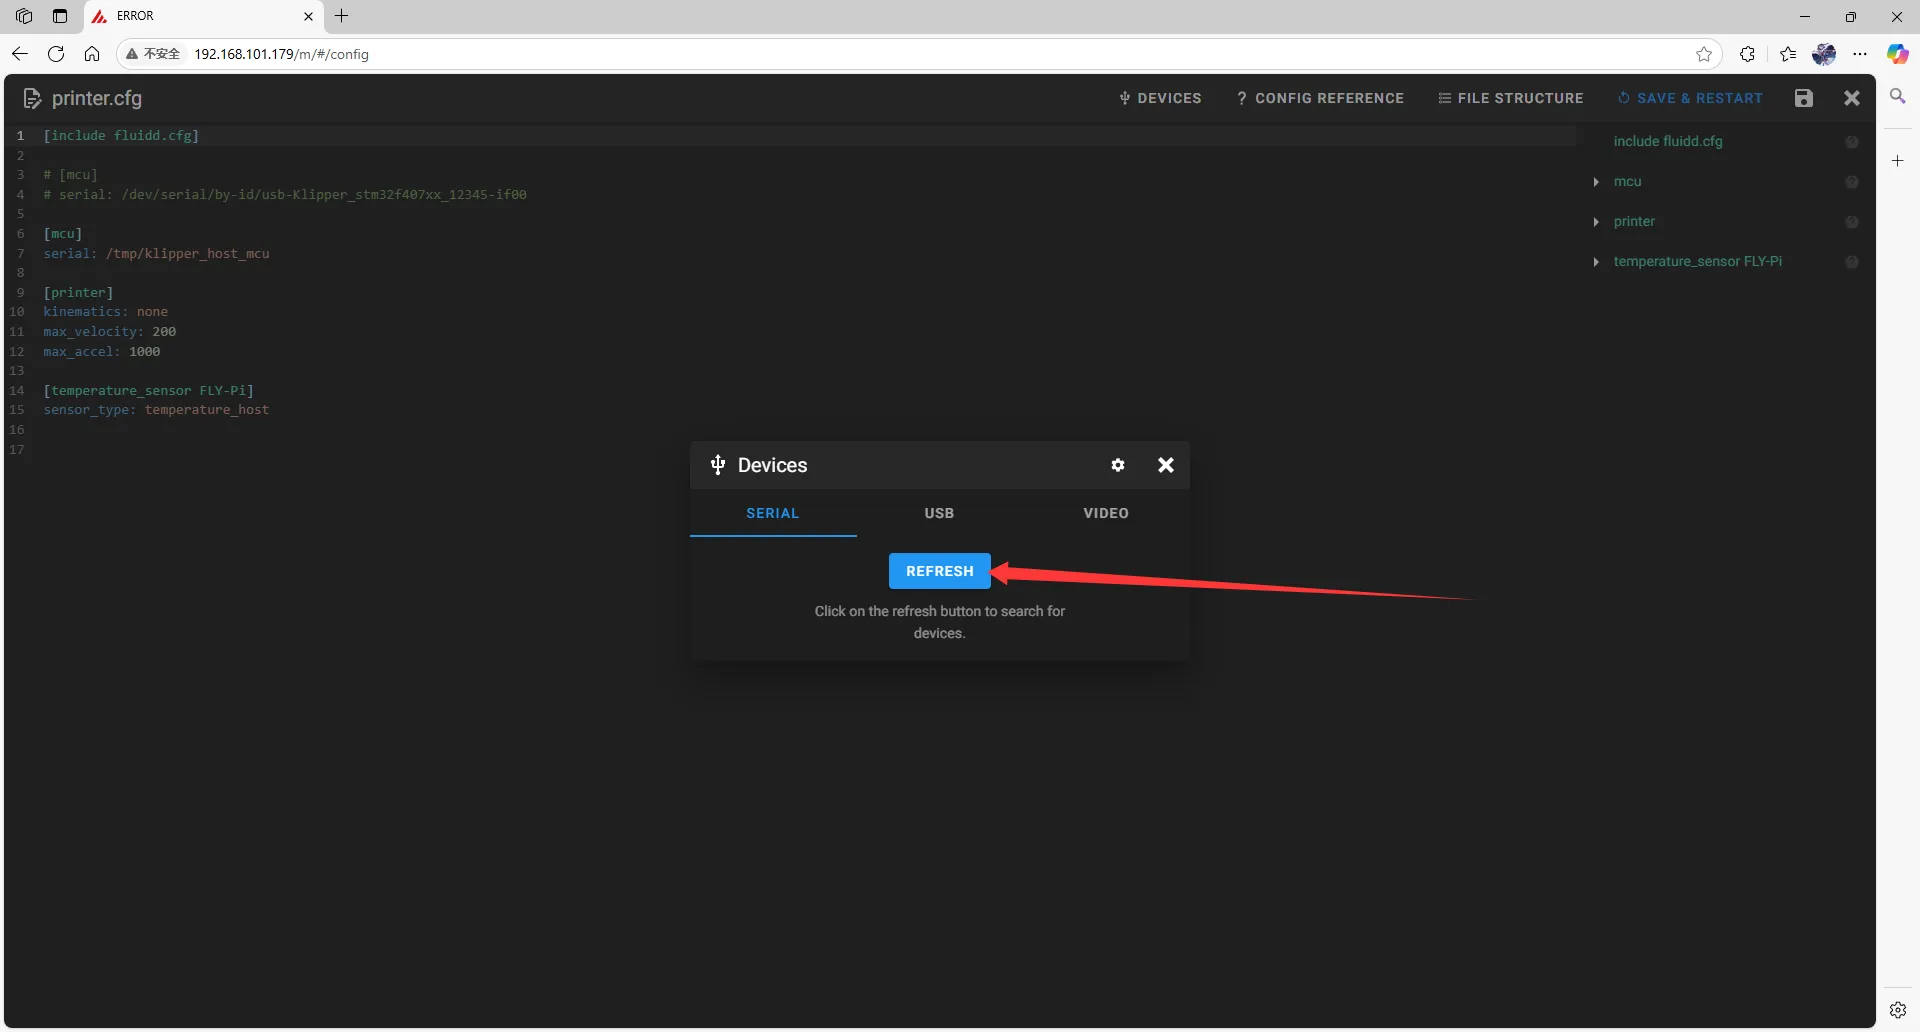
- Click
printer.cfgand then clickDEVICESin the top right corner
- Click
SERIAL, then refresh
- fluidd refresh
- mainsail refresh
- Copy the ID, click the arrow to copy
- fluidd needs to have
ttyUSB, and make surePath_by_hardwareexists, this is the RS232_ID
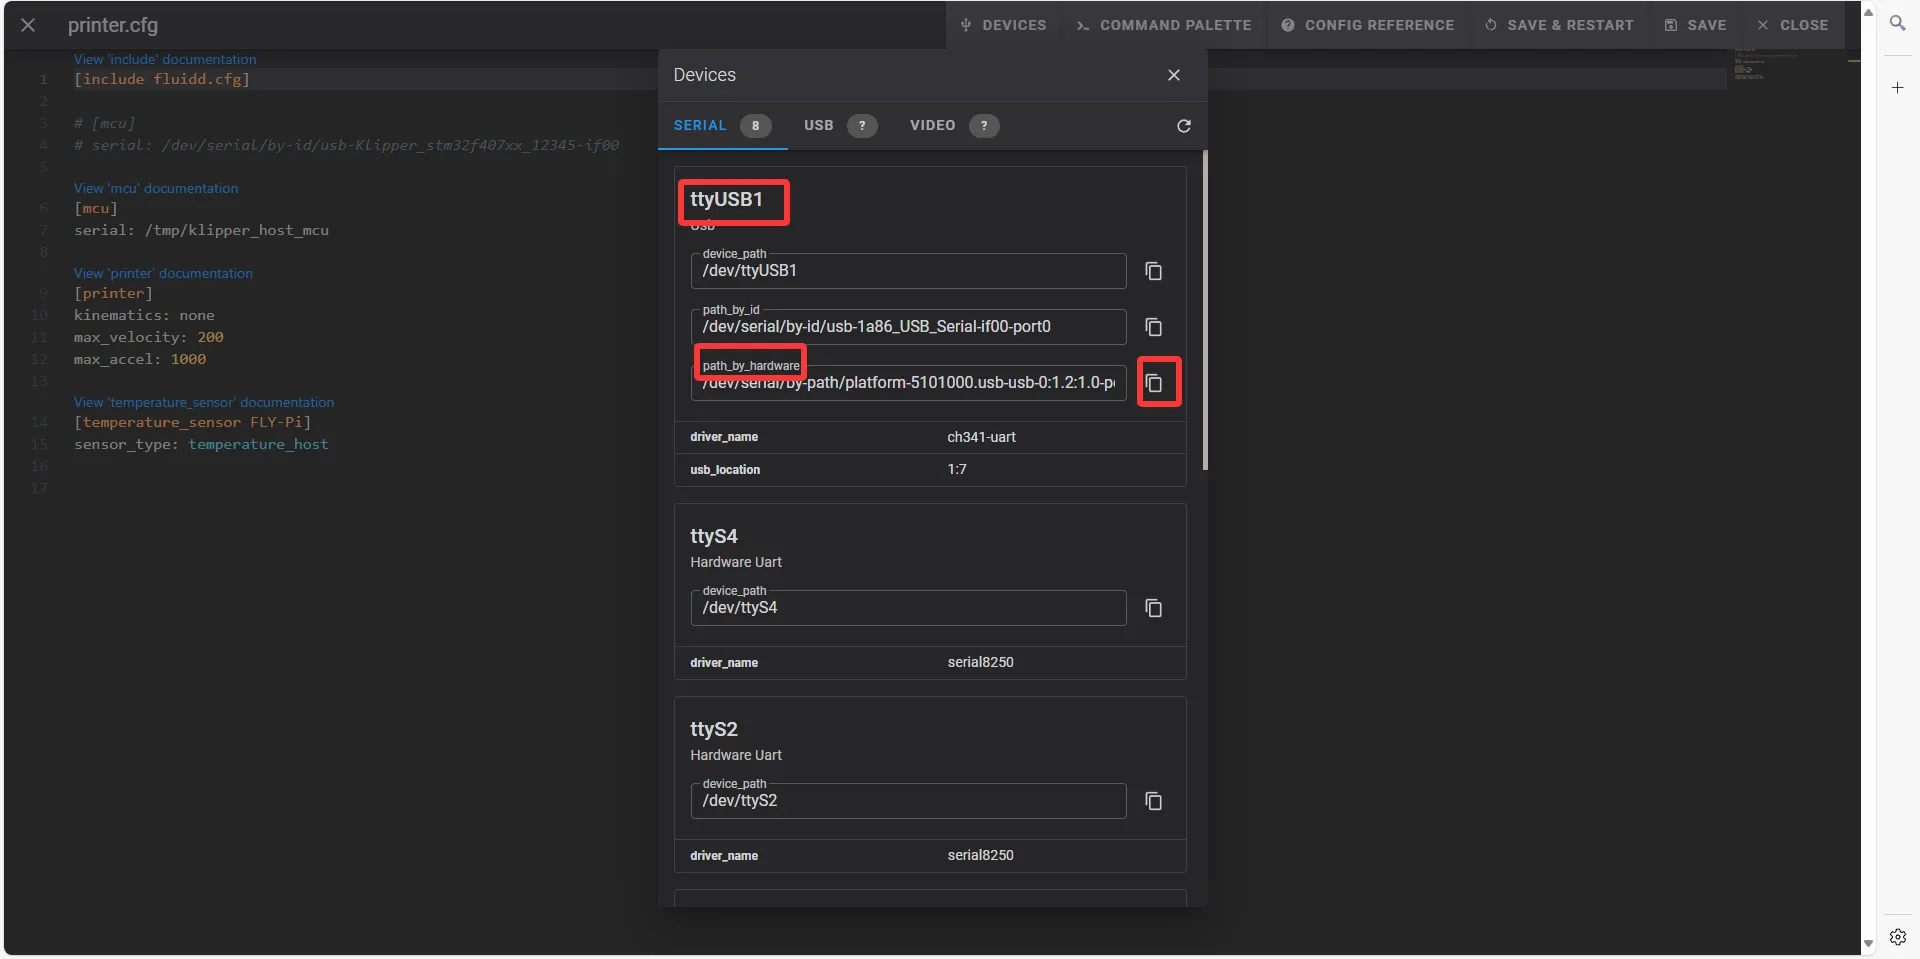
- mainsail needs to have
ttyUSB, and make surePath_by_hardwareexists, this is the RS232_ID

Fill in RS232 ID
- Close
DEVICESand fill in the ID
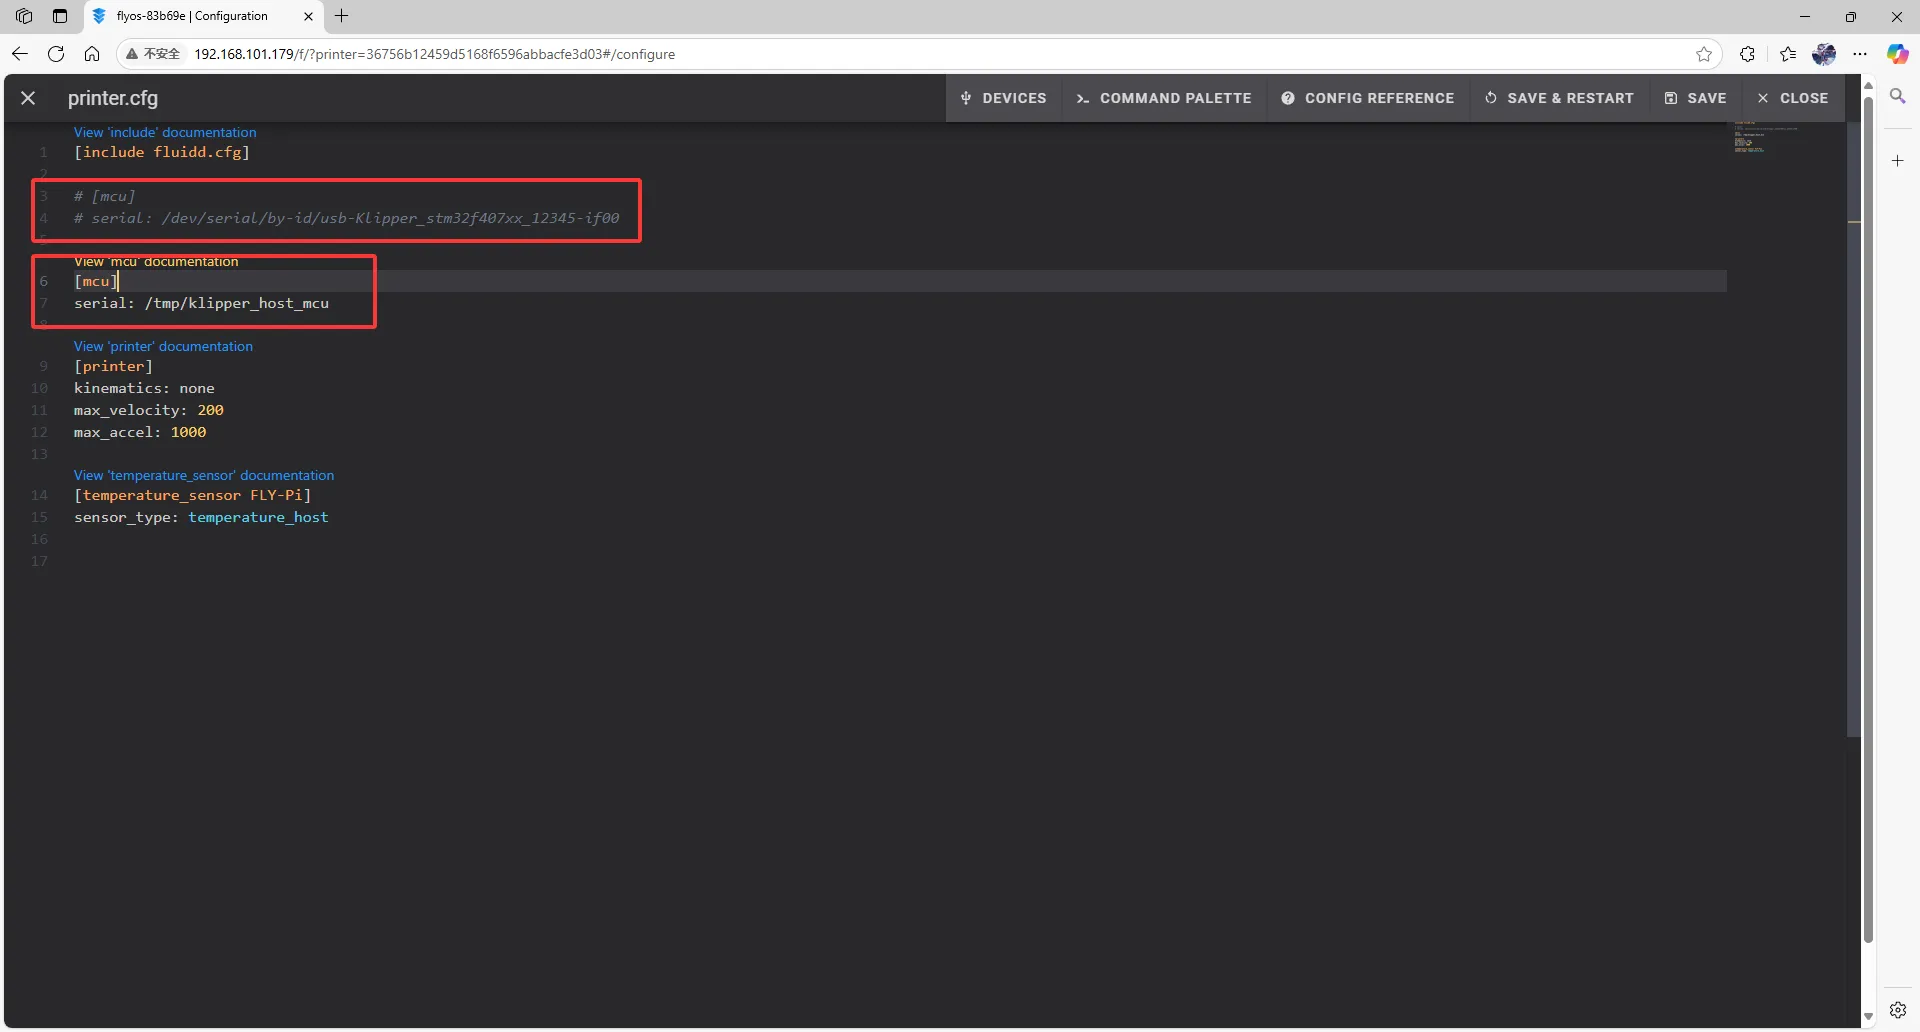
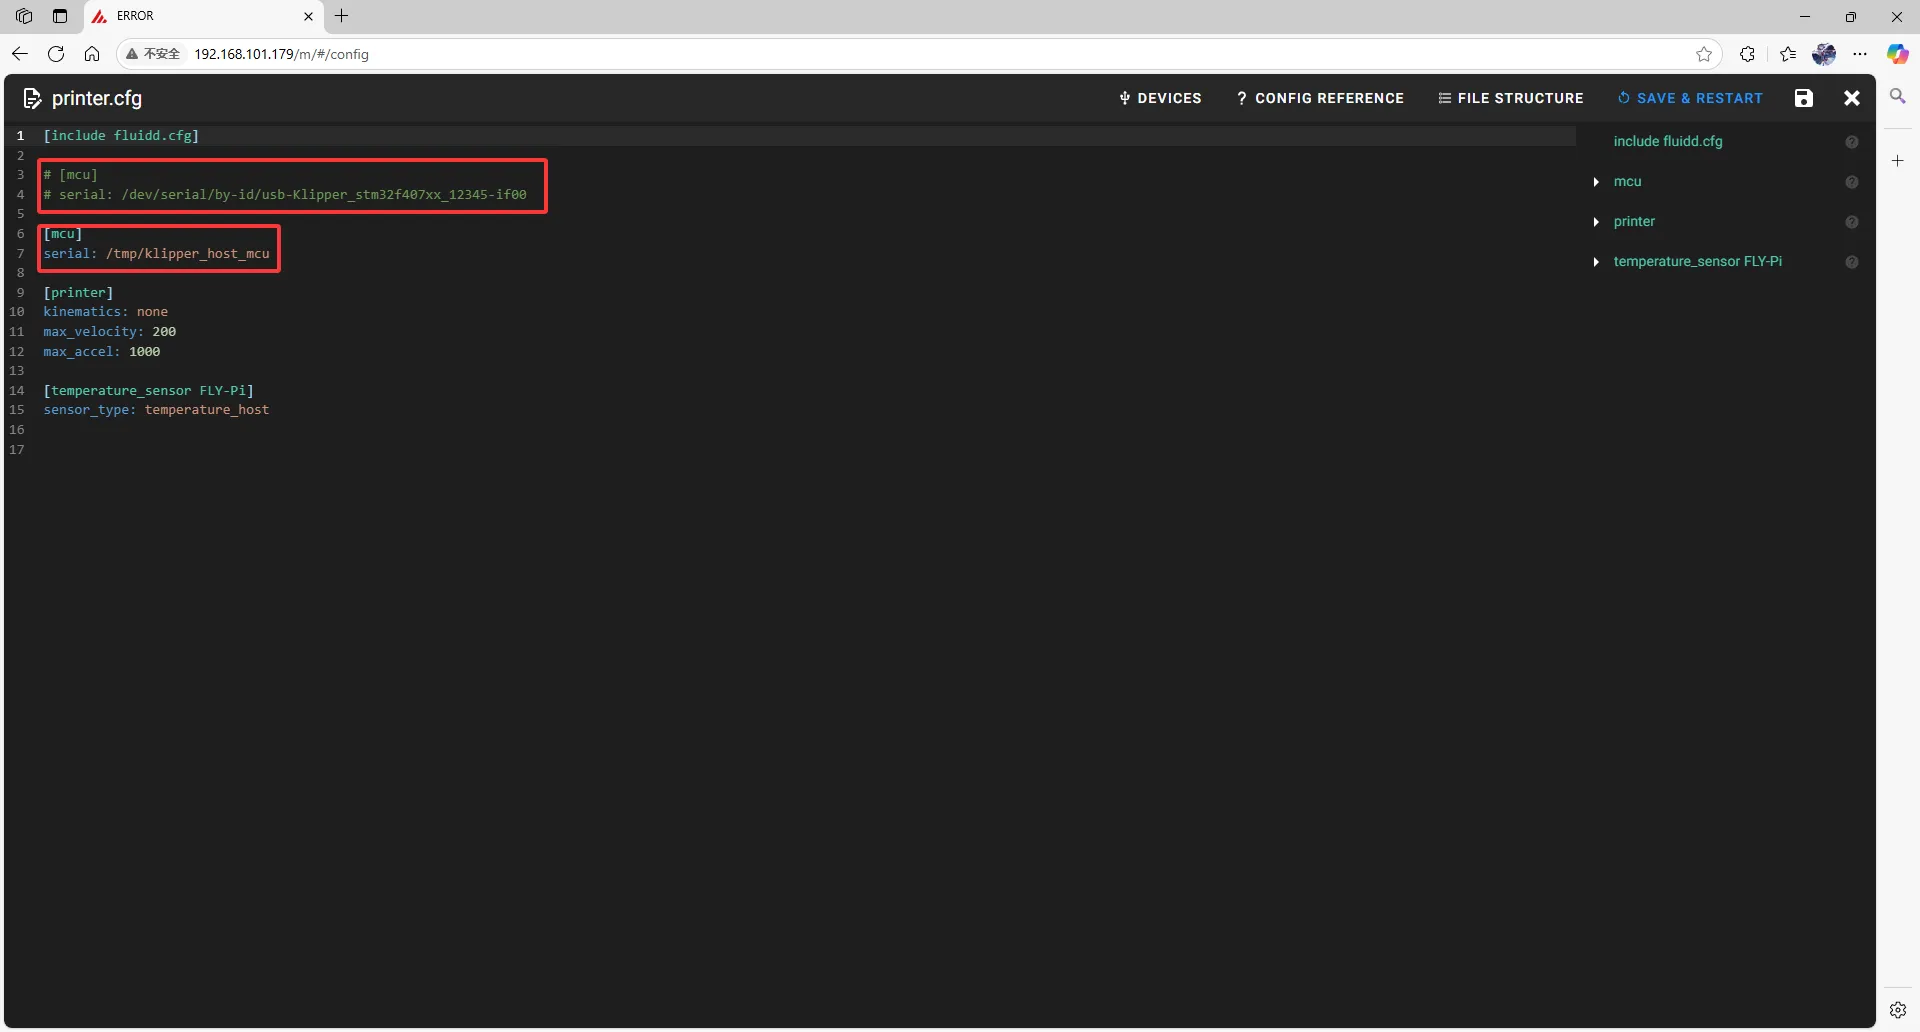
Notes- Please modify the configuration file:
[mcu]
serial: /tmp/klipper_host_mcu
to
[mcu host]
serial: /tmp/klipper_host_mcu- Add:
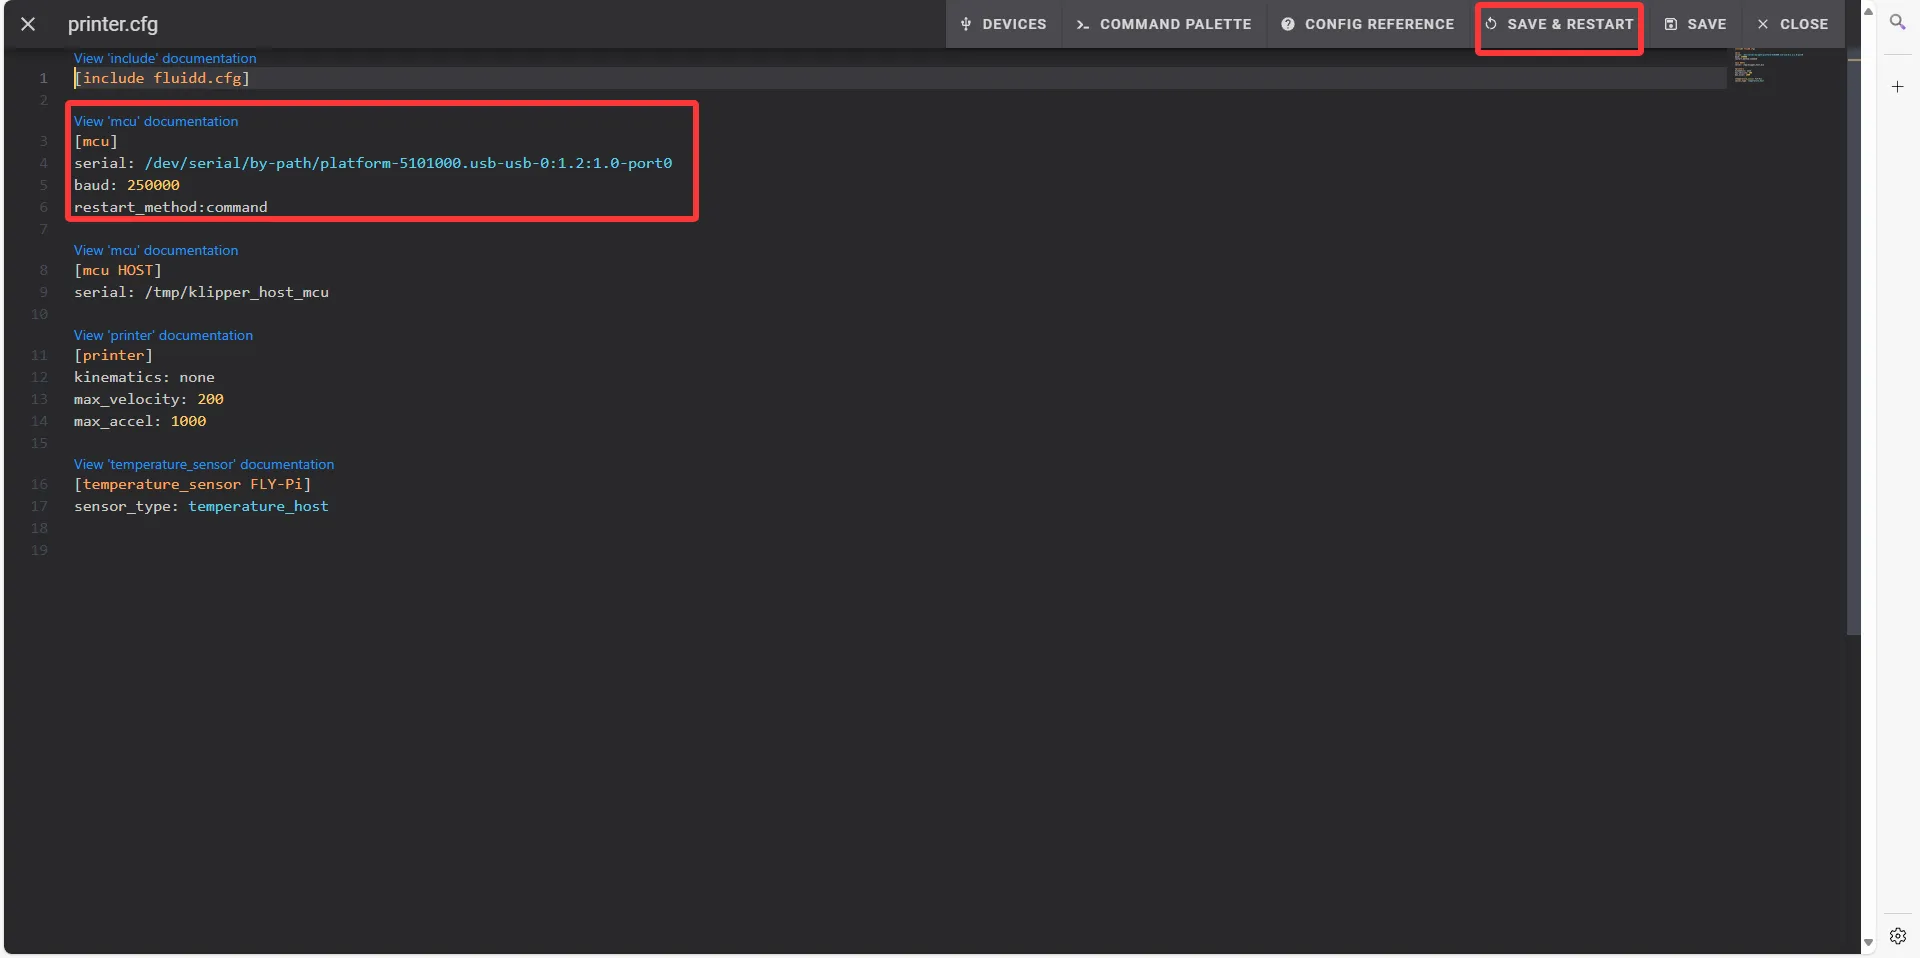
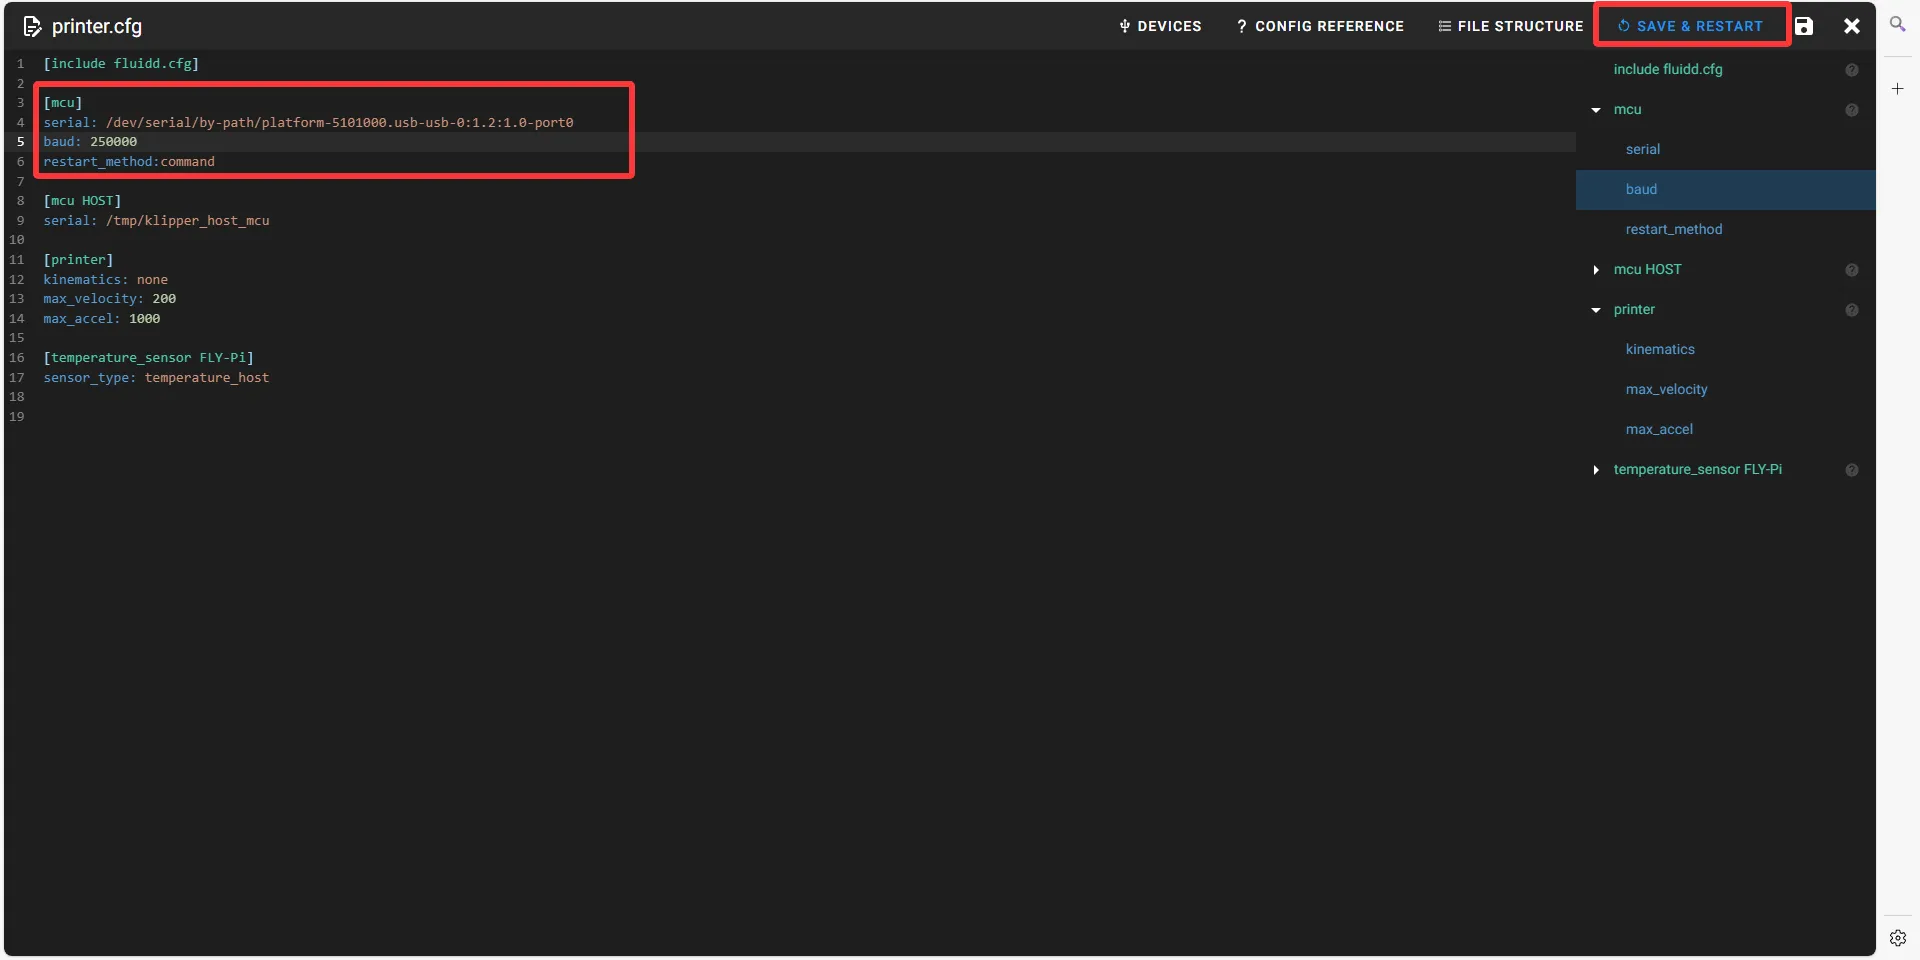
[mcu]
serial: <replace this with the ID you just queried>
baud: 250000
restart_method:command- Find [MCU] in fluidd
- Find [MCU] in mainsail
- Fill in the ID in the configuration
tip- After filling in the ID, click
SAVE & RESTARTin the top right corner
- If Klipper prompts
ADC out of range, this is normal. Connect the heated bed and thermistor to the mainboard, configure the nozzle and heated bed thermistor pins, and save and restart.
dangerousNote: All IDs mentioned in the document are examples. The actual ID of each mainboard is different. Please fill in the actual ID you obtained.
dangerousPlease note that the ID below cannot be used !!!
serial: /dev/serial/by-id/usb-1a86_USB_Serial-if00-port0