Motherboard ID Reading and Viewing
Please do not modify the configuration while translating the webpage
Please do not modify the configuration while translating the webpage
Please do not modify the configuration while translating the webpage
- CANBus UUID Acquisition
- Please ensure the dip switch is set to the correct position
- Please ensure that CAN H and CAN L measure about
60Ωwith a multimeter when powered off. If it is120Ω, the120Ωjumper cap needs to be inserted. If it is about40Ω, the jumper cap does not need to be inserted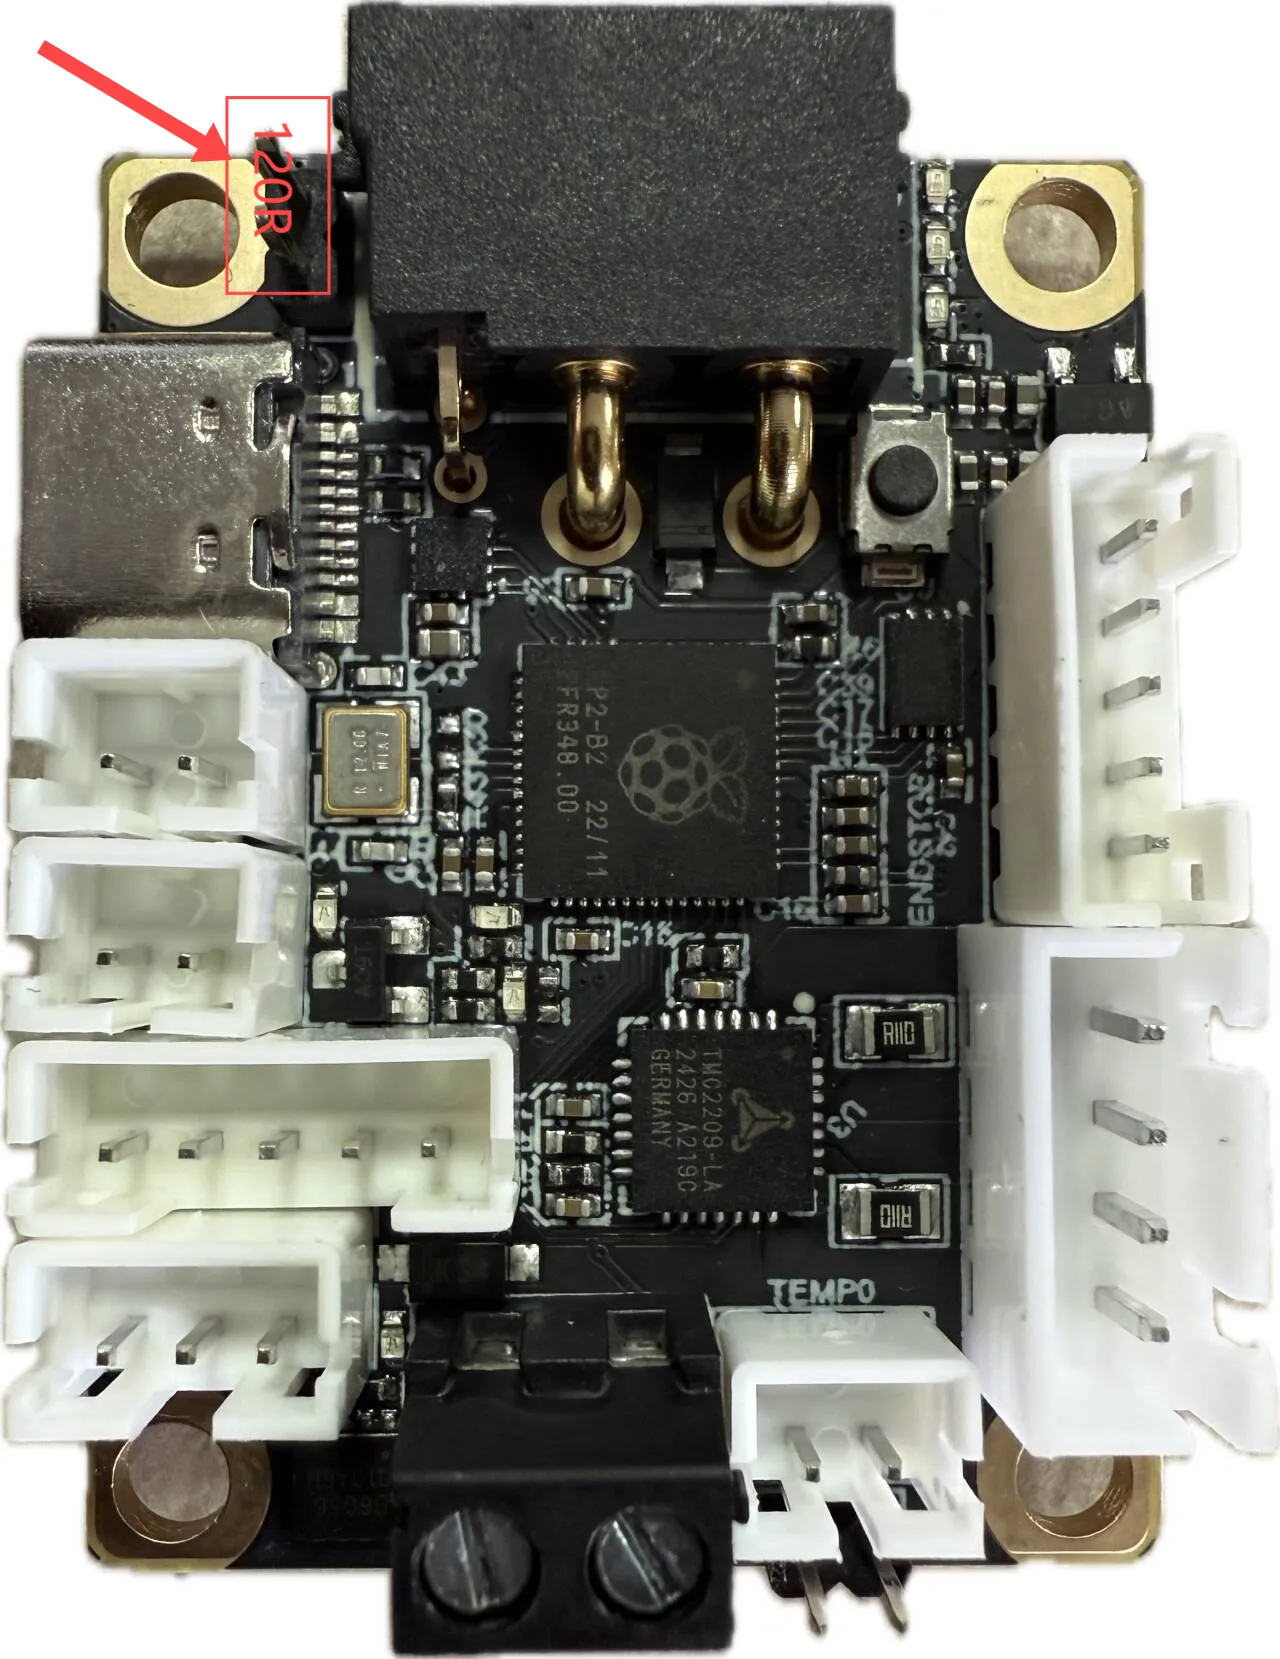
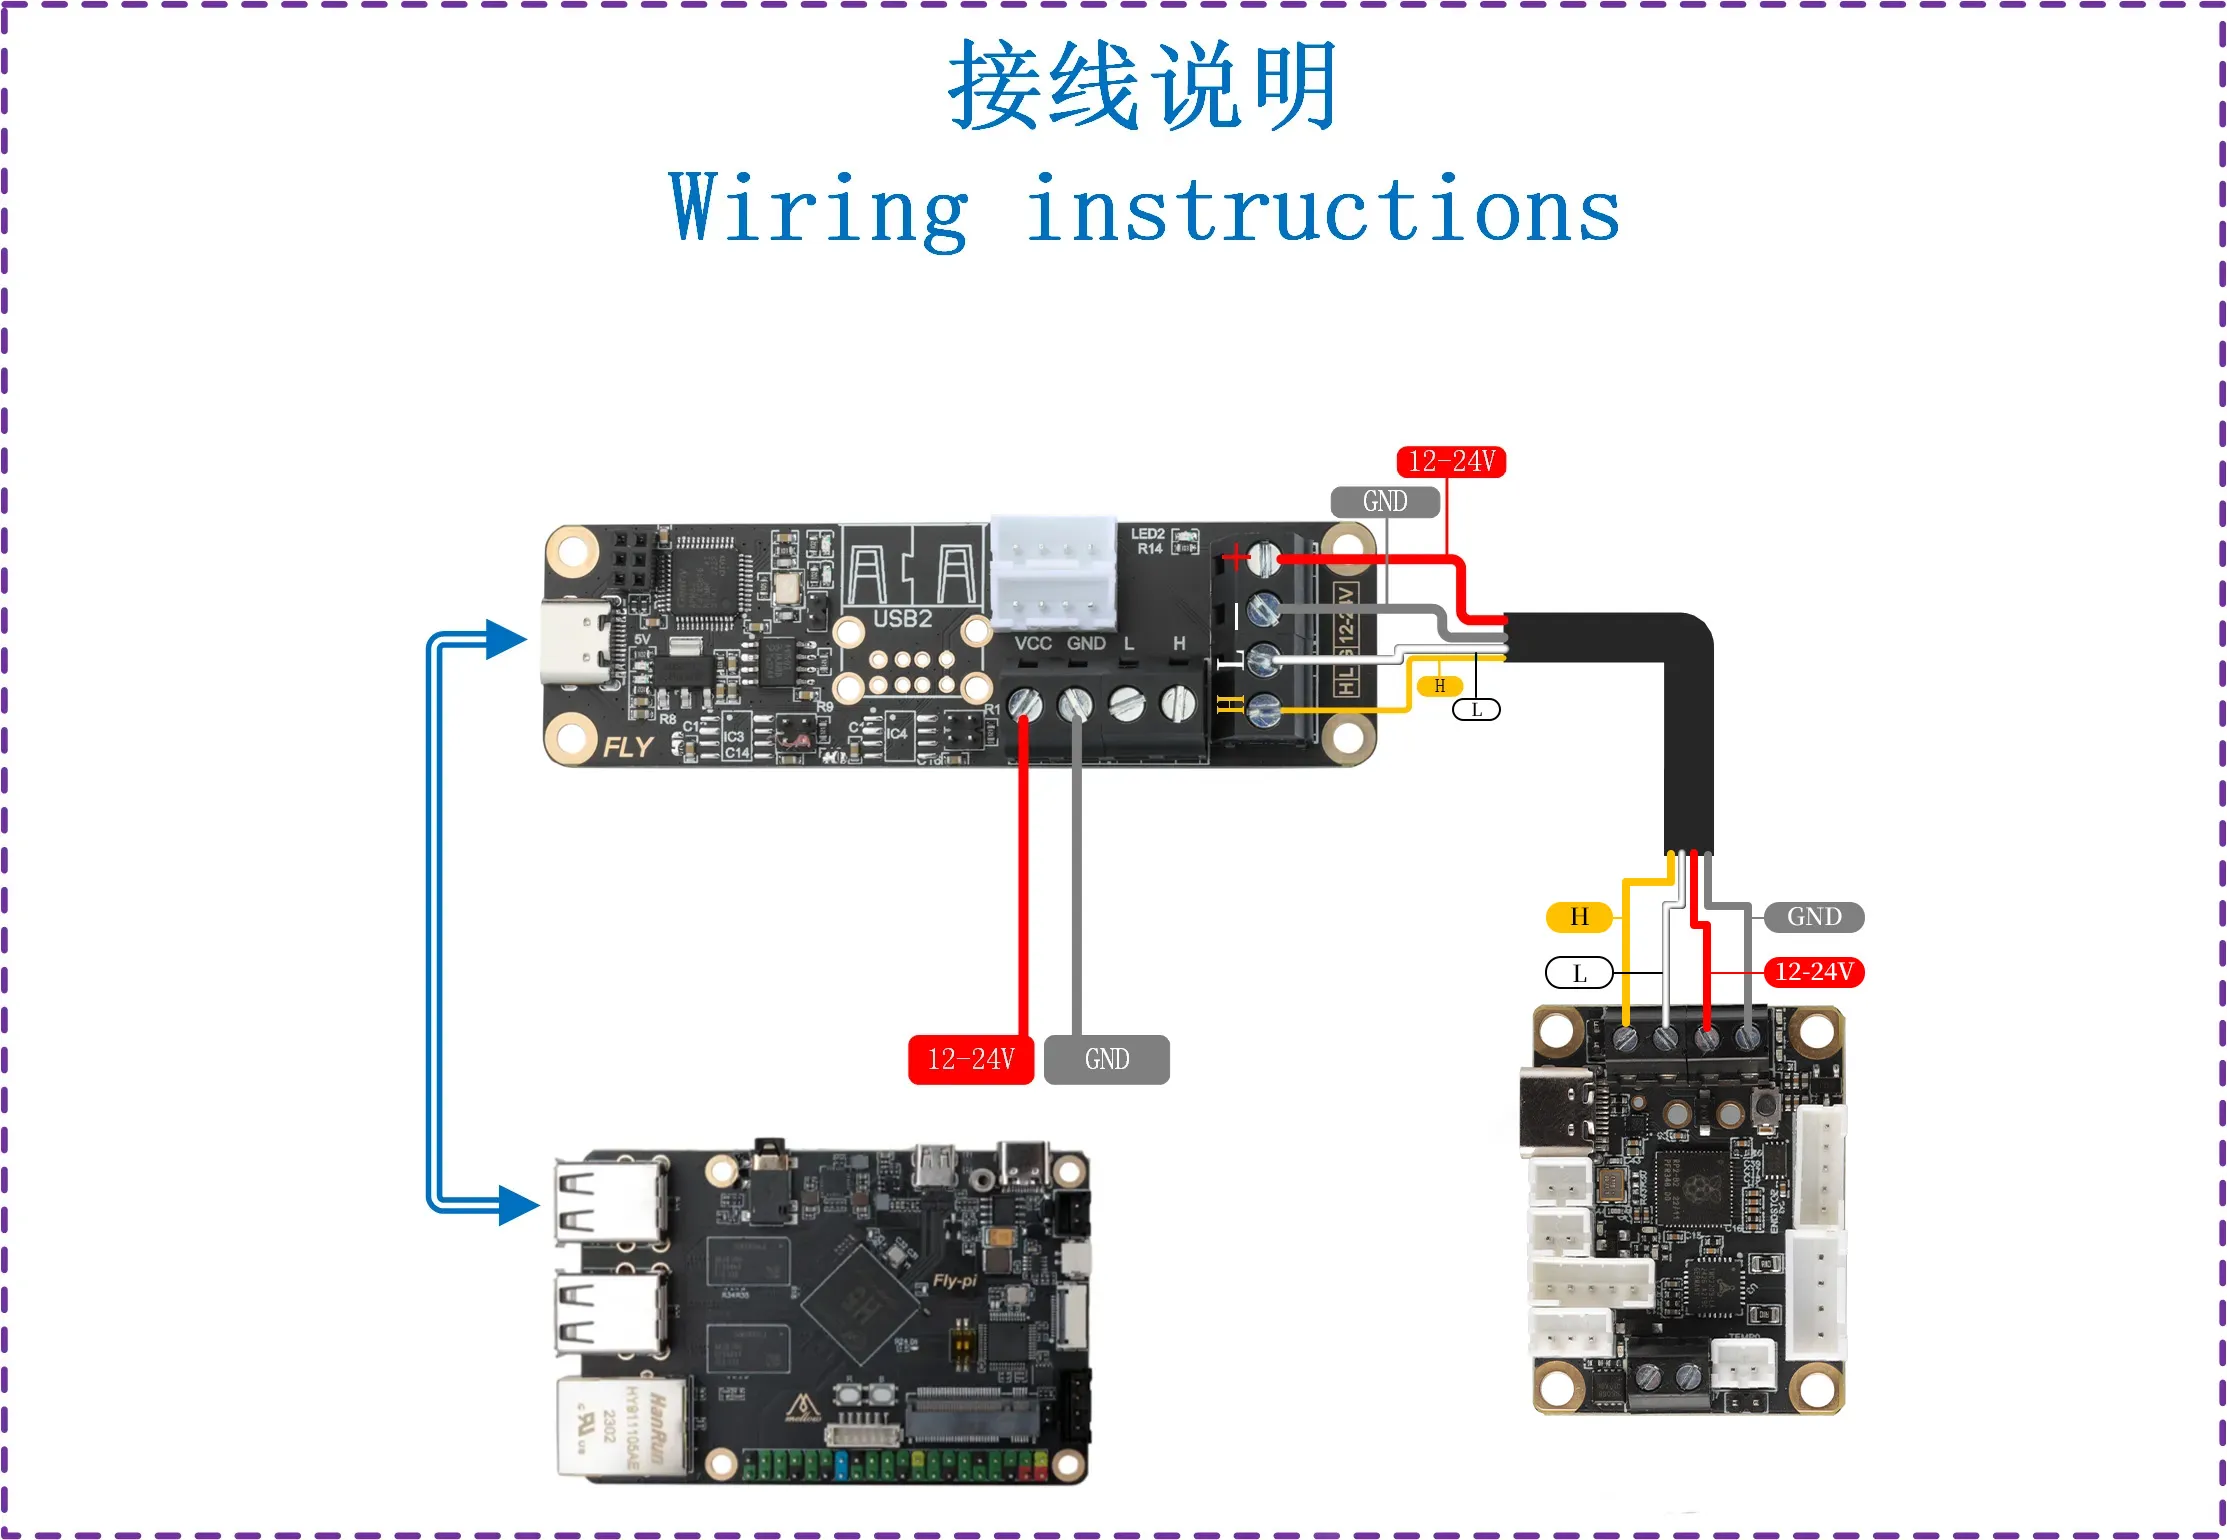
- Before burning the firmware, use an XT30 data cable to connect the tool board to the UTOC or the motherboard with the bridging firmware flashed. Below is the reference wiring diagram
- Please ensure the dip switch is set to the correct position
Schematic diagram of KF interface
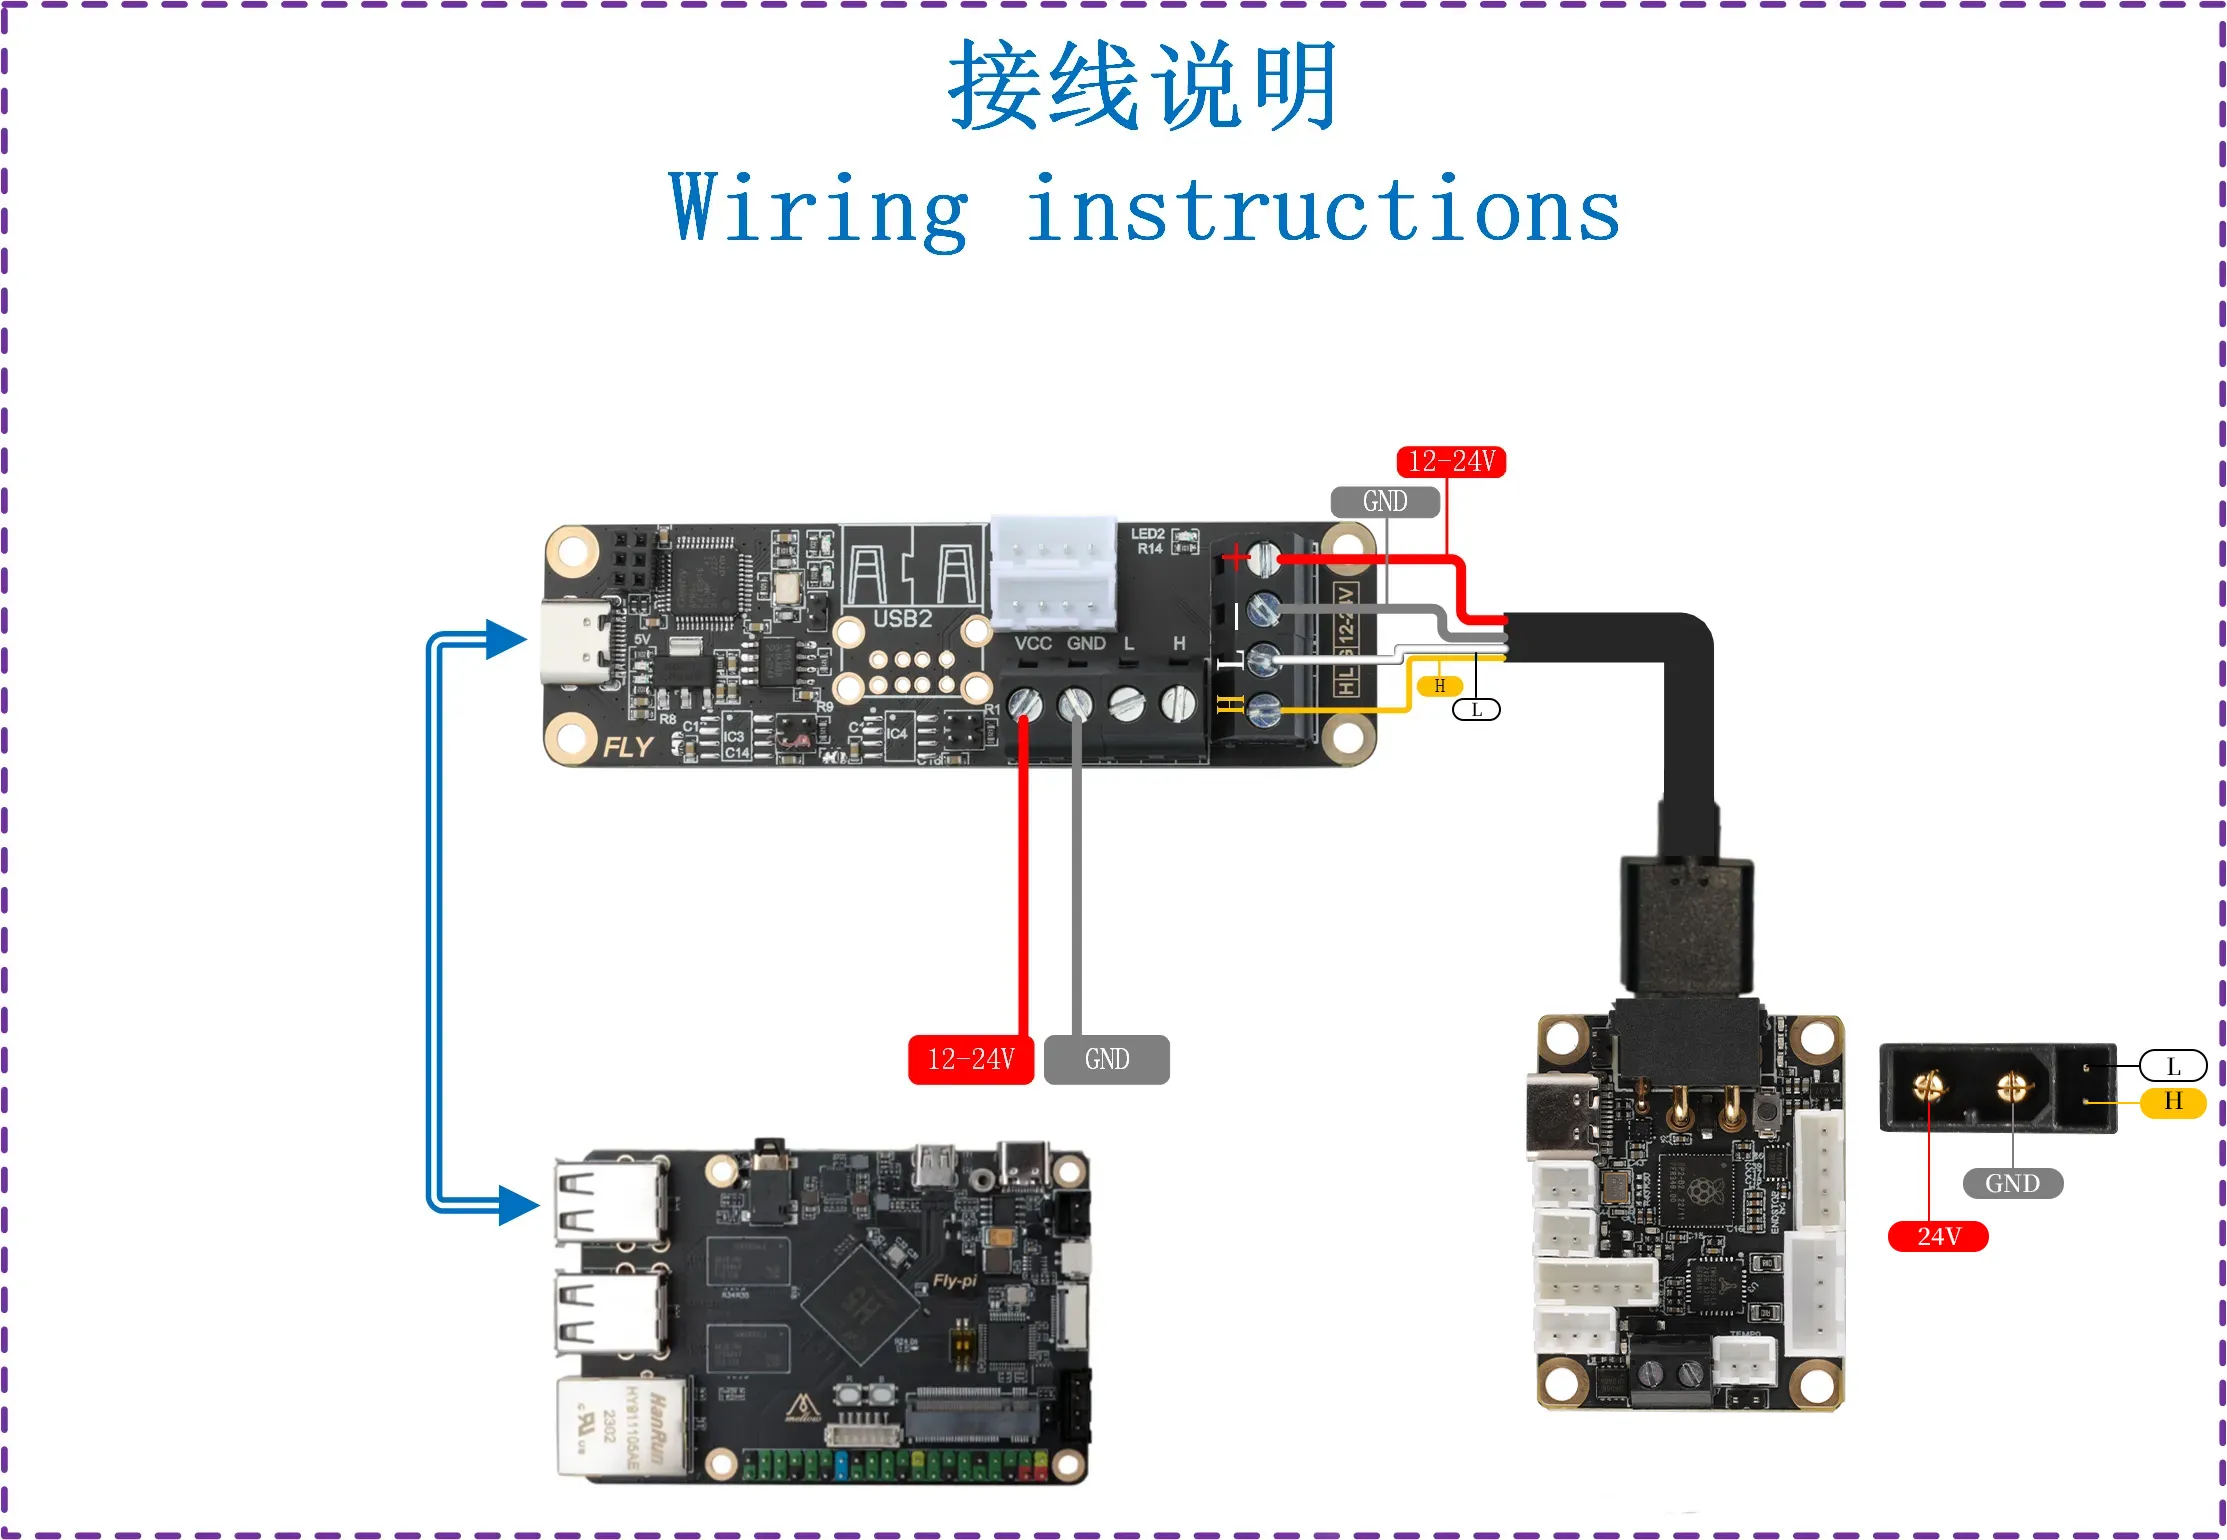
Schematic diagram of XT30 interface
-
Please ensure that CAN H and CAN L measure about
60Ωwith a multimeter when powered off. If it is120Ω, the120Ωjumper needs to be connected. If it is about40Ω, the jumper needs to be removedCAN Configuration and ID Search
- If you need to use CAN, make sure your host machine has performed CAN configuration.
NotePlease ensure the mainboard is connected to the host machine before performing the following operations.
warningEnsure the host machine's CAN network, the CAN rate of the bridge mainboard, and the CAN tool board's rate are all completely consistent.
Precautions Before Device Search
- Before searching for the CAN ID, please first connect to SSH.
- Please note that you must log in to SSH via the network rather than via a serial port.
- Ensure that the UTOC is connected or the mainboard with CAN bridge firmware is flashed, and ensure that the data cable connecting to the host machine has data transmission capability.
Device Search
- Now that you have successfully logged into the host machine, you can enter
lsusbto search for devices, which will result in one of the following scenarios:- If entering
lsusbprompts that thelscommand is not found, you can enter the following command to install it:sudo apt-get install usbutils - If entering
lsusbresults in no response at all, this indicates a system issue, and we cannot help here. You need to replace the system or use a confirmed normal system. - If the information shown in the image below appears, please note that this is just a reference. You only need to confirm that
1d50:606fappears.
- If entering
1d50:606fbelongs to the device you will be using this time.- If there are multiple
1d50:606f, it is recommended to exclude one to avoid affecting subsequent firmware burning and connection, such as if it is aFLY MINI PAD, then it is recommended to use the onboard UTOC instead of other CAN bridge devices. - If none appear, please check whether the data cable is properly connected and whether the firmware is correctly flashed.
NoteYou can only search for CAN IDs when there is
1d50:606f.Search CAN ID
- Enter the following command to search for the ID:
~/klippy-env/bin/python ~/klipper/scripts/canbus_query.py can0- If an ID appears and the final
Application:showsKlipper, it means this ID can be used directly. - If an ID appears and the final
Application:showsCANBOOTorKatapult, it means the firmware needs to be flashed before it can be used.
CAN Problem Collection
Note- If the CAN ID cannot be found, refer to the documentation below.
- CAN Problem Collection
Fill the CAN ID into the Configuration
- For fluidd:
{…}, click to findprinter.cfg
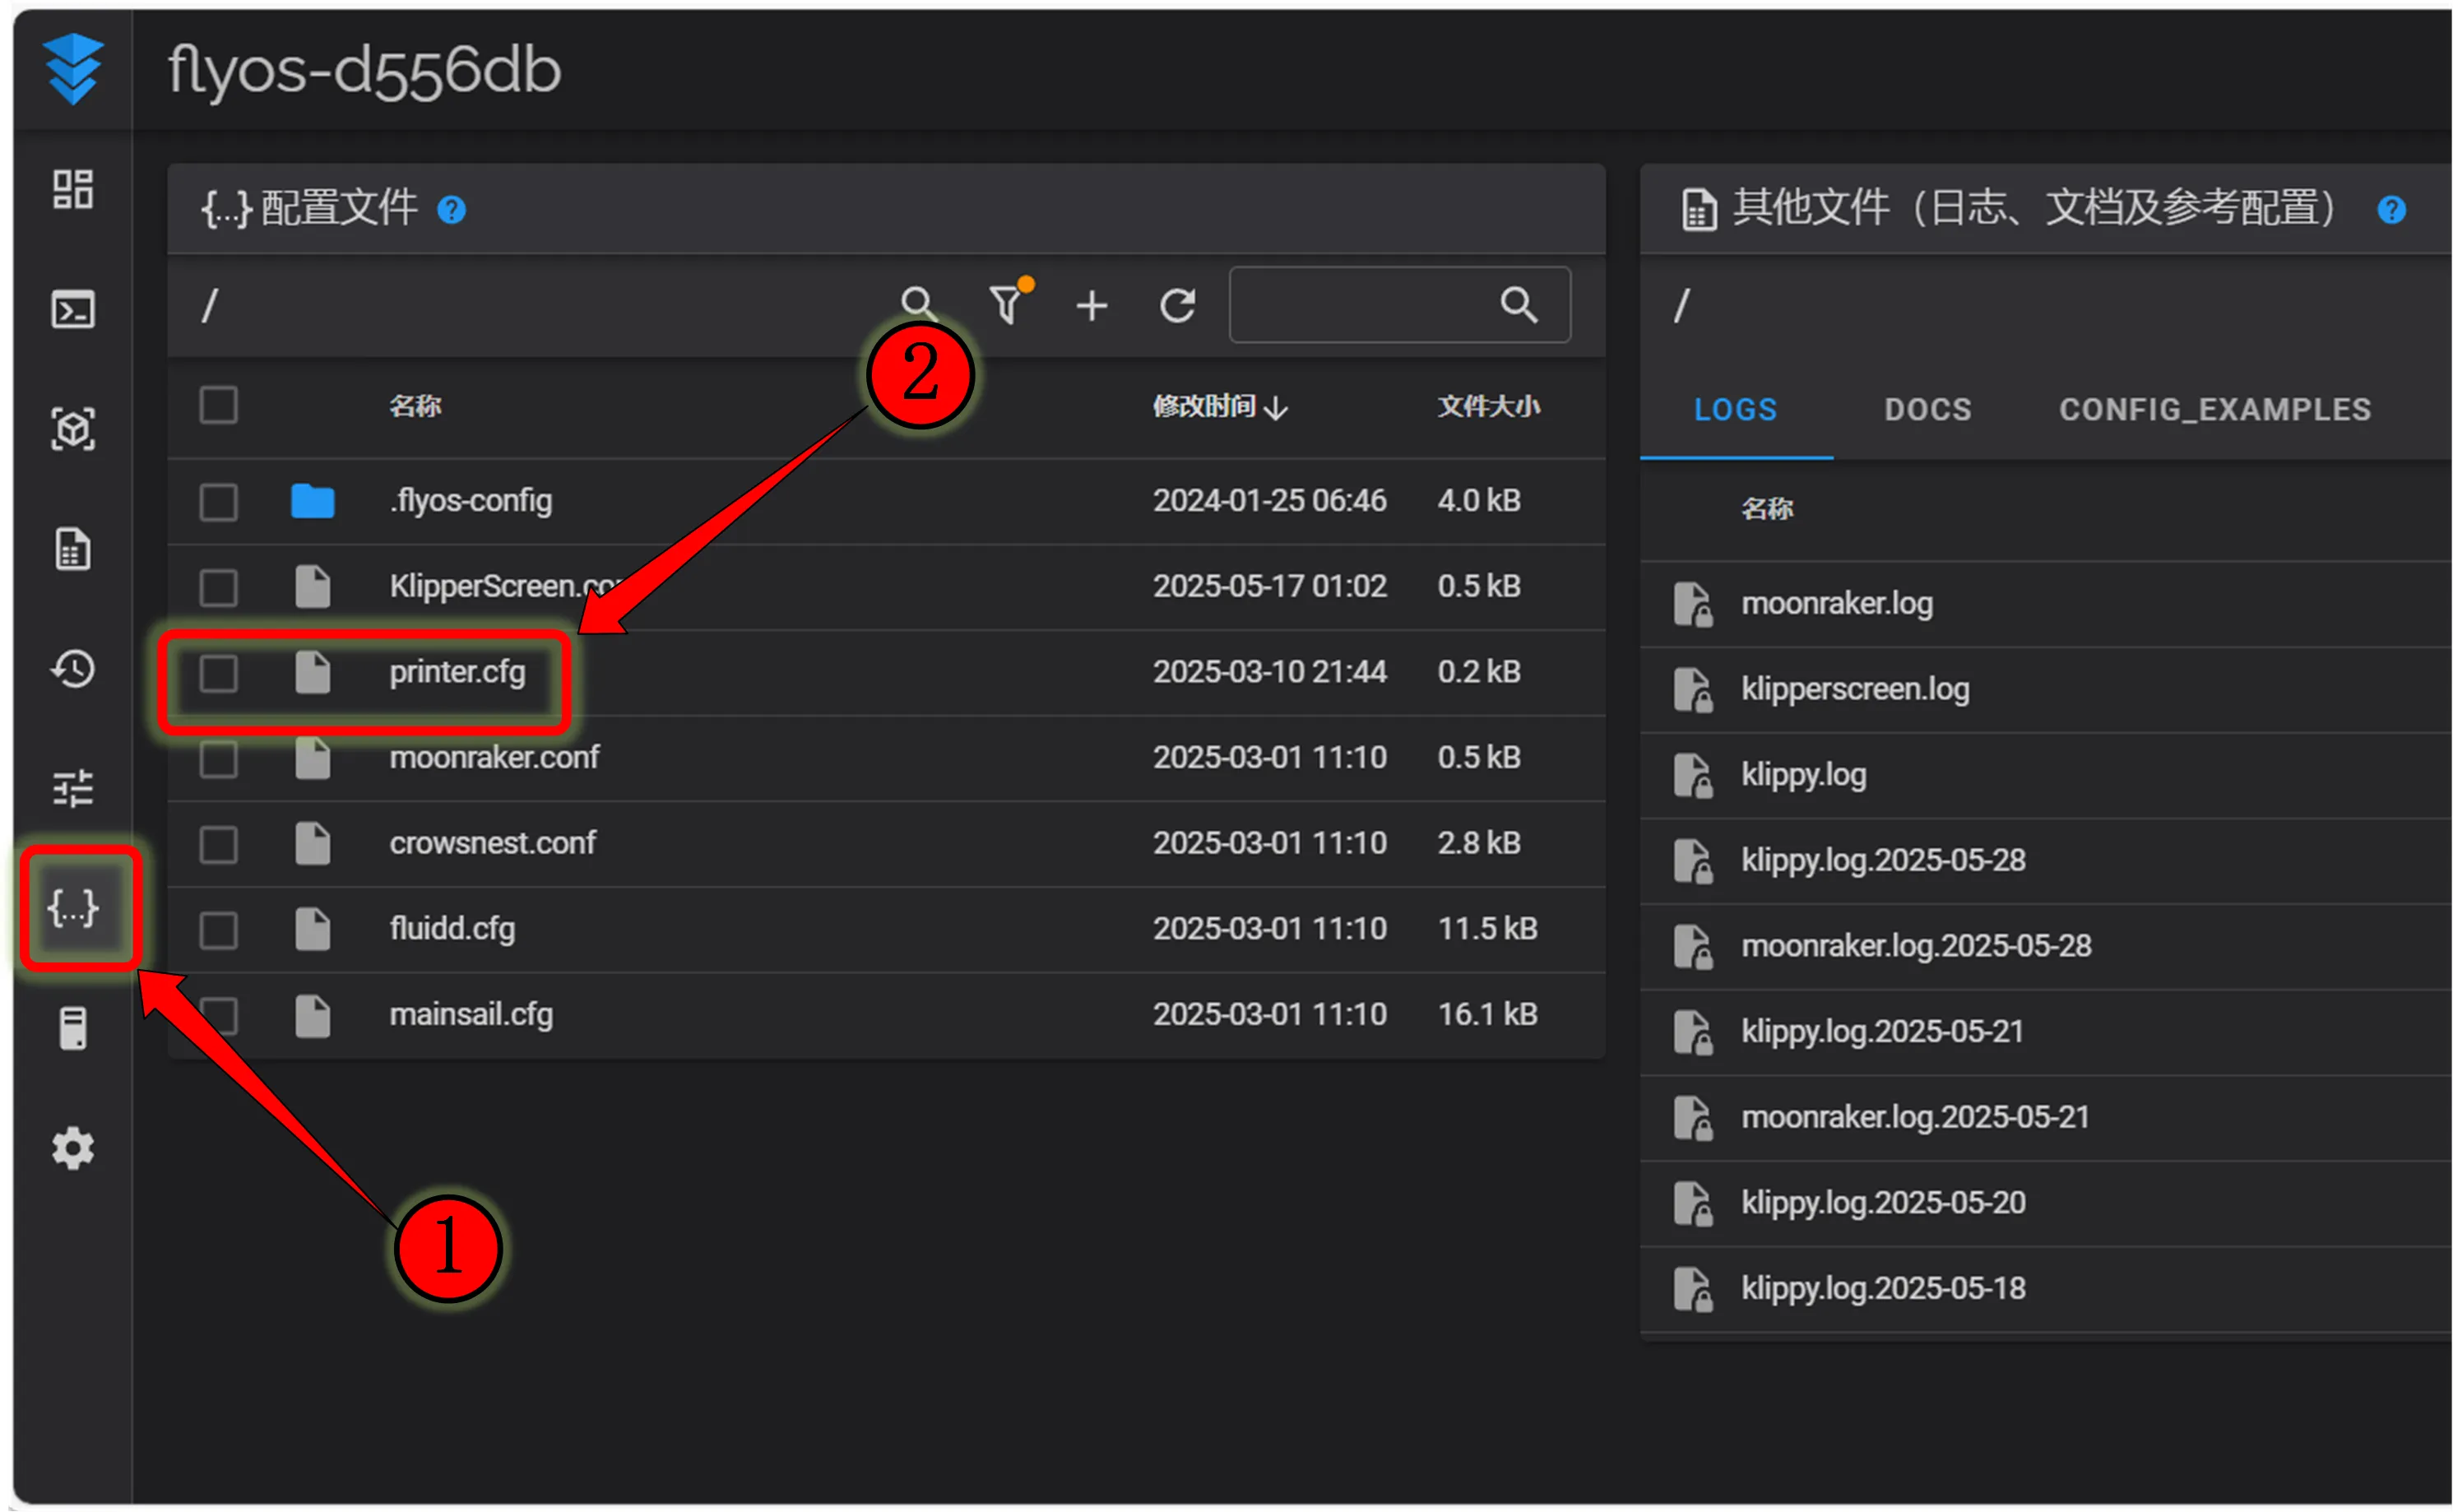
- For mainsail:
Machine, click to findprinter.cfg
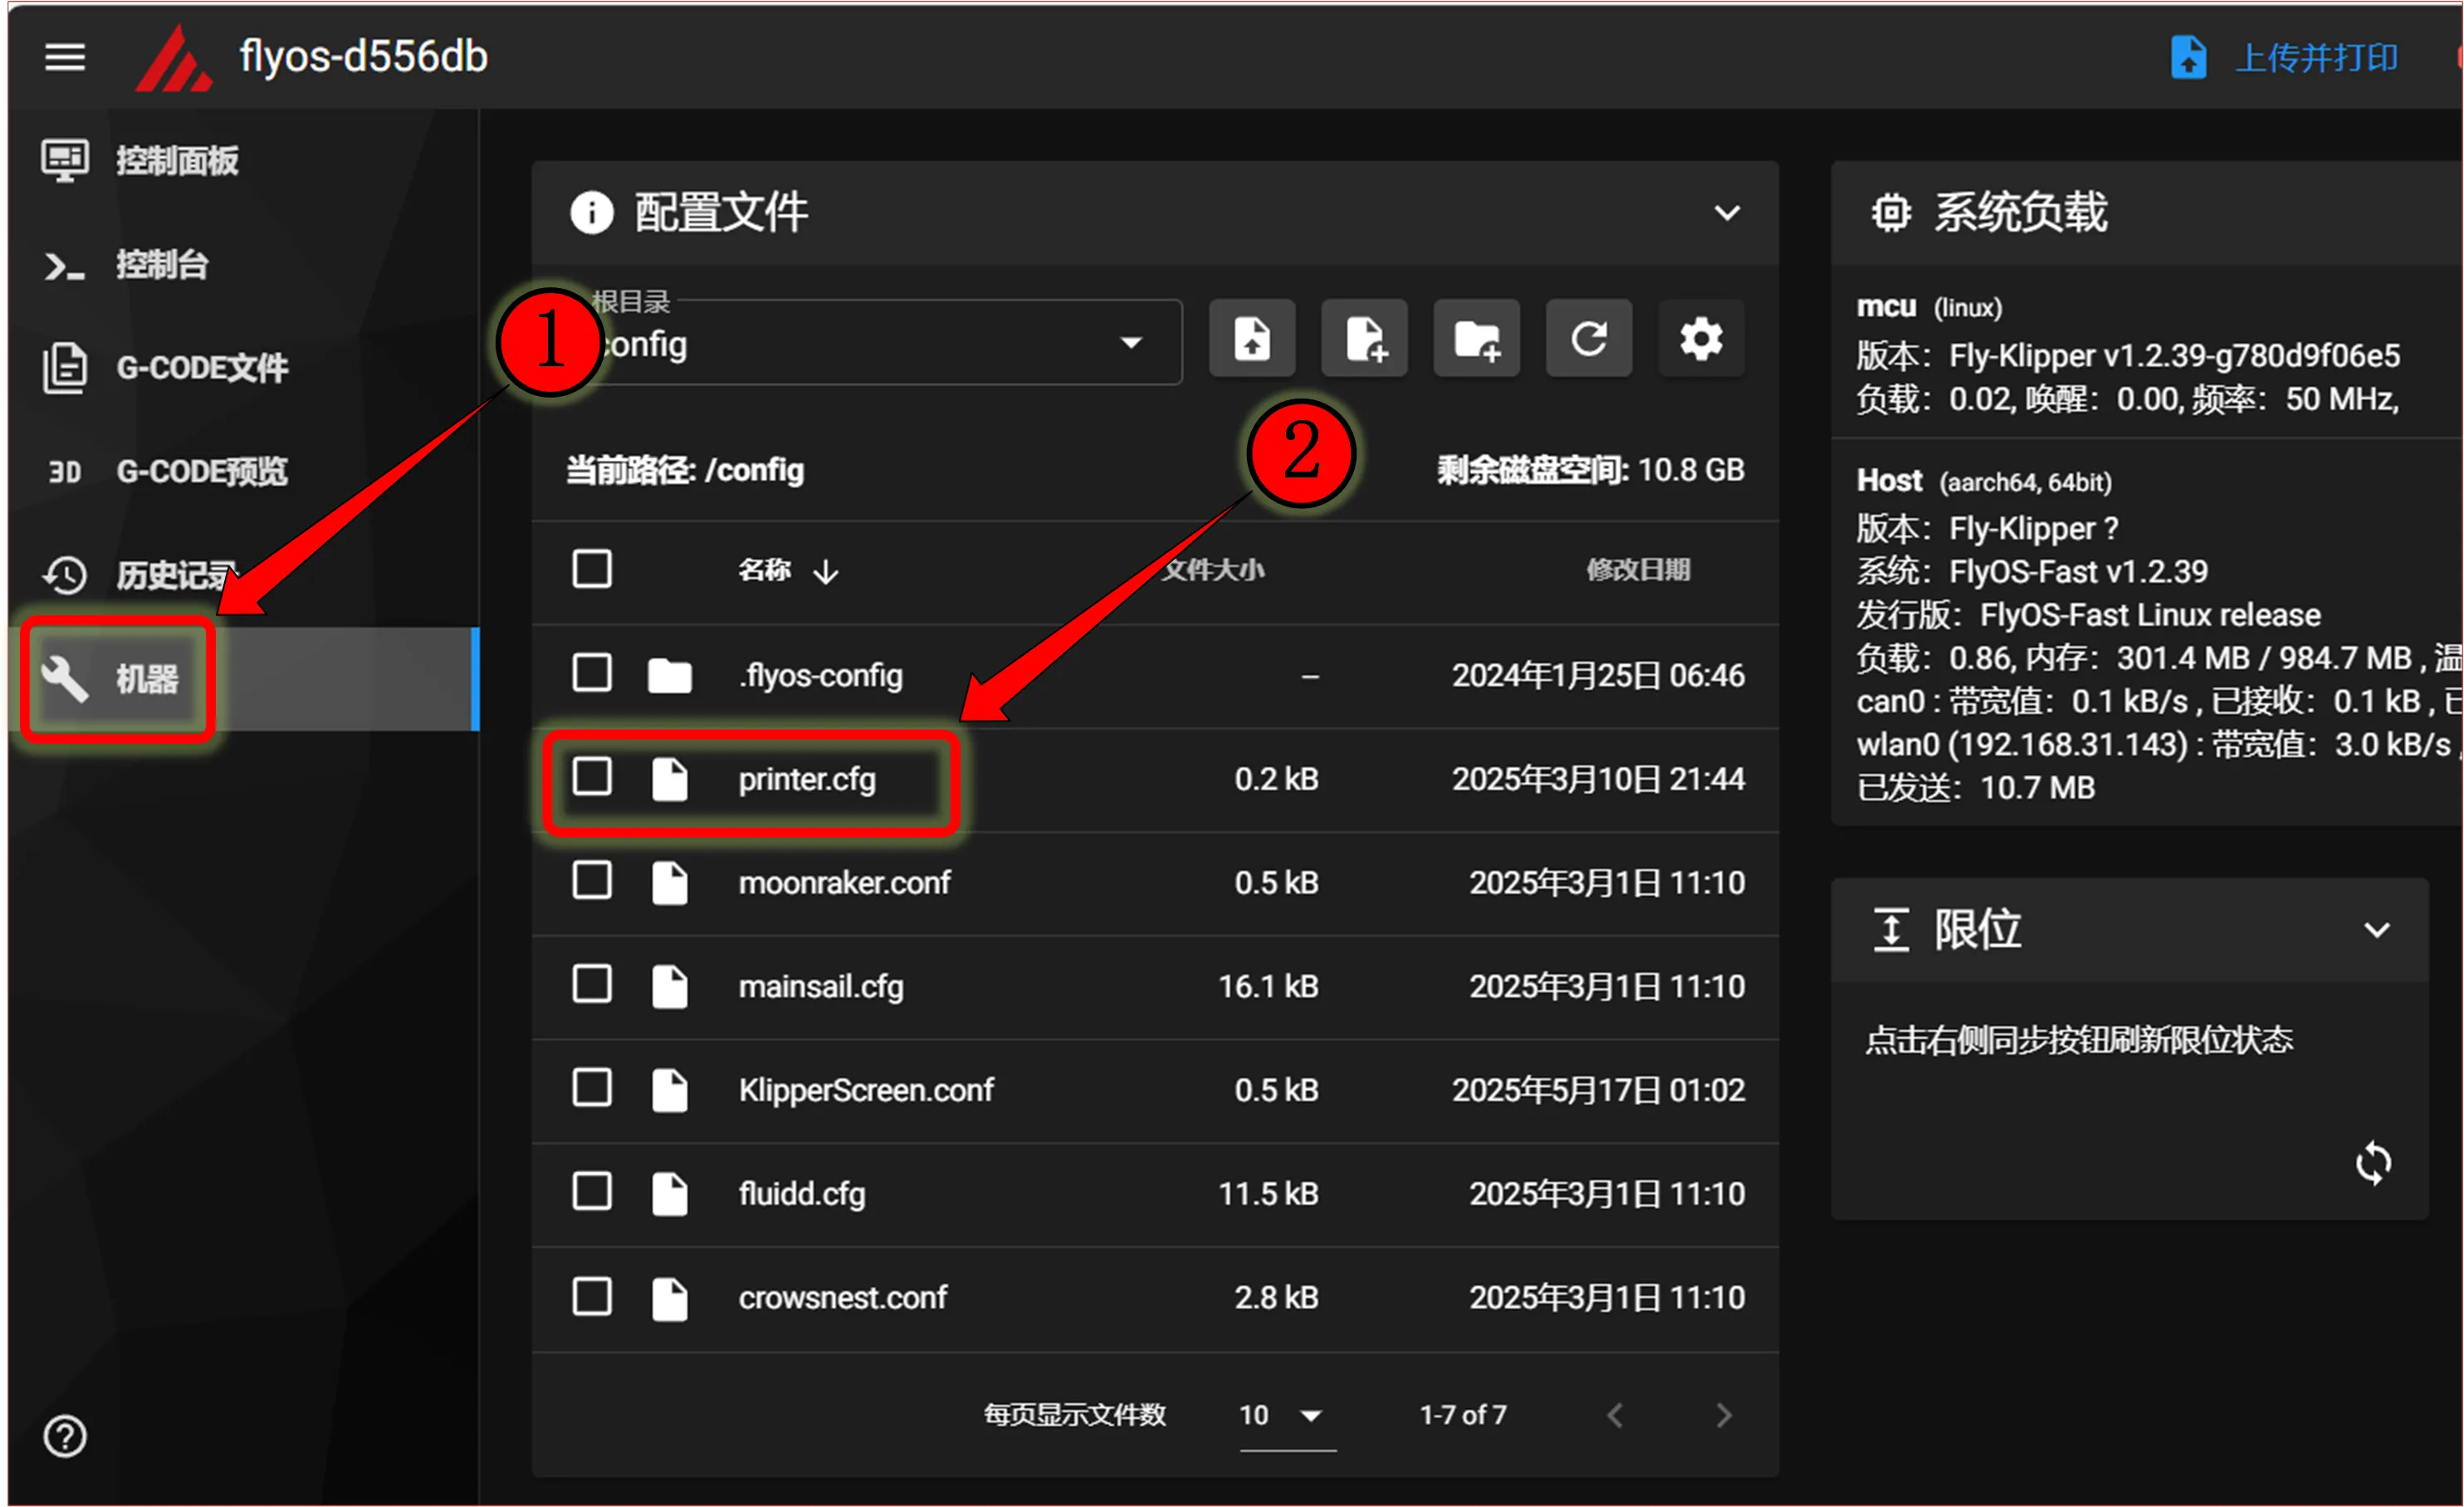
-
Copy the queried UUID and fill it into the
[mcu]node in theprinter.cfgconfiguration undercanbus_uuid:. After saving and restarting, the mainboard will connect. If Klipper prompts that the firmware needs to be updated or ADC errors occur, it means Klipper has connected to the mainboard. -
If
Application:shows Canboot, it cannot be configured in the configuration file. You need to flash the Klipper firmware before proceeding.dangerousNote: All IDs mentioned in the document are examples; each mainboard's ID is different. Please modify and fill in according to the actual obtained ID.
-
Below is a reference configuration:
dangerous[mcu]
canbus_uuid: <replace with the ID you just queried>- The following is a reference method for MCU ID configuration when there is one mainboard and one tool board.
- If it is the mainboard ID, it must be
[mcu]pluscanbus_uuid:followed by the ID you searched for. - If it is a tool board, it must be
[mcu tool board name]pluscanbus_uuid:followed by the ID you searched for.
