- Ensure the host computer can connect to the internet normally
- SSH login to the host computer through the network is required before firmware compilation
- Do not use serial port tools to log in to the host computer
Compile Katapult Firmware
Start Compilation
- A host machine with the installed
klipperservice is required Connect via SSH over the network - Make sure the device is connected to the host machine
- Note: Please use a regular host machine, such as a Raspberry Pi FLY board, etc. If it's a modified host machine (e.g., WiFi stick, Redmi, etc.), due to too many issues, we cannot provide technical support for these machines
- To switch from the
ROOTuser to a regular user, you can enter the command below - Do not use the
ROOTuser - For the fly user, you can directly enter:
su fly. For non-fly users, please replace<your host machine username>with your host machine's username!
su <your host machine username>
Instructions for Katapult Firmware Compilation and Configuration Page Operations
Please ensure the keyboard input method is in half-width mode, that is, English mode
- The up arrow key
↑and down arrow key↓are used to move the cursor up and down to select menu items - The Enter key
Enteror Space keySpaceis used to check the menu or enter the submenu - The ESC key
ESCis used to return to the previous menu - The
Qkey is used to exit the Katapult firmware configuration page - The
Ykey, when exiting the Katapult firmware configuration page, if prompted, click theYkey to save the configuration file
Below is an introduction to how to compile the firmware:
-
After connecting to SSH, enter the following command and press Enter:
cd ~/katapult && rm -rf ~/katapult/.config && rm -rf ~/katapult/out && make menuconfig -
Where
rm -rf ~/Katapult/.config && rm -rf ~/Katapult/outdeletes the previous compilation data and firmware,make menuconfigcompiles the firmware. After execution, the following interface should appear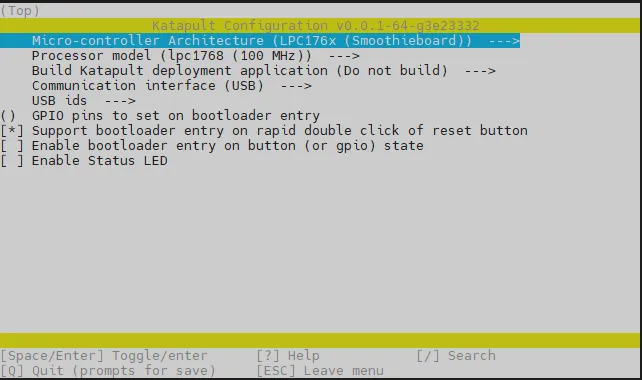
-
Select
Micro-controller Architecture (LPC176x (Smoothieboard))and press Enter -
Enter the menu and then select Raspberry Pi RP2040 and press Enter

-
Select
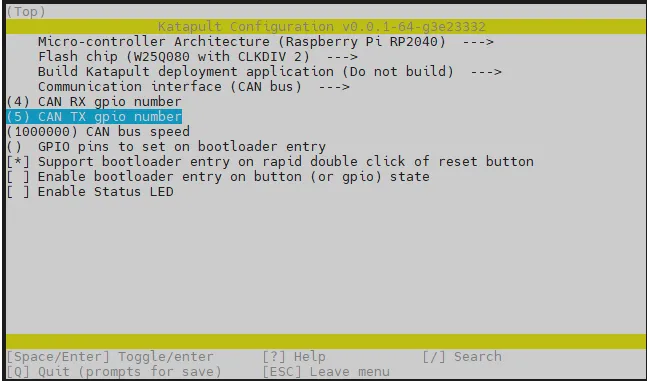
Build Katapult deployment application (Do not build), select: Do not build
-
Select Communication interface, select: CAN bus
-
Select
(4) CAN RX gpio number, delete4and enter1 -
Select
(5) CAN TX gpio number, delete5and enter0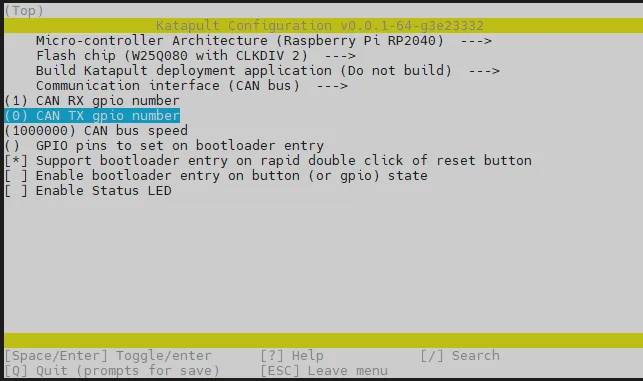
-
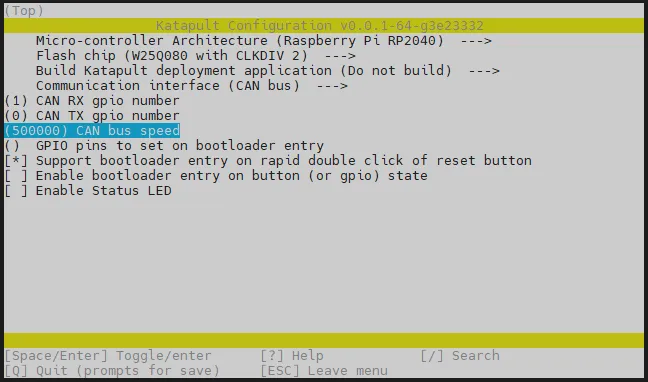
CAN bus speedis 1000000 by default, if used, change to500000 -
This is 1M
-
This is 5k
-
Select Enable Status LED and press Enter, select
Status LED GPIO Pin (NEW)and enter: !gpio18
Please enter !gpio18 in English input method state
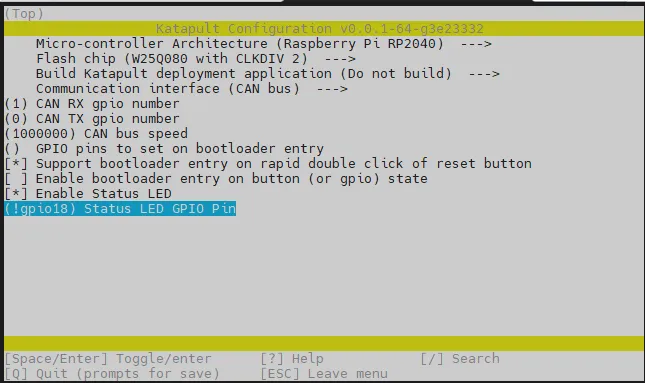
- Please check against the above picture to ensure consistency before proceeding to the next step
- Press
Qkey, and when Save configuration appears, pressYkey
- Now the configuration should be saved and you should have exited to the command line interface
- Enter
make -j4to start compilation, it takes some time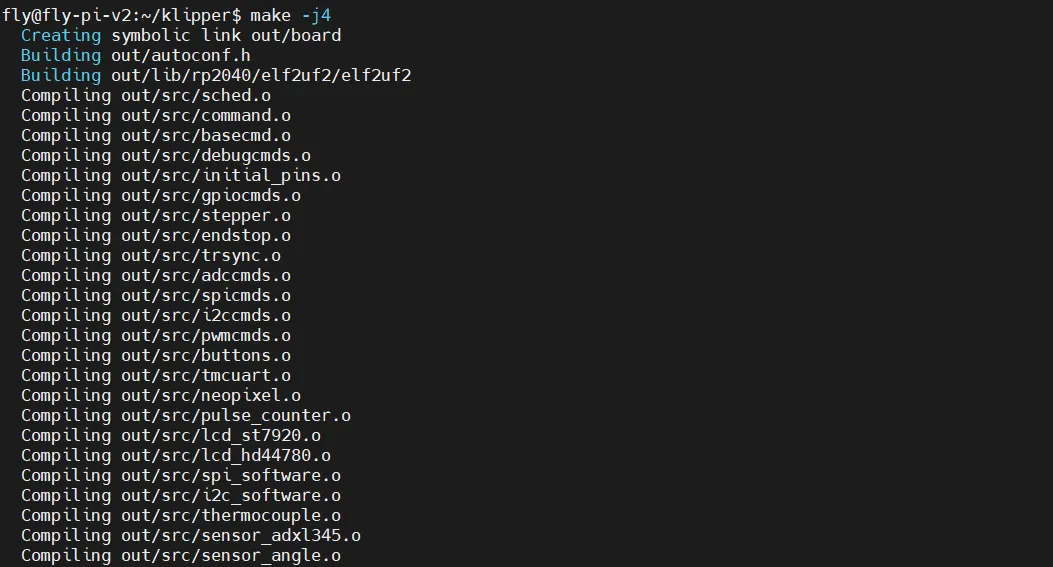
- If the following content is output, the compilation is successful
  Linking out/katapult.elf
  Creating bin file out/katapult.bin
  Creating legacy binary out/canboot.bin
  Building out/lib/rp2040/elf2uf2/elf2uf2
  Creating uf2 file out/katapult.uf2
  Creating legacy uf2 file out/canboot.uf2
  Compiling out/src/deployer.o
  Compiling out/src/generic/armcm_boot.o
  Compiling out/src/generic/armcm_reset.o
  Building out/deployer_ctr.o
  Compiling out/katapult_payload.o
  Preprocessing out/src/generic/armcm_deployer.ld
  Linking out/deployer.elf
  Creating hex file out/deployer.bin
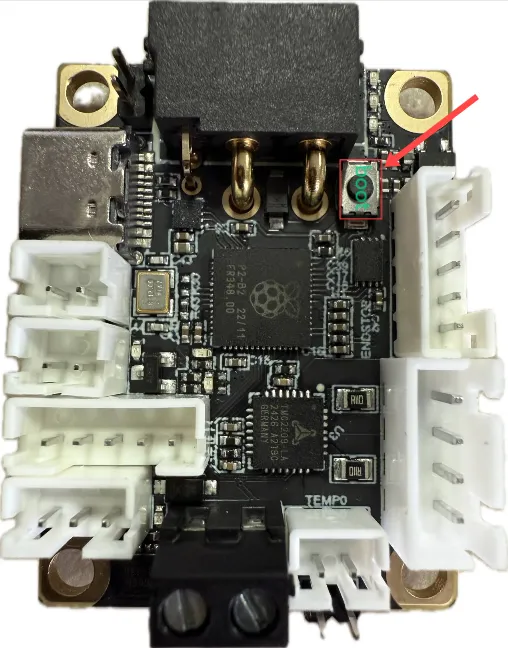
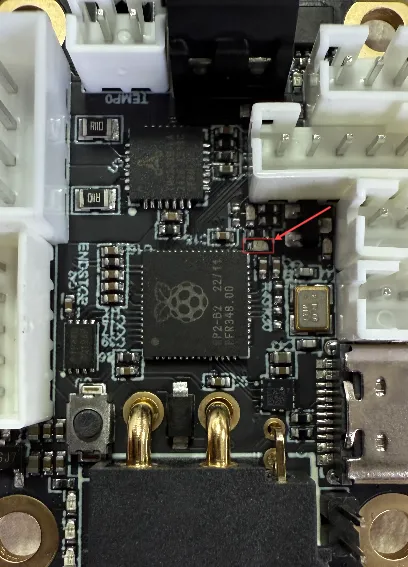
Enter Boot Mode
The arrow points to the BOOT button
- With the motherboard completely powered off, press and hold the BOOT button, then connect one end of the data cable with data transmission to the motherboard and the other end to your device
- Then enter
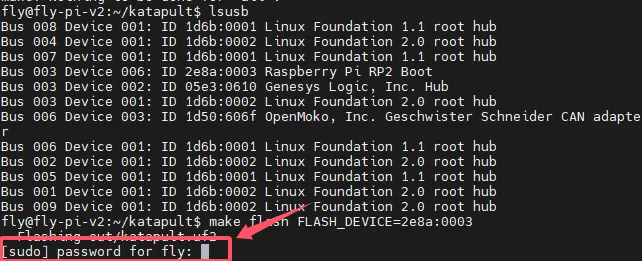
lsusb
lsusb
- If the following picture appears, it means it has entered boot mode
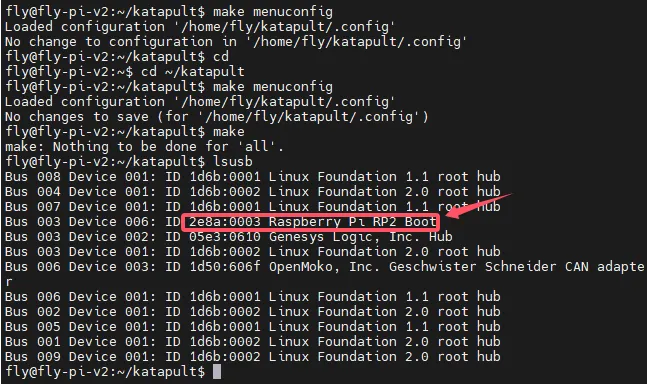
- Enter the following command to flash the firmware and then press Enter
make flash FLASH_DEVICE=2e8a:0003
Entering mellow will not be displayed
-
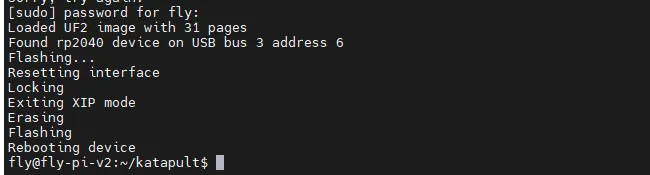
If the situation in the picture appears, enter
mellow, after entering, just press Enter directly -
If the prompt in the picture appears, then
Congratulationsyou have successfully flashed
Confirm Firmware Startup
- If the firmware starts normally, the LED will start flashing
- Search can id command, enter and then press Enter
~/klippy-env/bin/python ~/klipper/scripts/canbus_query.py can0
- If the above command does not search out an id, you can try the following command
~/klippy-env/bin/python ~/klipper/scripts/canbus_query.py can1
After entering, the id in the picture below will appear, this id is for reference only and cannot be used
