USB Bridge CAN Firmware Flashing
Start Compilation
- FAST System Firmware Compilation Tutorial
FlyOS-FASTSystem Notes- The default username for the
FAST systemisroot, and the password ismellow - Firmware compilation can only be performed using the
rootuser - And the
FAST systemonly has theROOTuser, no need for you to switch users!!!
- The default username for the
::: tip
- Please ensure that the host machine can connect to the network normally.
- Before compiling the firmware, use SSH to log in to the host machine via the network.
- Do not use a serial port tool to log in to the host machine.
:::
Klipper Firmware Compilation and Configuration Page Operation Instructions
::: tip
Please make sure that the keyboard input method is in half-width mode, i.e., English mode.
:::
- The key
↑(up arrow) and↓(down arrow) on the keyboard are used to move the cursor up and down to select menu items. - The confirm key
Enteror spacebarSpaceis used to check the menu or enter a sub-menu. - The exit key
ESCis used to return to the previous menu. - The
Qkey is used to exit the Klipper firmware configuration page. - When exiting the Klipper firmware configuration page and there is a prompt, press the
Ykey to save the configuration file.
::: warning
If there are fewer options in the configuration page, please first check [ ] Enable extra low-level configuration options to display some hidden options.
:::
Below is an introduction on how to compile the firmware:
-
After connecting via SSH, enter the following command and press Enter:
cd ~/klipper && rm -rf ~/klipper/.config && rm -rf ~/klipper/out && make menuconfig -
The command
rm -rf ~/klipper/.config && rm -rf ~/klipper/outis used to delete previous compilation data and firmware. -
make menuconfigis for compiling the firmware. After execution, the following interface should appear: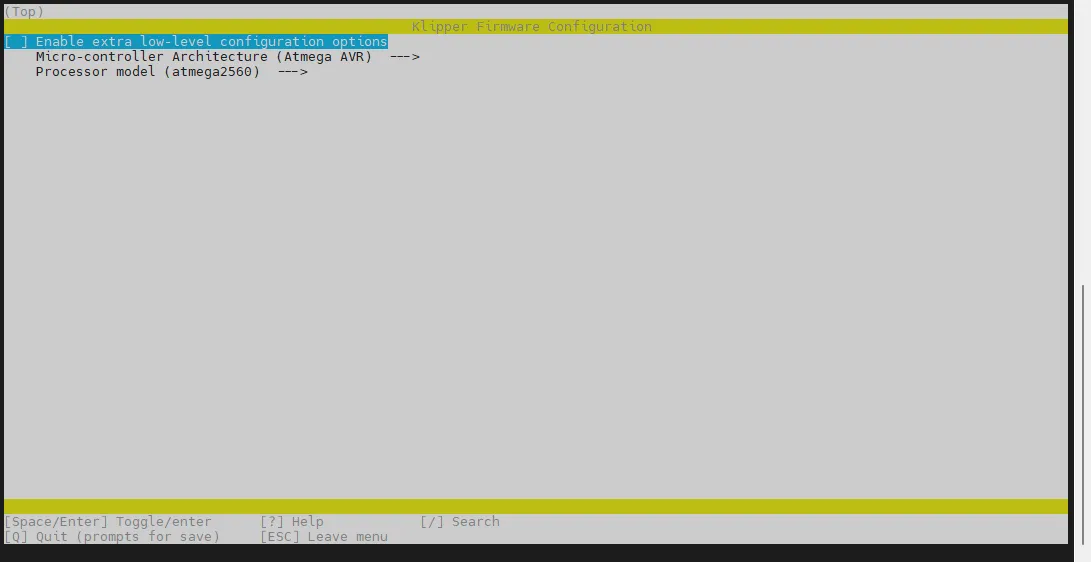
-
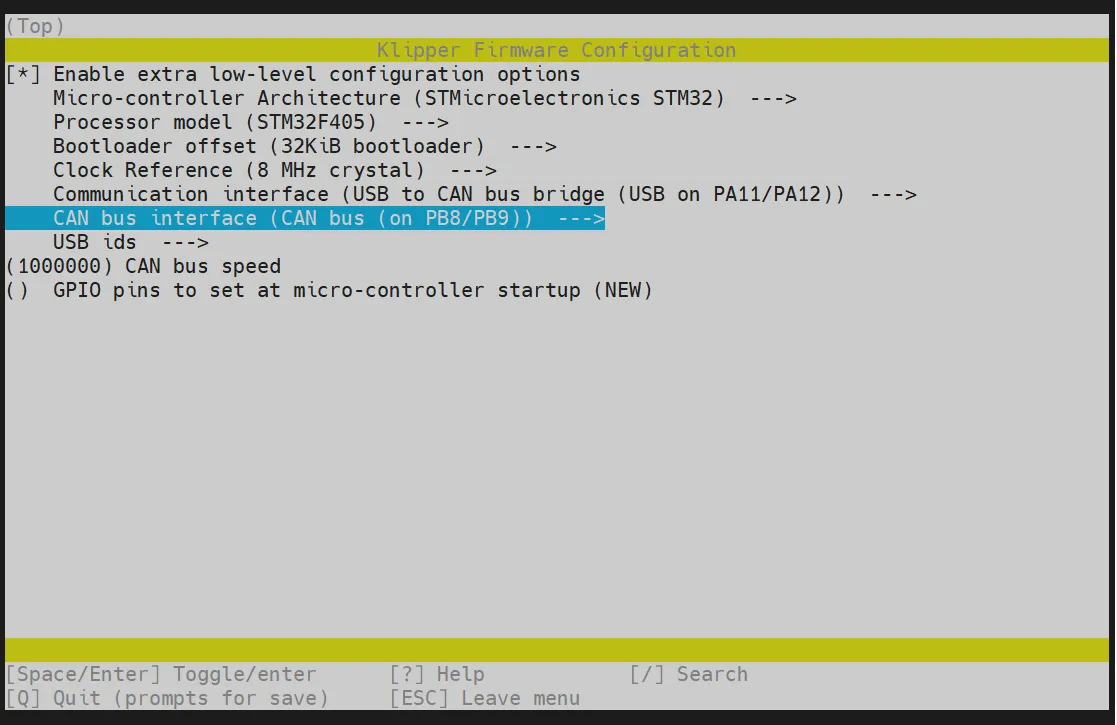
Select Enable extra low-level configuration options and press Enter.
-
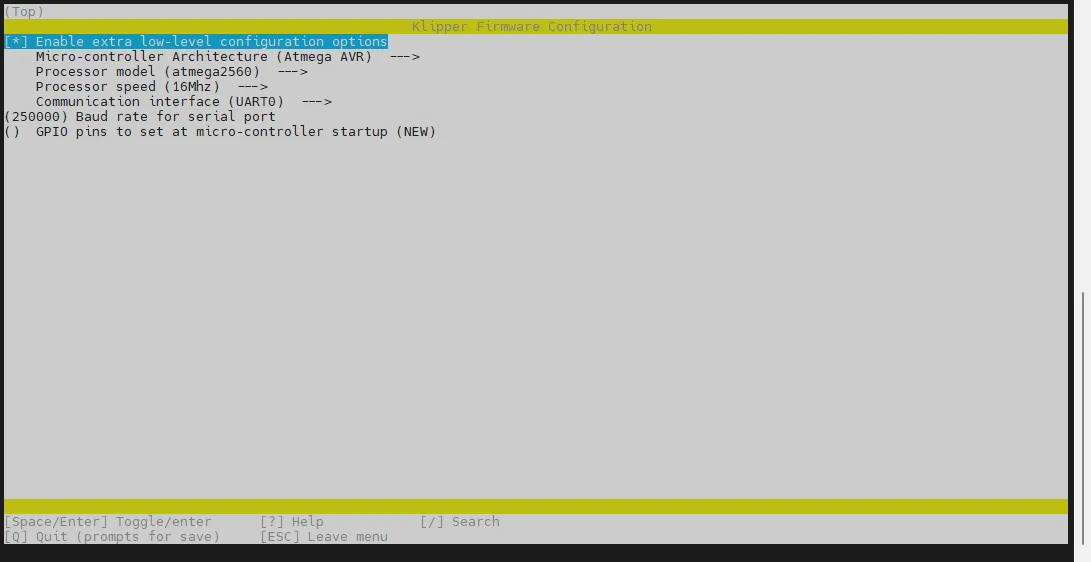
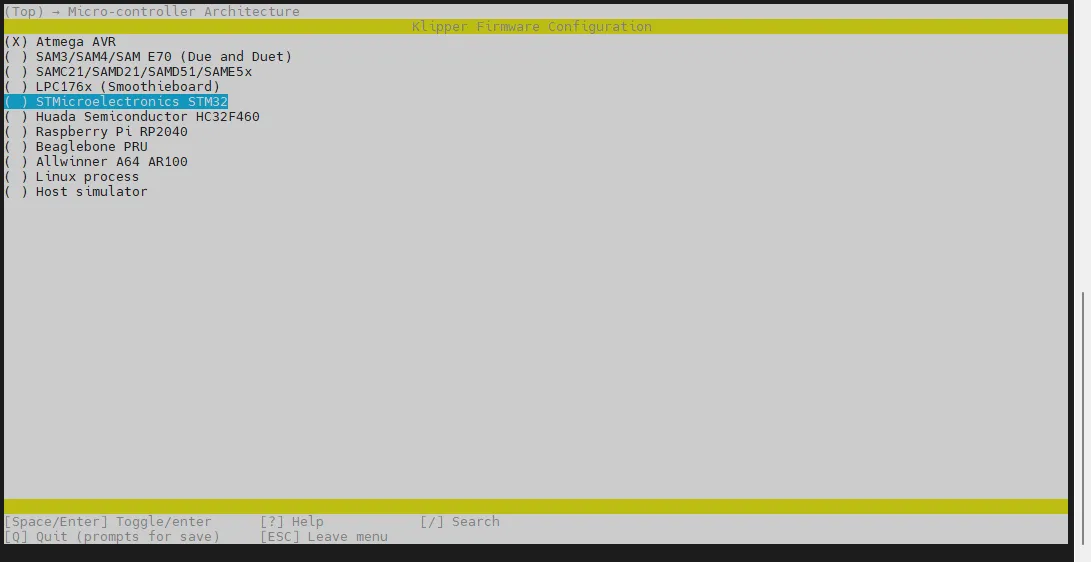
Navigate to the menu Micro-controller Architecture and select STMicroelectronics STM32, then press Enter.
Images are being updated
-
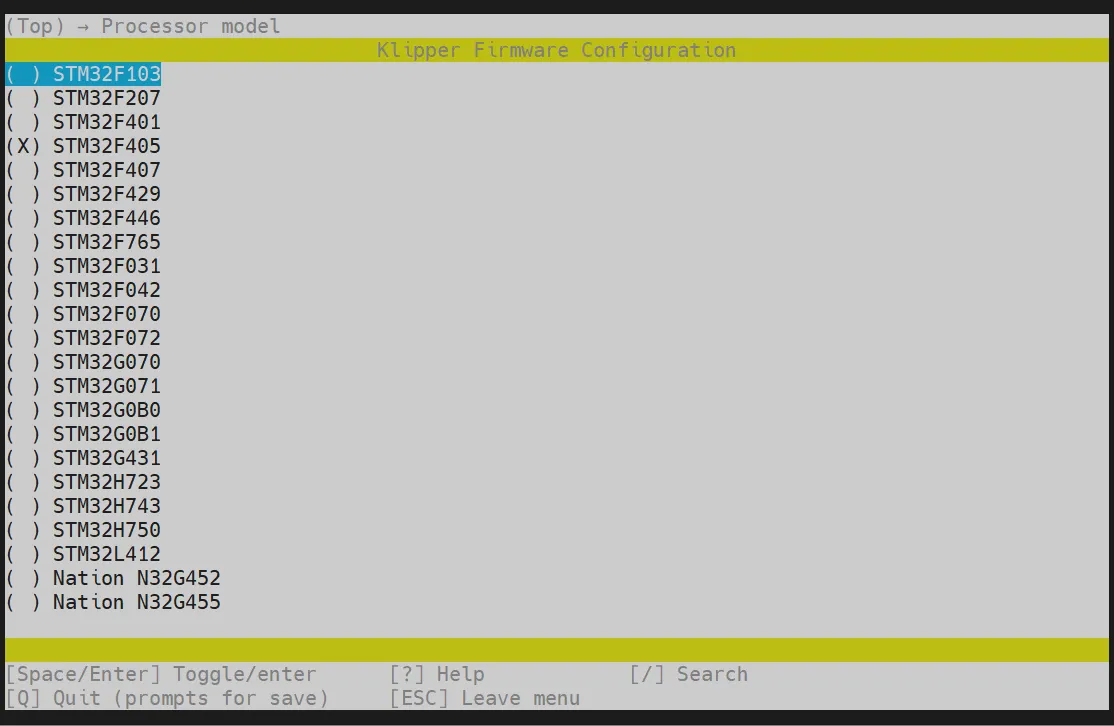
Enter the menu Processor model, select STM32F405, and press Enter.
-
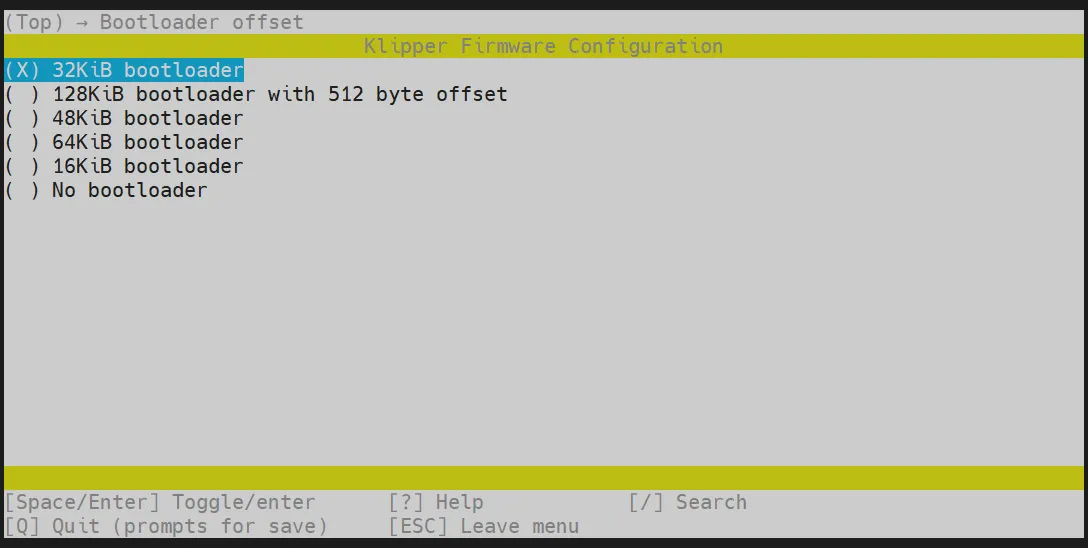
Select Bootloader offset, choose: 32KiB bootloader.
-
Select Communication interface, choose: USB to CAN bus bridge (USB on PA11/PA12).
-
Follow the image to select CAN bus interface (CAN bus (on PB8/PB9)) --->.
- Press the
Qkey, and when Save configuration appears, then press theYkey
- You should now have saved the configuration and returned to the command line interface
- Enter the command below to start compilation; it will take a while
make -j4
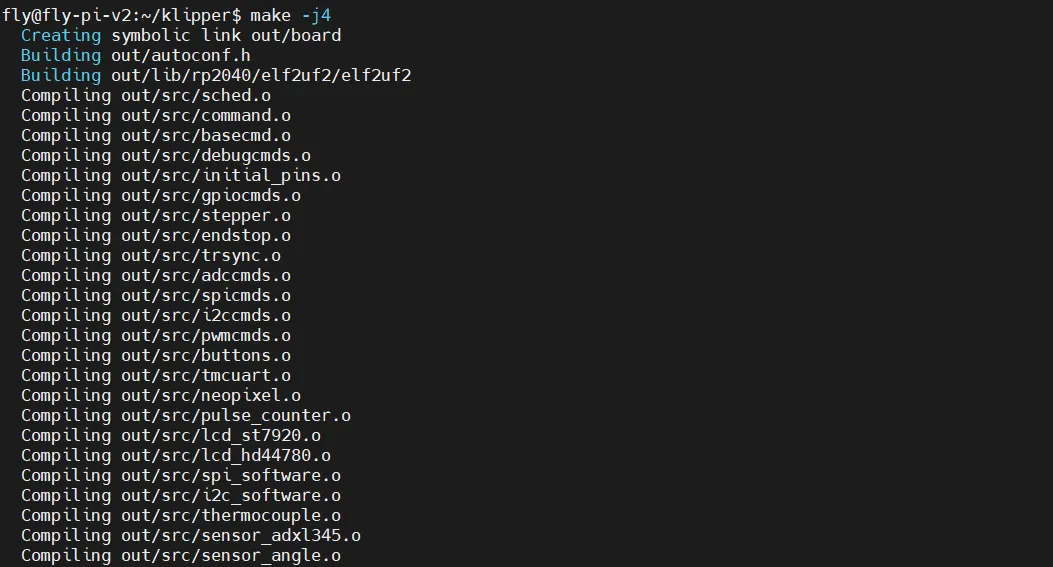
- If the following content is output at the end, the compilation is successful
- Due to Klipper version differences, as long as
out/klipper.binappears, it indicates successLinking out/klipper.elf
Creating bin file out/klipper.bin
Firmware Flashing
Execute the command below to flash the firmware
fly-flash -d gemini-v3 -h -f ~/klipper/out/klipper.bin