Reading and Checking the Mainboard ID
Note
- This tutorial describes how to read and check the ID of a mainboard.
Notes
Note
- Make sure the motherboard has flashed the
USBfirmware before operating; - This tutorial is only applicable for searching the Motherboard ID, not for Toolboard ID;
- Please ensure the host computer is properly connected to the motherboard before proceeding;
- For instructions on viewing the Toolboard ID, please refer to the relevant product documentation.
Connect to SSH
- Please log in to
SSHvia the network first - Please ensure you are logging in to
SSHvia the network, not via serial port
Search for Device
- Please ensure the host computer is connected to the Internet and that the data cable connecting the device to the host computer supports data transfer.
- After SSH connecting to the host computer, enter
lsusband press Enter. If you see the information circled in the image below, you can proceed to the next step.- If no information is displayed, this indicates a system issue with the host computer. We cannot assist with this, and you will need to replace the system with a confirmed working one or change the host computer.
- If the
lsusbcommand is not found, install it by running the following command:sudo apt-get install usbutils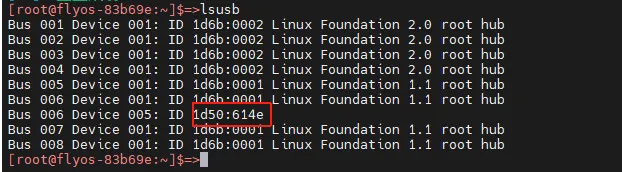
1d50:614eis the device you will use in this process.- Some host computers may fail to fully display or not display the information due to system issues.
- If the device is shown after running the
lsusbcommand but1d50:614eis missing, try using a different data cable or connect the main board to another USB port on the host computer.
Note
You must proceed to the next step only after one of the 1d50:614e devices is found.
Search for USB ID
ls /dev/serial/by-id/*
- Enter the command below and press Enter. If everything works properly, a blue ID line like the one below will appear. (The example below is for reference only)

- If no ID appears after entering the command, but the device shows up in
lsusb, please try using a different host computer or operating system
Note
If multiple IDs appear, please choose the corresponding ID based on your motherboard's MCU model.
Fill in the USB ID into the Configuration
 |
 |
Note: All IDs shown in this document are examples. The actual ID varies for each motherboard. Please modify and fill in based on the ID you obtained.
Fill in the USB ID
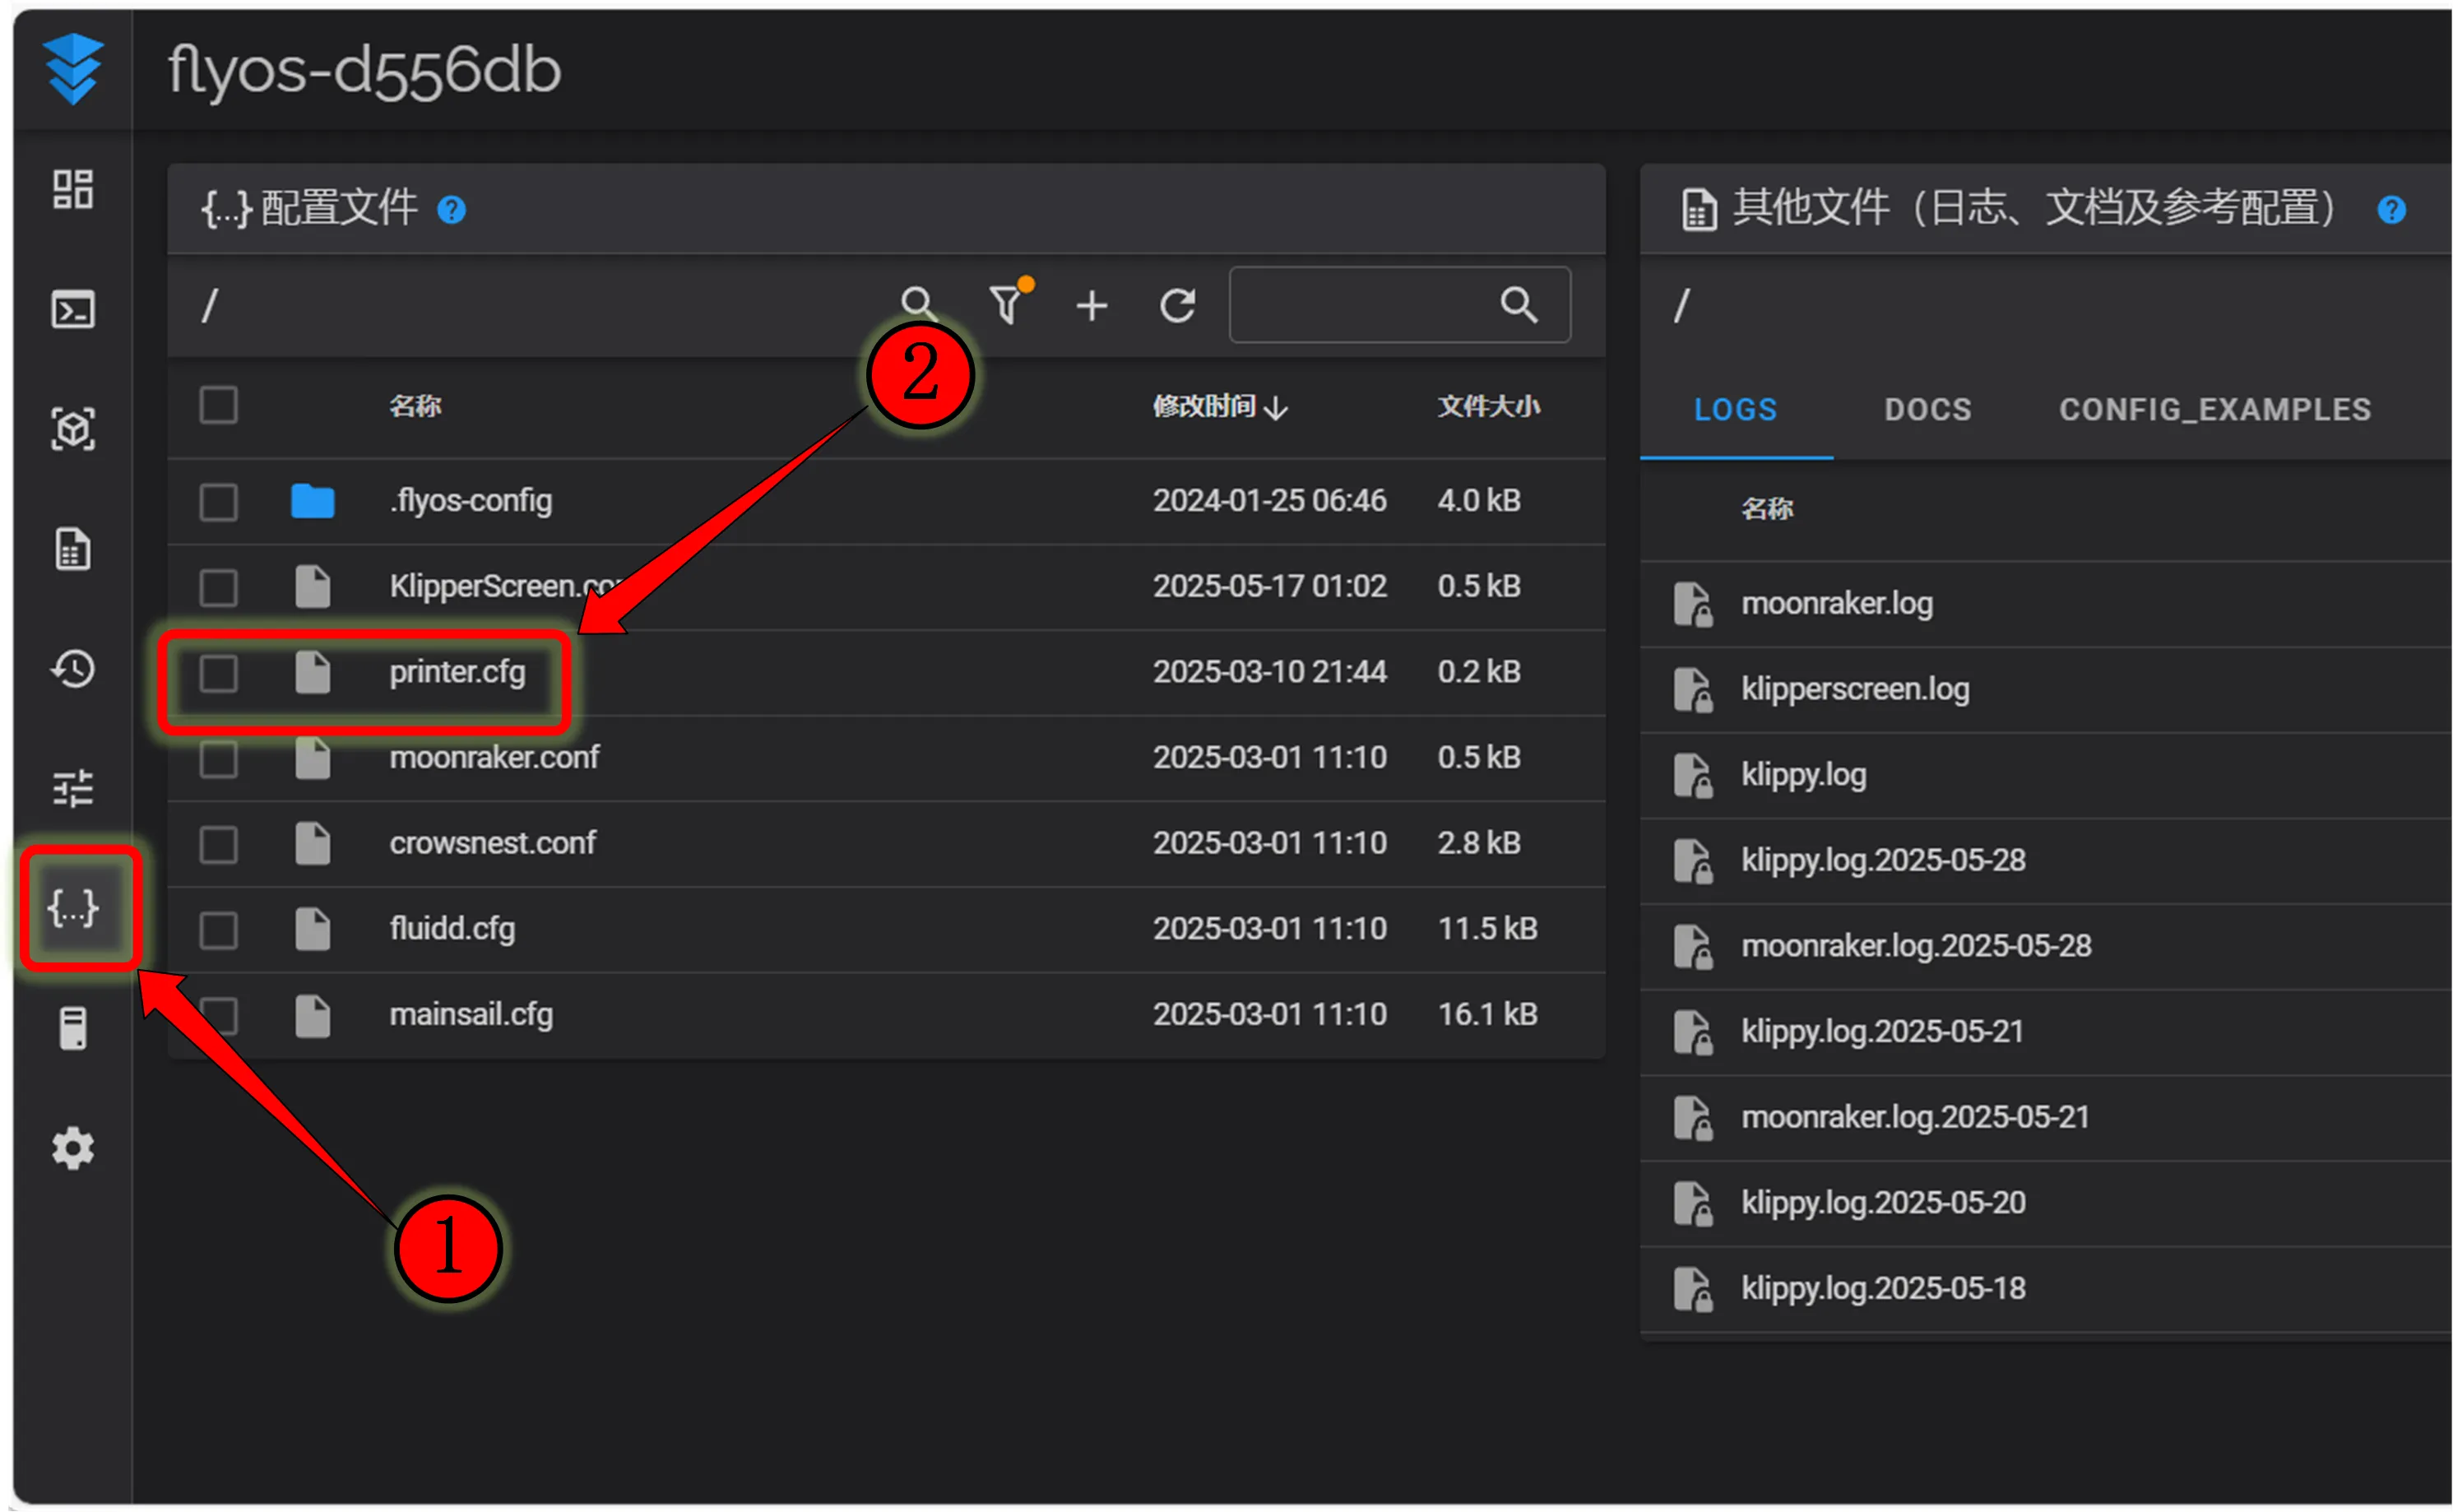
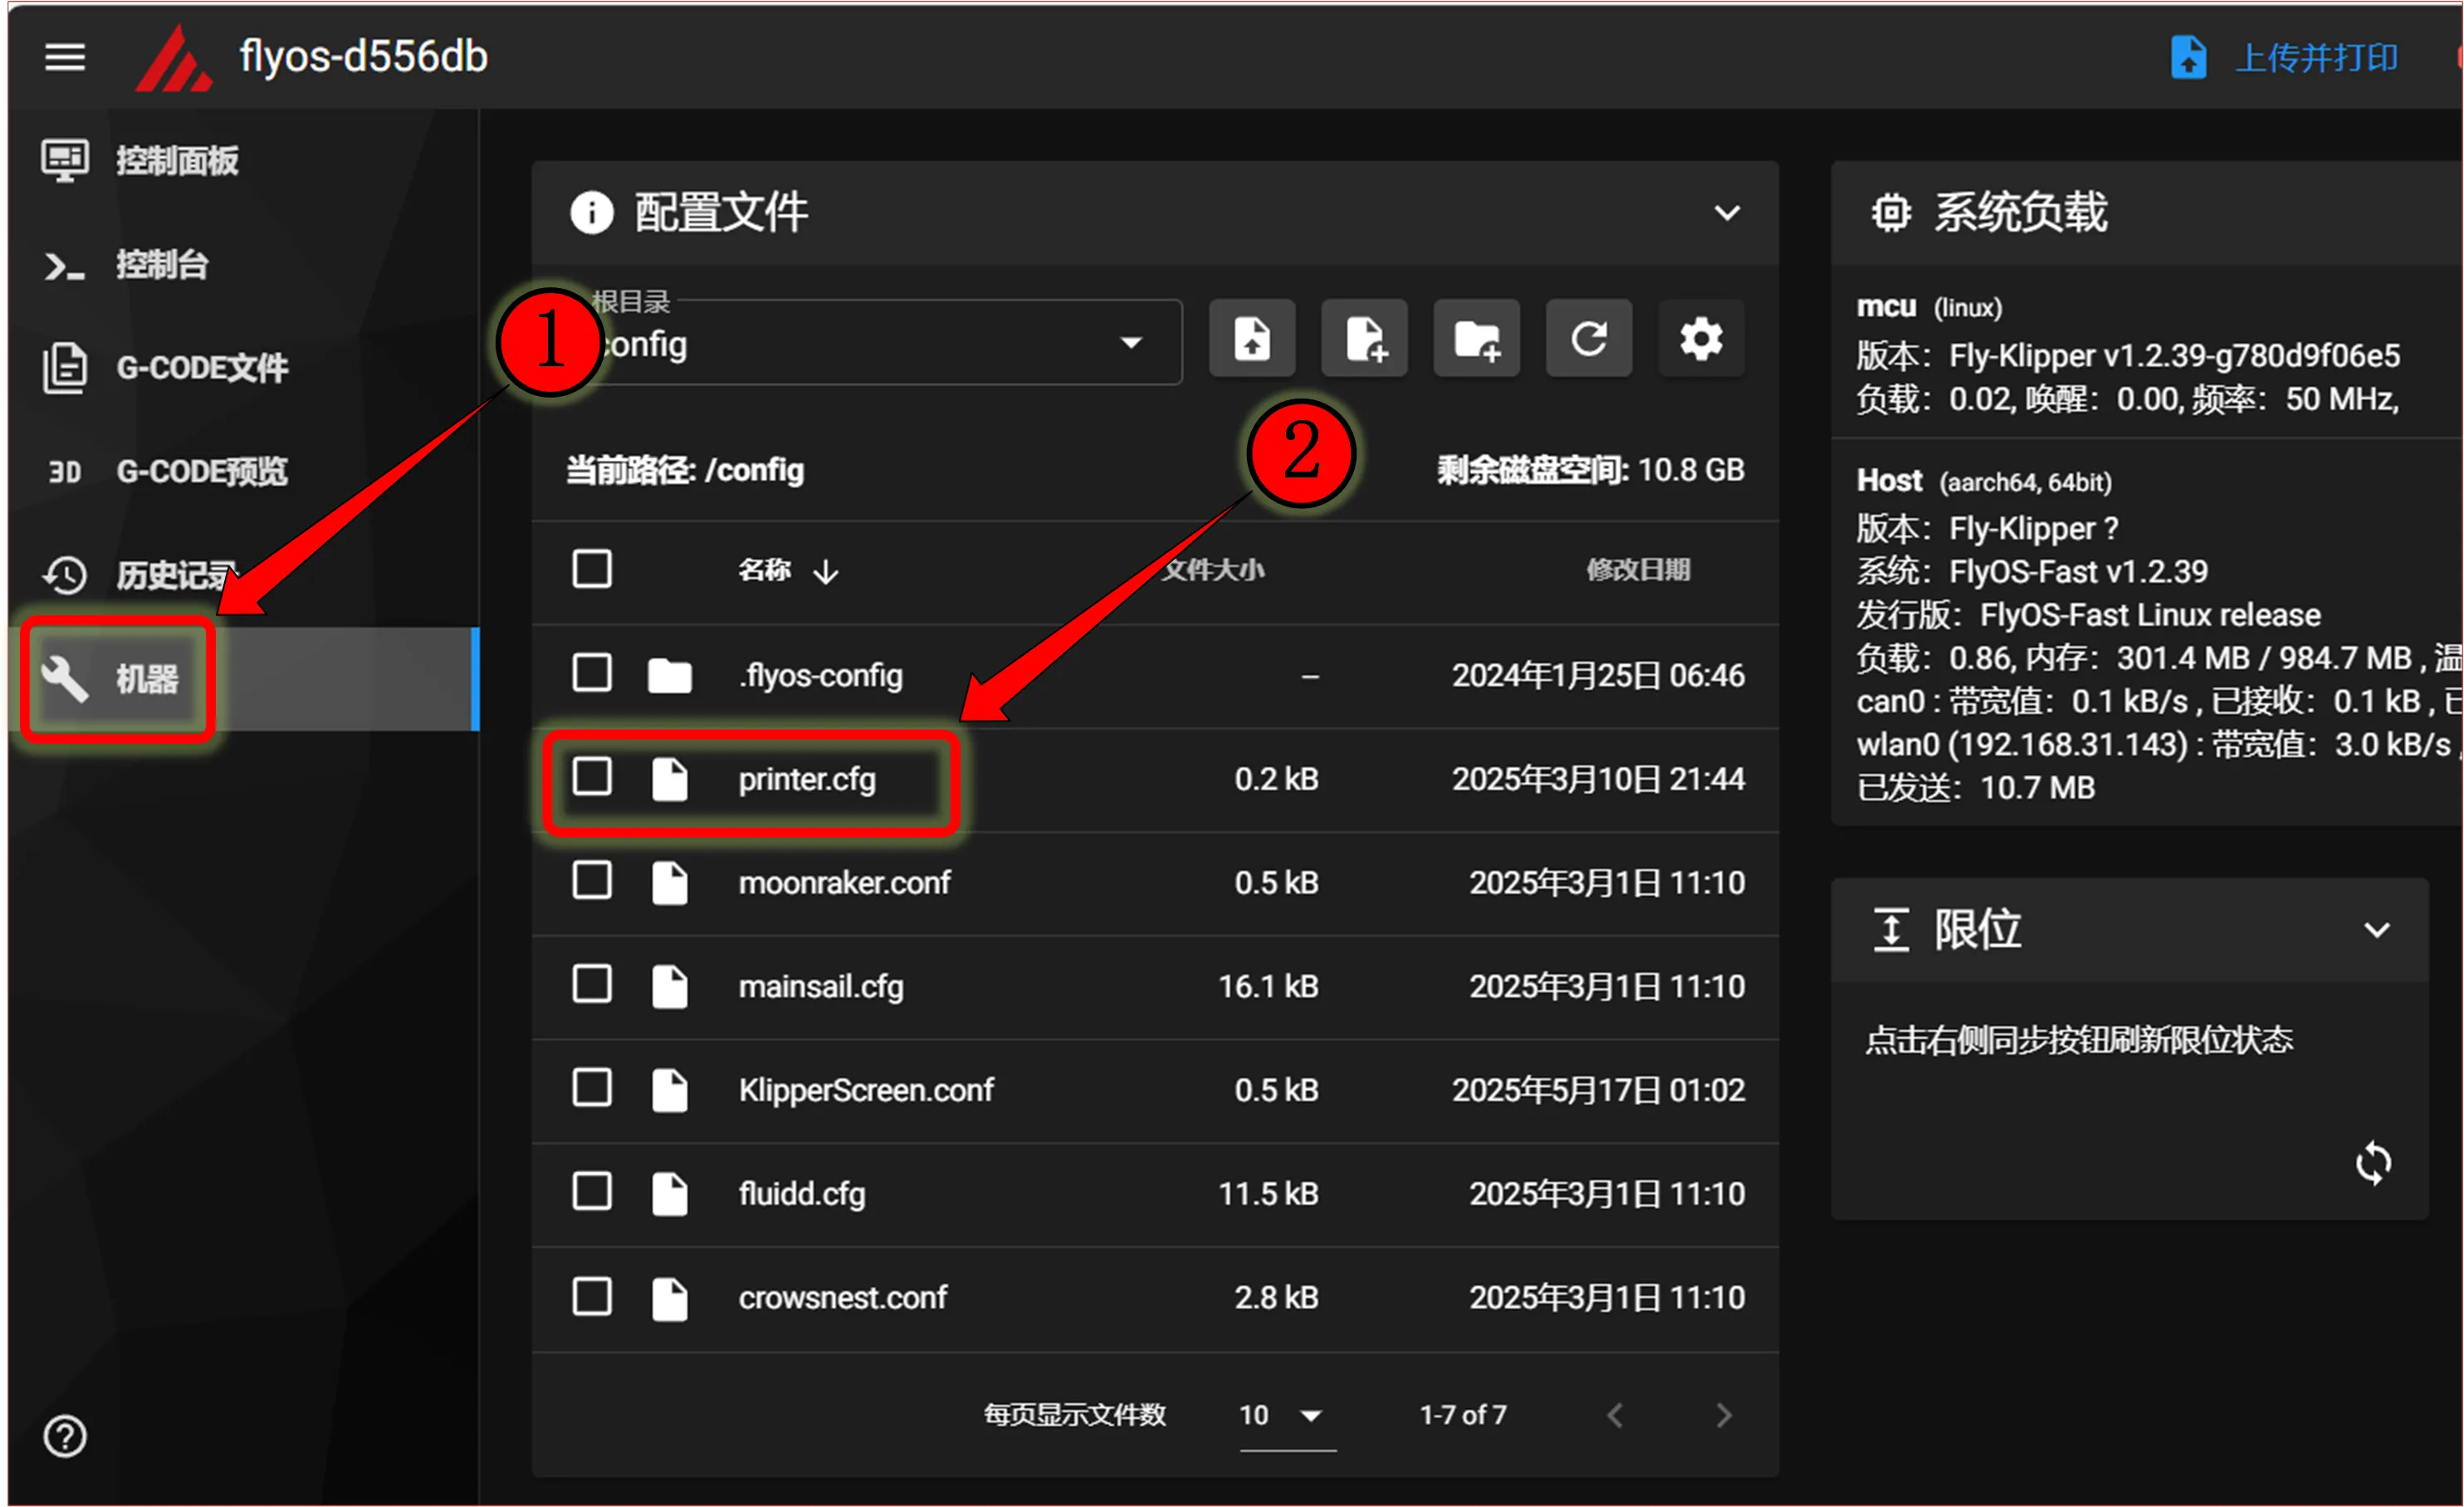
- Locate
[mcu]and replace it
Note
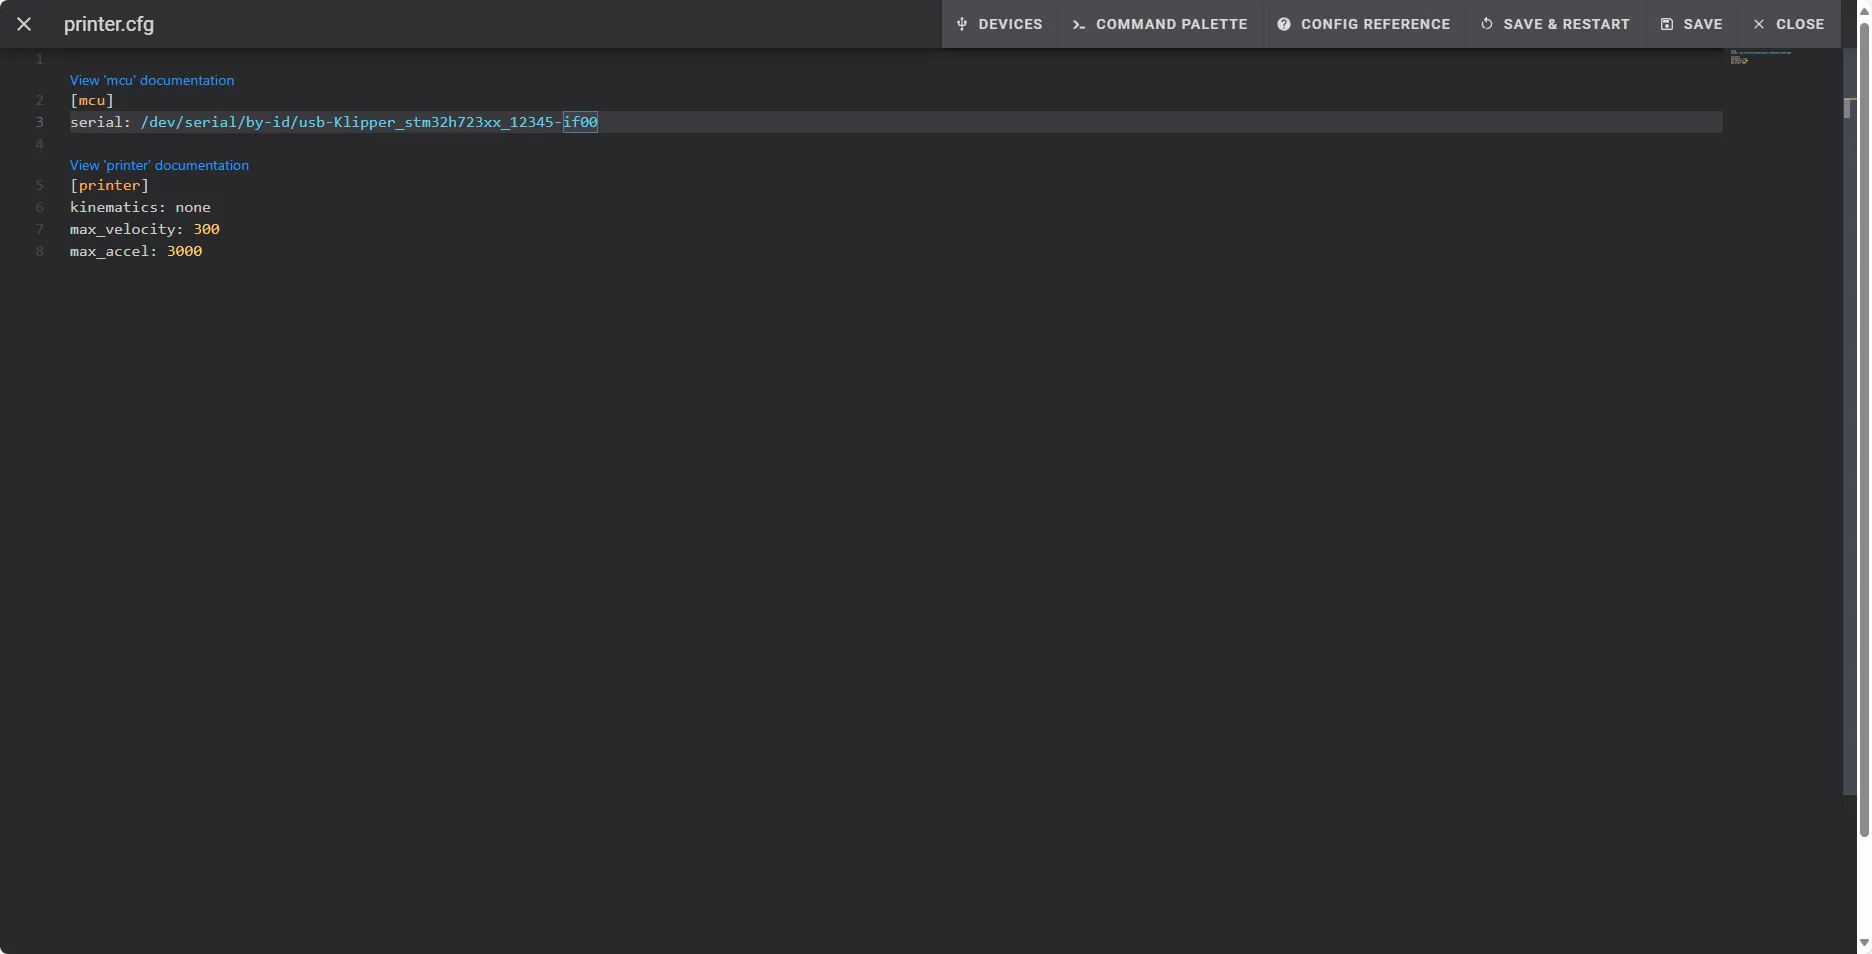
- In the configuration file, replace:
[mcu]
serial: <Replace this with the ID you just queried>
- Reference examples
 |
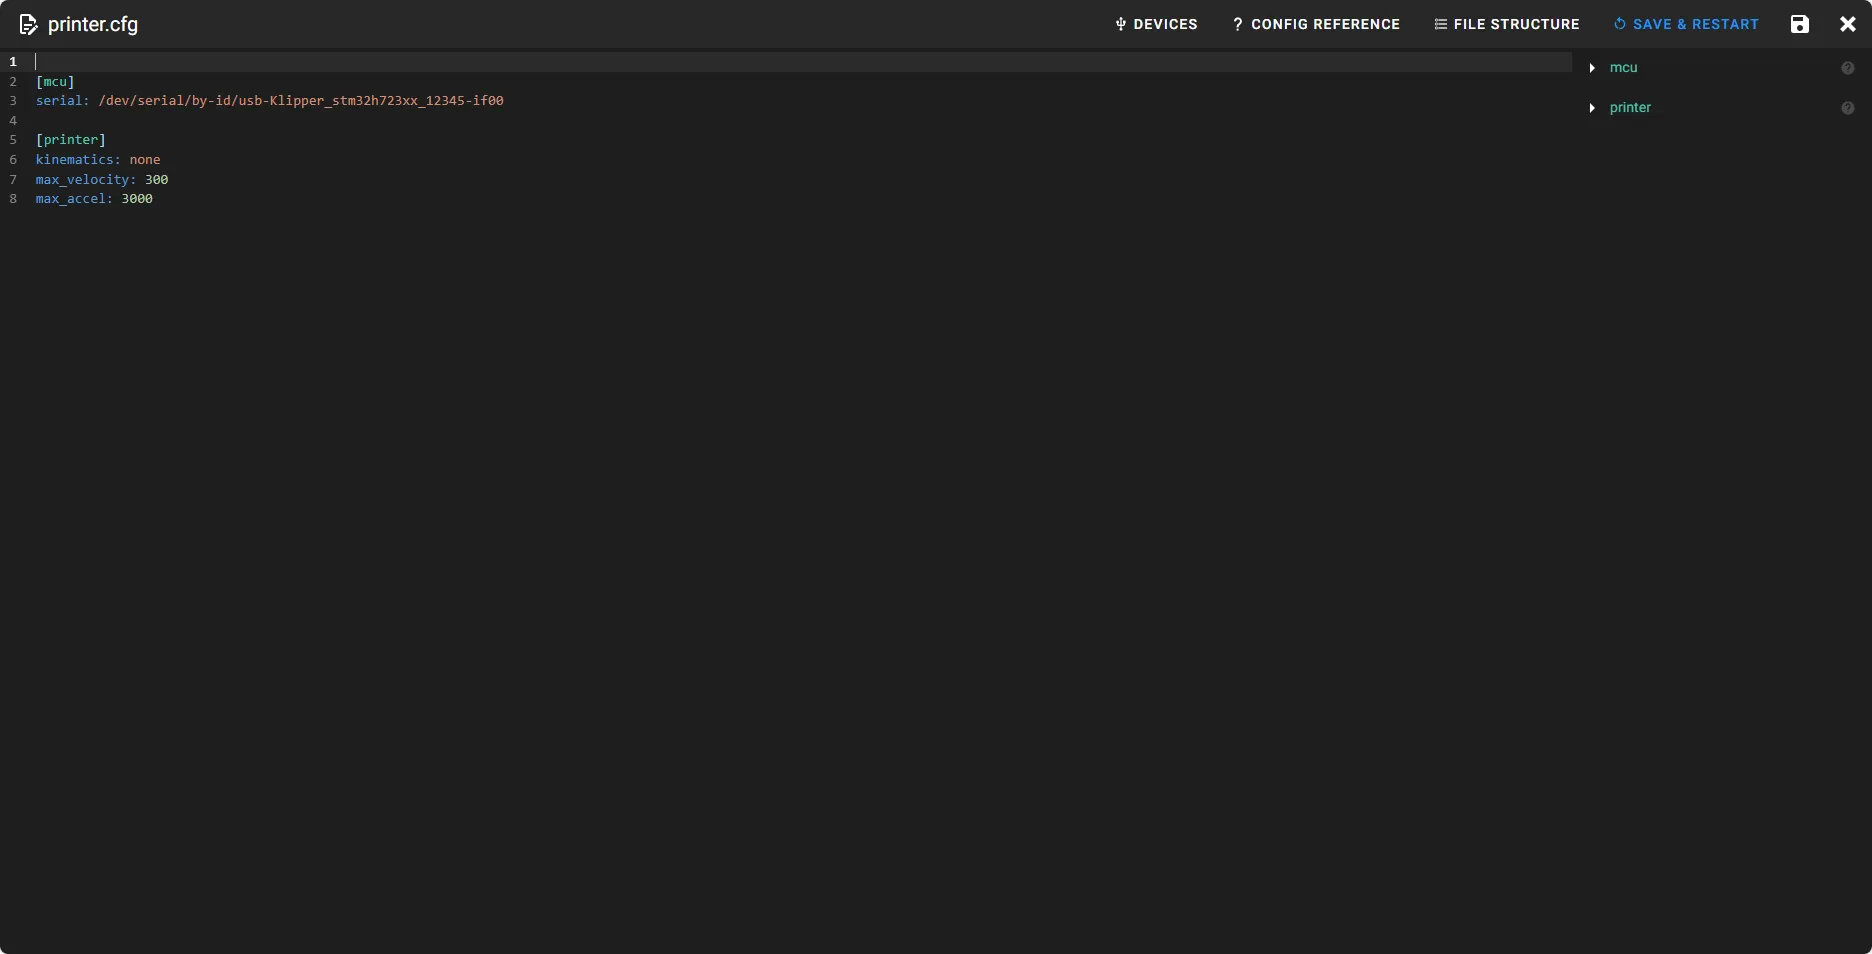 |
- Click
SAVE & RESTARTin the upper right corner. It will automatically save and restart klipper
Loading...